So you want to snowboard, huh? It’s a complicated world out there, full of rails, boxes, trees, pipes, groomers and powder. And If you’re going to get the goods, it’s usually not a small investment, either. Boots, bindings, and boards are each expensive, and the full setup can run around a grand. We’ll try to take the edge off, however, by providing some basic information about what to look for when getting set up.
First of all, when you go into the shop or are browsing online, there is some stuff that is absolutely crucial for you to know: your height, weight, shoe size, and riding experience / preference (that is, if you have any riding experience / preference.)
Boards
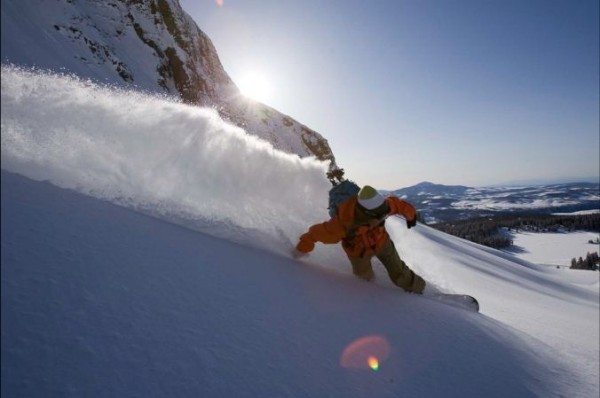
They’re the big ticket item, what you and everyone else will be seeing all season, and most importantly, the piece of equipment that will determine whether your overall boarding experience is good or bad.
Riding experience / preference is a good place to start thinking about boards. This refers to the type of riding you like or envision yourself doing. If you’re a stair-set-hucking skateboarder that can’t wait to hit the park or the pipe, you’ll want something totally different than, say, a surfer who wants to emulate his wave riding experiences. The same goes for terrain: if you’re going to be ripping icy groomers and not huge pow fields (or vice versa), you’ll need a certain type of stick. Below are the four main board categories.
All Mountain:
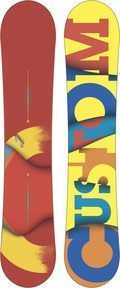
These are your most common types of boards. They’re made to go anywhere and do anything. If you haven’t ridden before, this is probably the type of board you’ll end up on. These boards are built for utilization of the whole mountain, and have a medium stiffness and are more stable than Freestyle boards. You won’t get a ton of pop out of these, but these boards should work fairly well in all conditions. They’re also typically “directional,” which means that they’ll have different tip and tail designs rather than symmetrical tips and tails.). Examples: Burton Custom, Ride Antic; Venture Zephyr; Never Summer SL; Burton Feelgood (ladies).
Freeride (Big mountain):
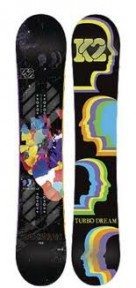
These boards are designed for big lines, dropping cliffs, hitting kickers, and charging powder. They usually won’t perform well in the park (if you like big lines but also like to hit up the park, get an All Mountain board). These boards tend to be fairly stiff and are also usually directional. This category also includes splitboards: those made for skinning into the backcountry and getting wild (if you’re new to the sport, splitboards aren’t for you; backcountry snowboarding takes some serious knowledge and skill). Examples: Burton Fish (powder only); Jones The Solution (split); K2 Turbo Dream.
Freestyle:
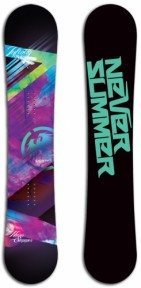
These are for tricking out. Freestyle boards are more flexible, easier to maneuver, and lighter than Freeride boards. If you’re going to be hanging in the park with the cool kids, this is what you’re going to want to rock. The shorter length, flexibility, and lighter weight of these boards make grabs, spinning, and sliding easier. Most freestyle boards will be twin tips, that is, the tail and tips are identical making landing and riding switch easier. While some are true twin tips, many are directional twins with the back being more stiff for added tail support. These boards usually won’t perform super well in powder, or when you’ve got them set on edge, ripping groomers. Examples: Lib Tech Skate Banana; Never Summer Pandora (ladies); K2 World Wide Weapon; Gnu Park Pickle, Arbor Roundhouse, Bataleon Airobic, Burton Hero.
Alpine:
Alpine boards are built for speed on hard-packed groomers and are typically used for racing. They will not perform well in powder or in the park, and have a very stiff flex profile. Examples: Donek Metal FC 171; Virus UFC 163; Coiler NSR 182.
So you’ve picked your board according to the type of riding you want to do. Good. Now we have to determine the correct board length for you. For height, you want the board between your collarbone and chin. If you’ve rented boards before, you’ve probably been sized up by height. When buying a board of your own, weight is equally important. Why? If you’re too heavy for a board’s flex, you’re going to have problems with the board being squirrelly and washing out. If you’re too light, you’ll have trouble handling the board. Most snowboard manufacturers will offer a chart that looks similar to this:
SIZE Recommended Rider Weight
-
151cm 95-145lbs
-
154 115-165
-
158 130-180
-
162 140-190
5. 166 155-205
For the best results, try to put yourself in the center of one of the weight ranges.
There are two exceptions to the length rule: powder and jib-specific boards. If you’re getting a board for powder and powder alone, you may want more length for better float and control. If you’re hitting the city streets or spending all your time on rails, you might want to go shorter for better maneuverability and lighter weight.
Many people forget that width of the board is nearly as important as the height. The main issue here is toe and heel drag. If you have size 11 feet or larger you’ll want to consider at least a mid-width board. Extra-width boards got a bad name years back because of some design flaws that left them riding clunky and slow. Manufacturers got with the program in the past few years and made mid-width and wide boards that function well for those of us with larger feet.

No discussion of today’s snowboards would be complete without some mention of camber and rocker. Traditional camber is where the board rises in the center from the two contact points near the feet. This style of board gives good edge control and responsive turning. Reverse camber boards are the opposite, forming one long arch, like a bow. These boards feature pronounced rocker (upward curve from the center contact point), are more loose, and provide good float in powder. Flat camber boards are just that: flat with rise at the tip and tail. These boards will be loose and forgiving, like a reverse camber board, but typically with more stability and control. Finally, we have the hybrid camber boards (hybrid camber varies, but will usually have rocker between the feet and camber near the binding inserts and the nose and tail). These boards can be designed to excel in an array of conditions. They are typically use-specific, so be sure you understand what the mixed camber is designed to do best.
And don’t forget to demo! If you really want to make the right decision, riding the stick is the best thing you can do.
Boots
Boots are more important than you might initially think. After all, you’re feet are in them all day; they are the connection to your board. You need to treat your feet right. A properly fitting boot is the key. You want your boots tight, but not ridiculously so. If there is room for movement, your foot will find it and you’ll end up with blisters or overworked ankles/tendons/joints. You want to wear the same size as your street shoes or a half size down, since these boots will most likely pack out a bit.
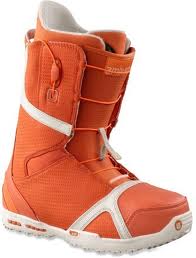
Snowboarding boots have two main parts, the first being the inner bladder and the second the outer boot. The inner bladder usually has a lacing system independent of the outer boot. Get the inner bladder tight and then crank down on the outer boot. Walk around in them and see how they feel. If there’s heel movement, move on! You want those heels locked down. There are many lacing systems out there that I’m not going to get into. Getting the fit right is the most important thing, regardless of what system the boot uses.
Buying boots before the board (and bindings) is usually a good idea. You’ll want to make sure that they’re a good fit for the width of the board, and your boots need to be compatible with your bindings. The majority of boots will fit the majority of bindings, but step-in bindings are an exception. See the note on step-ins below).
Bindings
Finding the right binding is very similar to finding the right board. You already know what type of riding your going to be doing. Just like a board, you want a softer, more forgiving binding for park riding to allow for sketchy landings and tweaked airs. Stiff bindings will provide more control and less energy loss between you and your board. These are good for ripping down groomers or holding the pipe wall. And finally, we’ve got the All Mountain binding, which sits right in the middle of the spectrum. It’s pretty good for doing pretty much everything; it provides comfort, control, and plenty of versatility.
You’ll also want to make sure that your binding will fit your board. Mounting setups include 4×4 holes, 2×4, and channels. If your binding doesn’t fit the mounting setup, you’ll have issues. And my advice? If you’re really going to get into snowboarding, skip step-in bindings.
And there you have it, BLISTER’s Snowboarding 101. Of course, things get a little more complicated and specific as you delve farther into the sport and the designs behind it. We’ll be posting more Snowboarding 101 articles to dive into more advanced issues, such as sidewall construction. If you have any questions or comments, let us know below, and we’ll get back to you with the answers.
