
Load Carrying
The Loka does an excellent job of distributing and carrying weight of heavy camera gear, which I think is largely due to its internal aluminum frame. Even when fully loaded with camera gear and carrying a pair of skis, the pack holds its shape and distributes the weight evenly over my back.
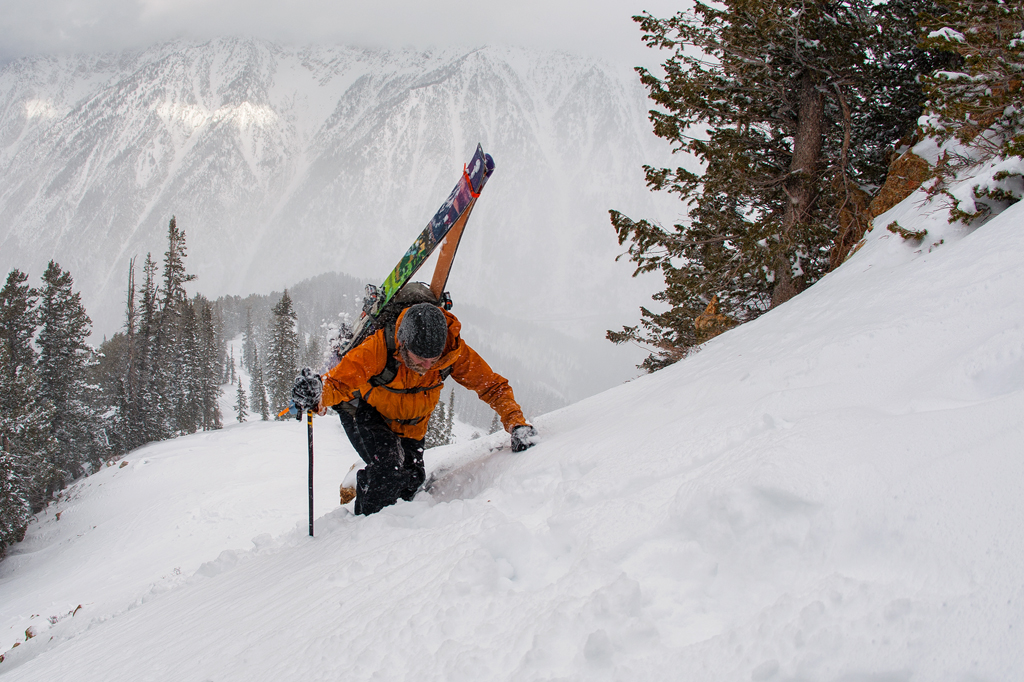
I’m impressed that F-stop has managed to integrate an internal frame into this pack and still keep the weight close to or lower than competitors’ packs.
Storage
F-stop recommends that you load the pack with the heaviest items toward the bottom. This may be obvious to some, but I had never thought much about how best to stow my stuff. The Dakine Sequence comes set up in such a way that you load the body of the camera at the top of the ICU (Internal Camera Unit; more on this below), exactly the opposite of what F-stop suggests.
Having tried it both ways now, I have definitely found it best to keep the body of the camera in the lowest, middle location and I usually detach the lens from the body.
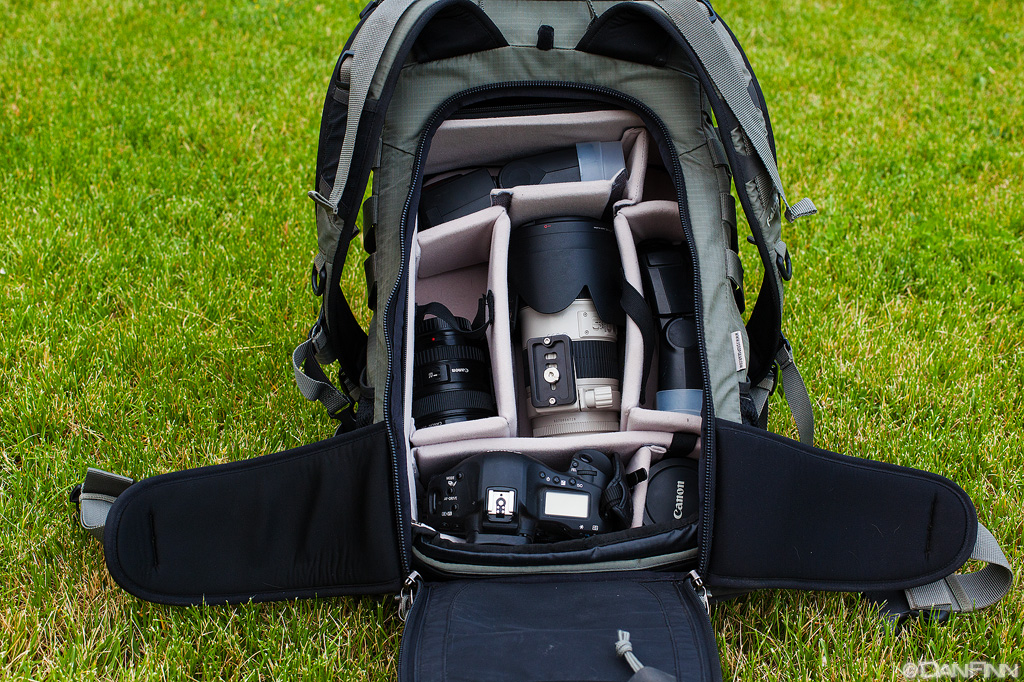
The Loka has one main chamber for the storage of the ICU, which is inserted from the top of the pack and secured via velcro loops to the internal frame. On the back of the pack is a large zippered opening that you use to access your camera or other gear stored inside the ICU.
There are several different smaller zippered storage pockets that can be used to store and organize additional gear: one internal pocket on the top flap of the pack, one external pocket on the top flap of the pack, and one large one on the front of the pack.
The two external pockets both used sealed, waterproof zippers, and the pocket on the front of the pack has a built-in drain at the bottom, which is a great place to store anything that might contain any sort of moisture that you don’t want near your electronics.
There is also a multifunction internal sleeve that is designed to carry either a laptop (up to 13”) or double as a hydration bladder pocket.
ICUs
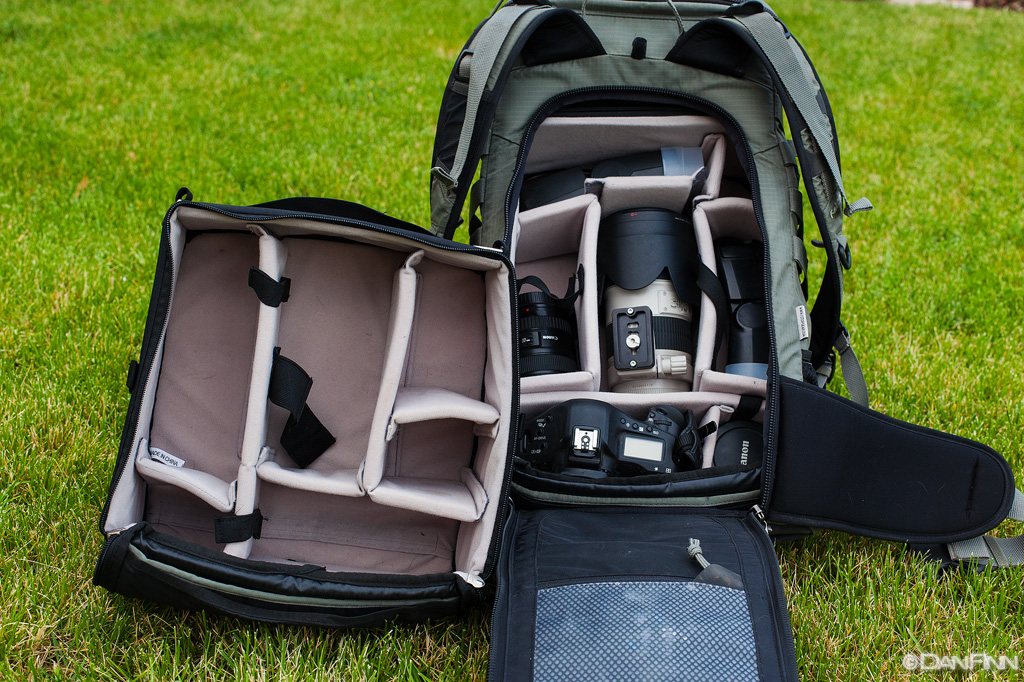
An ICU is essentially a sleeve that goes inside the backpack. Inside this sleeve will be different baffles and dividers to separate and store your camera gear and keep it from colliding. These dividers are generally attached via velcro so that they can be easily and quickly moved around to fit your specific gear, and this is the case with the F-stop ICUs.
I have been using a combination of two different ICUs, depending on my gear and the activity. The ability to use different ICUs provides a huge amount of flexibility and configuration combinations.
F-stop has nine different ICU combinations that are compatible with the Loka. I ordered my Loka with Large and Medium Slope ICUs, which are widest at the bottom and taper toward the top. (Both the medium and large slope ICUs measure 6.5” deep at the bottom and 4.5” deep at the top, internally.) This makes perfect sense given the way that F-stop suggests you carry your gear.
With the widest part of the ICU at the bottom of the pack, you are able to fit a full size pro body (e.g., Canon 1D or Nikon D series, or perhaps other bodies + grip) at the bottom of the ICU and use the rest of the space for lenses or flashes, which generally don’t require as much depth.
Within the ICU, you can completely customize your baffle setup however you like. The slope series also includes baffles designed to be used with it. Some are taller than others, and the tallest ones are designed to be used toward the bottom of the ICU.
On days when I’m going for a longer backcountry ski tour, or there is more climbing involved on the bike, I will go with the medium ICU and just bring a couple of lenses. This keeps the weight down and gives me extra room to bring along things like a backcountry shovel and probe, extra layers, and water.
If I’m skiing inbounds or going for a hike and I don’t mind the extra weight, I will load up the large ICU with a variety of lenses or flashes.
Access
Accessing your camera gear is quick and easy; I would generally lay the pack down with the back facing up and open up the rear flap to access the ICU.
I also found that with the waist belt secured, I could take the shoulder straps off, spin the pack on my hips and, with it now facing forward, open up the rear flap to access my camera and lenses without having to take off the pack. For anyone hurrying to get a shot, this seemed to be the fastest way to access the camera gear.
Versatility
I recently got back from a four-day backpacking trip to Havasupai, Arizona. I knew I was going to want to bring my camera gear along with me, and the Loka had performed so well in every other situation that I figured I’d give it a try and see how it did when I intentionally overloaded it.
For the 10-mile hike, the pack was stuffed with the following:
- Canon 5d2 body
- Canon 17-40 F4L lens
- Canon 15mm fisheye lens
- Canon 50mm F1.4 lens
- Three batteries for the 5d2
- Spare CF cards
- Benro C2682TB1 tripod
- Hammock
- Two sleeping bags (I was trying to act like a gentleman by carrying my girlfriend’s bag)
- JetBoil Stove
- iPad
- Enough dehydrated backpacking meals to feed 1 person for 3 full days
- Clothes: 2 pairs of shorts, 1 bathing suit, 3 t-shirts, 3 pairs of boxers, 3 pairs of socks, a Patagonia down vest
- Headlamp
- Black Diamond Apollo lantern
- Pair of beat up sandals
- A knife, some toiletries and some other small, random items
This was by far the heaviest load I had ever had in the Loka. But even when overloaded, the pack still carried very well. The weight felt evenly distributed over my back, with the majority of the load carried on my hips, supported by the waist belt.
Along the 10-mile hike, I tested out the difference between carrying this load with and without the waist belt secured. The difference was huge. As soon as I unclipped the waist belt, it felt like the pack weighed about twice as much on my shoulders. There is no denying that this is a fully legit, load-bearing waist belt, and it serves its function very well.
Something else worth noting is that at no time during my use of the Loka pack—including on this overloaded backpacking trip—did any of the strap adjustments move on their own. No matter the load, they always stayed completely in place and I never needed to readjust them.