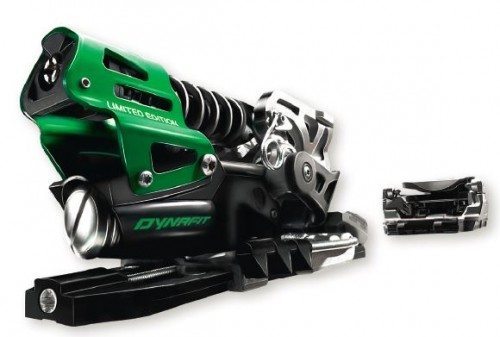
 First Look: Dynafit Beast 16 AT Binding
Max DIN 16
Frameless Design
Rotating/Tracking Toe Piece
Stated Weight: 935 g per pair
BLISTER’s Measured Weight: 957 g
Last Friday, I mounted the S13 prototype of the new Dynafit Beast to a pair of 192cm DPS Wailer 112 RPC (115mm waist), which should be an ideal match. I will ski them with a Tecnica Cochise boot, which will be skied in bounds with a Zipfit Liner, and in the backcountry with an Intuition Pro Tour liner.
I am quite excited about this setup. I was able to ski them in bounds this weekend, and by the time you read this, I will have wrapped up a tour of about 3,000 vert before work.
Clearly that’s not enough for a full-blown review, but I do have several comments about the Beast 16 that can serve as a first look into its setup and my initial impressions.
Mounting
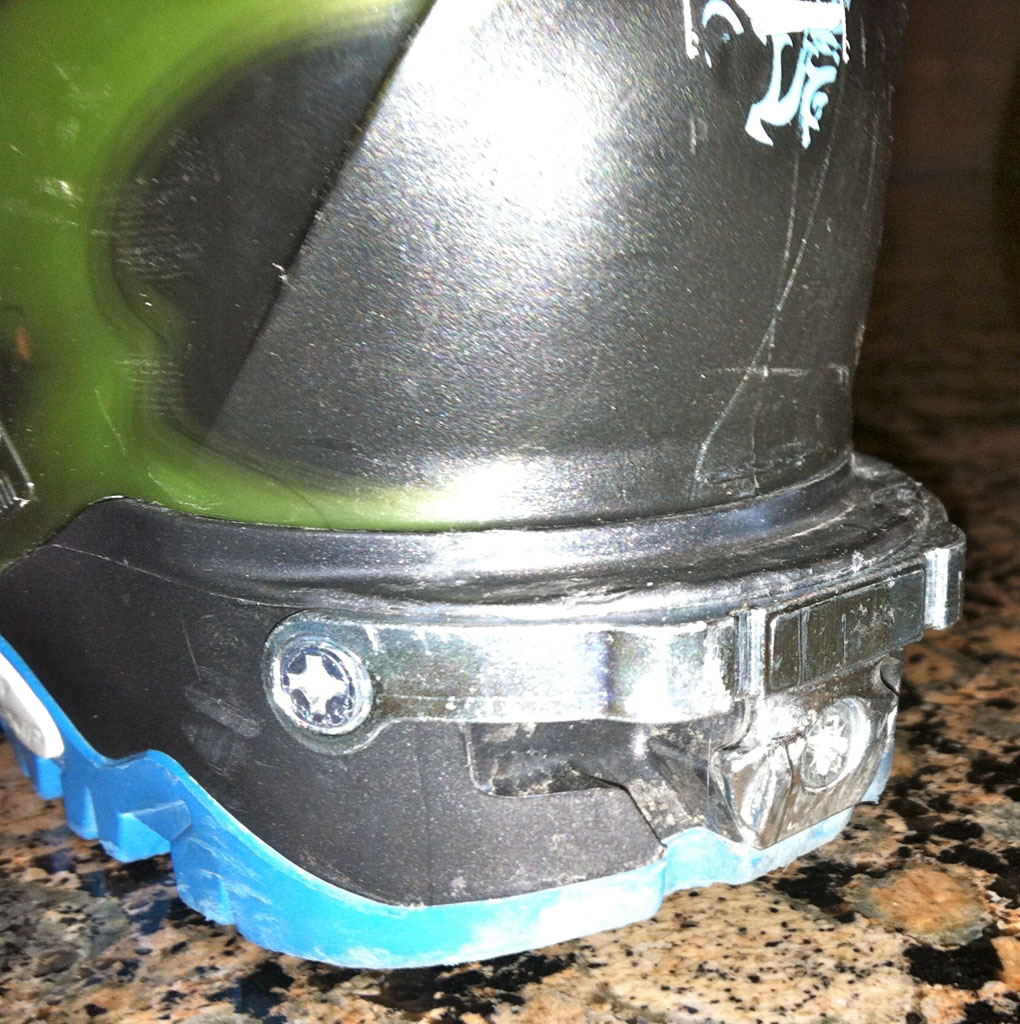
First, I mounted the metal horseshoe to my Tecnica Cochise Pro Light boots. The old Dynafit heel tech fitting popped right out, and the new Beast 16 fitting popped right in. I was only slightly afraid that, since the Tecnica boots are not Dynafits, I might need to get handy with a Dremel. This was absolutely not the case.

The metal horseshoe mounted super easily. I have not actually tested the boot in an alpine binding yet, but my assumption is that it should work without issue. The metal does not ride up above the ledge of the heel block, so using the heel piece in a Duke or Guardian binding should not be an issue—but again, I have not tested it in depth yet.
I was, however, able to ski the horseshoe piece in my Plum Guide bindings for a quick, 1.5-hour tour. The metal horseshoe is just about 0.5mm thicker than the stock Tech fitting, so I did need too open my Plum Guide one click to clear housing of the heel piece with the horseshoe when the heel is run flat. The binding seems to have functioned properly, and the pins appear to have adequate insertion into the boot, so no big deal, as far as I can tell.
From there, I grabbed some skis, and got set to start drilling.
The prototype Beast 16 binding includes a paper jig, which worked great: quick and easy to center and drill.
Once the holes are in, you mount a little plastic rotation-limiter piece in front of the toe piece itself. The toe piece actually uses six holes, and the anti-rotation holes are quite forward on the ski.

Mounting in and of itself was fairly smooth, give or take. But I have to say I absolutely hate Torx screws on ski bindings, especially the T15 size that Dyanfit specs on this binding, which took some serious digging to find the correct bit for my torque wrench.
The proper 4.5nM torque spec to secure a binding to a ski is right at the limit of the head of the screw. I ended up stripping three screw heads, while only going for 4.5nM of torque. I see no reason to use T15 screws—a pozi screw works much better in my opinion. Whenever I end up pulling these bindings, I will be switching out for a full complement of normal pozi screws since I will need to replace 15% of them anyhow.
Otherwise, all in all, the bindings mounted up really nicely.
Forward pressure was fairly easy to set to the boot, though I will end up playing with this a bit to truly get it dialed in. There is a small bit of play between the heel piece and the track, so I will see if that affects anything on snow, and whether a touch of extra forward pressure (in the form of light contact between boot and binding) will remove this play.
My assumption is that I will feel it flex and wiggle a little bit on hard snow, as its fairly obvious when clicked into the ski standing in my boot in the living room. This is far more prevalent on one binding than the other. Again, these bindings are prototypes, not production grade, and we will get a production pair as soon as they land in the U.S. to see if this issue is still present.
NEXT: TECH SPECS AND FIRST ON-SNOW IMPRESSIONS


Very cool, looking forward to hearing more about the binding.
Marshall,
It looks like the new metal heel piece requires two additional screws on the left and right side of the cochise tech heel. Is this a new heal from Technica, or did you just screw directly into the old heel piece itself?
hey tommy,
you just screw it right into the Tecnica heel piece. no big deal.
thanks!
-marshal
cool bindings!
one question though, why did you mount them on those shit-sticks?
they don’t even have a picture on the top!
jesus…
How does the hole-pattern of the beast interfere with the radical bindings?
If i´m using a radical, would it be possible to mount the beast at the same line, or do i have to alter the mounting point due to hole overlaps?
And a big thank u blister! for always posting high quality information about the new stuff!!
hey phil,
I will be able to update this info on the final review of the beast coming in about a month.
Thanks!
Hey,
i´m thinking of the same thing as Phil. Will it be possible to mount the beast on the same skis and same line with Beast and Radicals?
thanks!