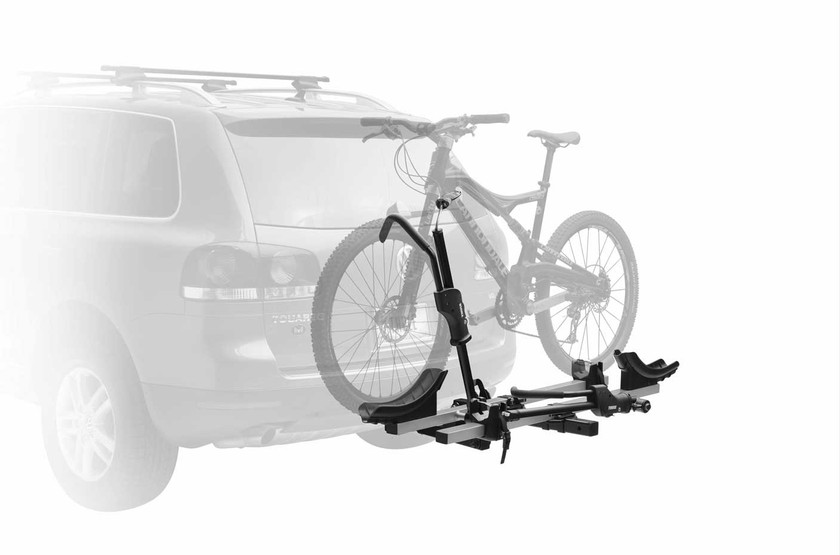
Manufacturer Specs:
- Fits 20-29” wheel diameter bicycles
- Fits up to 3” wide tires
- Limited lifetime warrantee against manufacturer defects
Manufacturer List of Features:
- SecureHook with integrated cable lock secures the bike without making frame contact
- Hitch Switch lever folds and stores platform when not in use and tilts carrier away from vehicle for rear of vehicle access
- Reinforced tray provides maximum strength and rust-free protection
- Adjustable wheel strap quickly secures back wheel to tray
- Accommodates bicycles with disc brakes, thru-axels and other non-traditional frame designs
- Included Snug-Tite receiver lock virtually eliminates hitch carrier movement in receiver and locks the carrier to the vehicle
- Model 916 fits 2” hitch receiver
- Model 917 (tested) fits 1 ¼” hitch receiver
- Model 918 – additional 2 trays for use with model 916 only
Test Duration: 8 months
MSRP: $440
If you are searching for a bike rack, first read Blister’s Bike Racks 101 article, which points out the many advantages and disadvantages of several popular rack types. It’s not always as simple as slapping on a rack and going riding; choosing the best rack can often involve unforeseen dilemmas.
Take, for instance, when I got a new car in March of 2012. I didn’t want to put a dirty bike in my new (to me) car; I surely wasn’t going to attach my old strap-on rack’s hooks (and wasn’t wild about any of the infinite number of ways to scratch my car); and I didn’t like the chance of my bike peeling off the roof with roof-top rack systems.
So I was looking for a hitch rack, and opted for the Thule 917XTR T2.
Some incarnation of the T2 has been around for years now, and its popularity has been exceptional; one or more seem to grace every trailhead parking lot. Having spent over a year now with the T2 I can understand why they have become so popular. I can also see how recent competition will likely force Thule to make a few tweaks and options available in the future.
Assembly
Like most racks, the 917XTR T2 came with “some assembly required.” All of the necessary tools were included in the box, but I found the provided Allen key to fit bolts very poorly, so I next tried one of my own before quickly switching to a regular socket wrench (being sure not to over tighten anything) rather than the slower, closed-end wrench that was included.
Installation took about 35 minutes, from cutting the box open to loading my bike. The instructions were very clear and straightforward.
Loading
I have the 1 ¼” version for my Subaru Outback, which means I can carry two bikes and can’t upgrade to fit four bikes (not that I’d want to, but I’ll discuss that later). I have experience with the four-bike option of this rack, along with a few other two-to-four-bike racks that I will compare this to later as well.
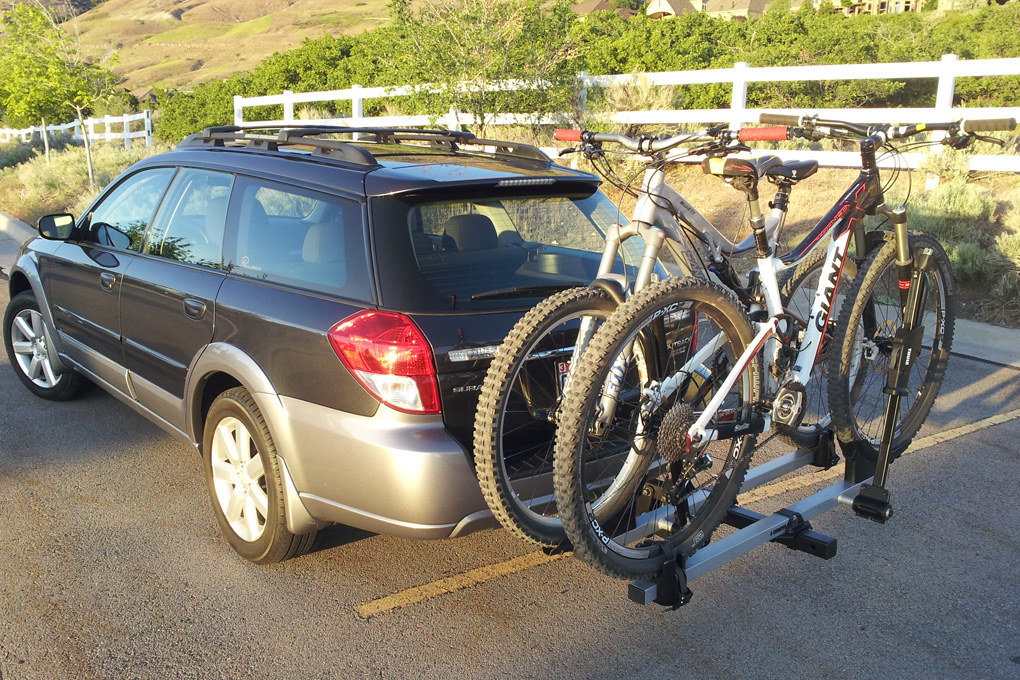
That said, loading the rack onto my car has been super simple from day one. The 1 ¼” hitch base fits snugly into my car’s receiver, and with a ¾” socket and wrench for the hitch lock pin, I can easily snug the pin down for a wiggle-free / noise-free connection.
The supplied hitch lock attaches to the protruding end of the hitch lock pin to keep anyone from making a getaway with your gear (or at least the rack). I quickly lost the little plastic protective end piece of the lock, which means that I’ll have to keep the lock well lubricated, but otherwise I can’t find much fault with this system.
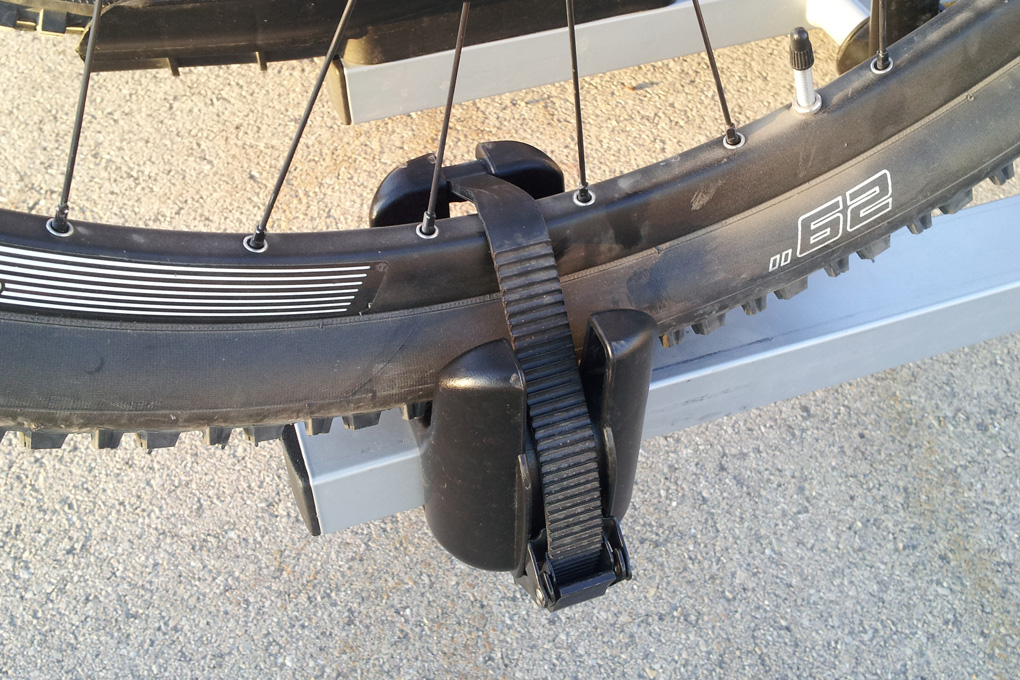 As marketed by Thule, loading bikes onto the rack is an incredibly simple process. Toss the front wheel into the plastic catch, set the rear wheel anywhere on the tray, swing the arm up and position it close to the fork, and press it down until it’s snug. Then at the rear of the bike, slide the rear wheel retention device so it sits directly under the hub, and lightly cinch the wheel strap.
I emphasize lightly because the plastic wheel strap system seems to be a common point of complaint with the T2, and honestly I believe it has more to do with people over tensioning the strap (therefore tearing-up / stripping the teeth that hold it in place) than anything else. After a season of use, my rear wheel straps still look like new, but I have been relatively aware and careful when cinching wheels down.
My only complaint with the rear wheel lock system is that the straps are not permanently attached to the rack, so if they are left in the cam, someone could steal them much too easily to replace their own rack’s worn out or lost straps. For now, I throw them in my car when I’m at the trailhead.
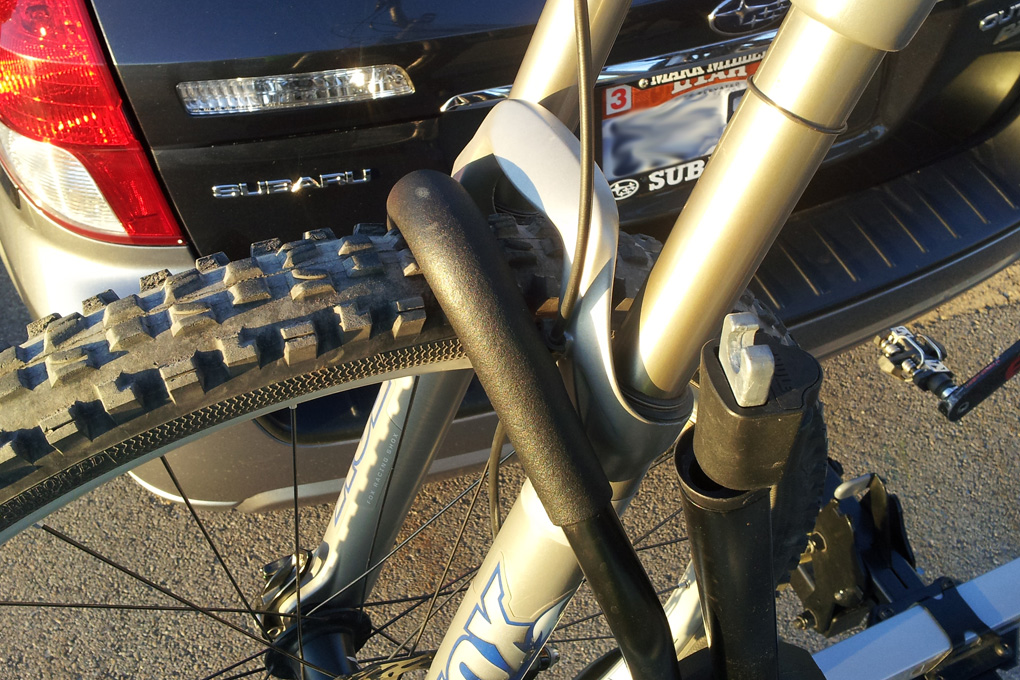 Once loaded, the rack holds each bike very securely without even touching the frame. There is a tiny point of contact around the fork crown / lower area, but compared to any other rack I have used, this seems quite minimal. If someone is concerned with this point of contact, I’m sure a little extra padding could be placed around the wheel hook to prevent any possible paint wear on the fork.
I’ve also heard that larger DH dual crown forks are more apt to rub on the support arm. My Fox 36 clears easily, but if that is something you will be carrying, it will be worth checking to see if the fit will be satisfactory before purchasing the rack. (I’ll try to get a Boxxer and Fox 40 on here soon and report back.)
Unloading
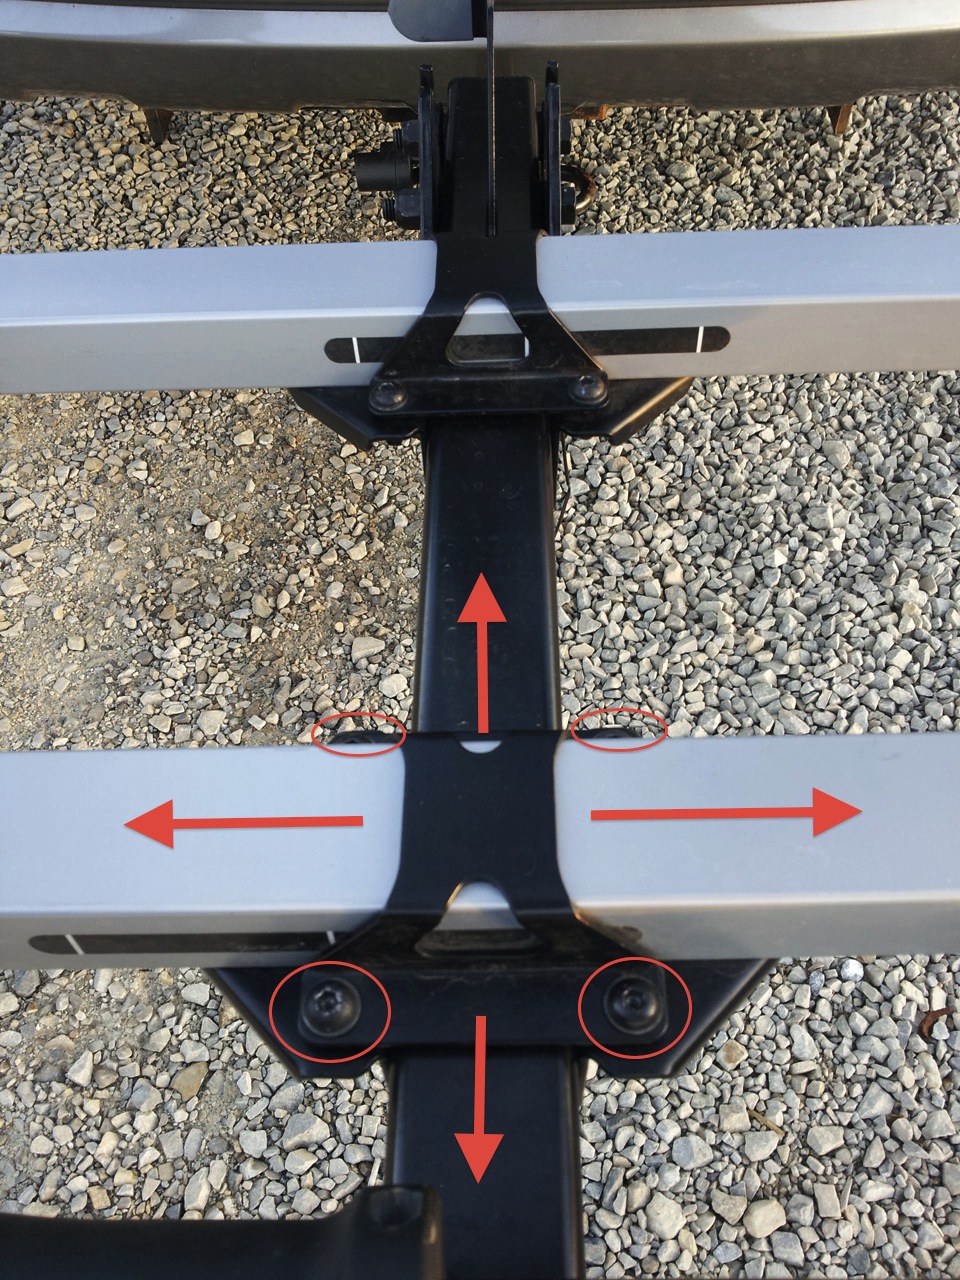
Unloading is equally as simple: you simple reverse the process listed above.
With two bikes on the rack, if there is any interference between the handlebars and seats / seatposts, it is very easy to loosen four bolts (circled in red in picture at right) with an Allen key and slide the trays either apart or in opposing side-to-side directions to accommodate these issues. I haven’t run across this problem dealing strictly with mountain bikes, but I can see there being a potential issue when carrying varying types of bikes, e.g., a mountain bike with a road or BMX bike. Thule rack offers the most adjustability in this department I have seen.
The T2 also has an integrated lock system within each support arm. Like Rob Dickinson mentions in his Kuat NV review, these cable locks will keep honest people honest, and hopefully deter a jerk with bolt cutters enough to make the bike left leaning against the grocery store look more appealing. Still, if someone wants your fancy whip, it wouldn’t be that difficult to get.
I’ve also had a few instances where the lock cables wouldn’t immediately ratchet back down into the support arm when unlocking my bike, which can be a touch frustrating. I have figured out, however, that with a slight rotation of the cable, the system unbinds and the cable quickly pulls down into the support arm.

