DISC BRAKES
The condition of the disc brakes is the next important thing to inspect, and their condition will also give you insight into how well the owner has maintained the bike and how hard it has been used.
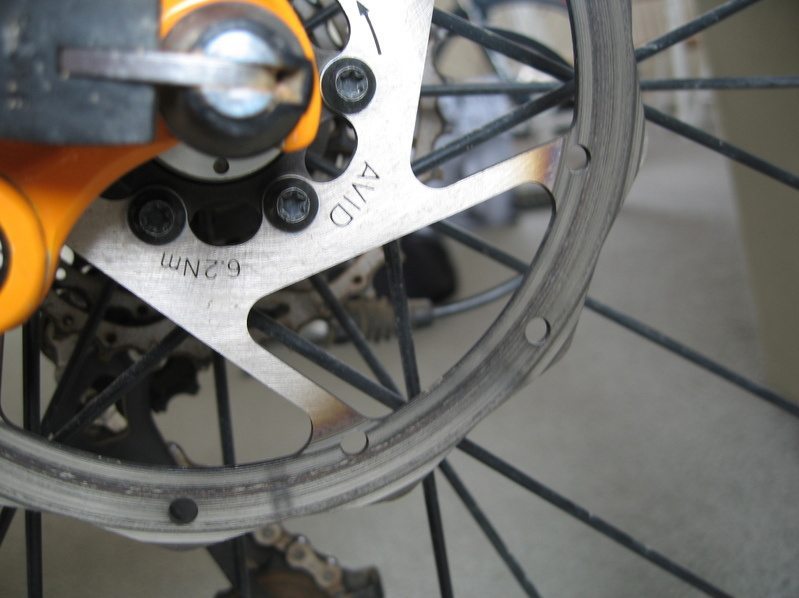
First, look at the rotors. They should be either totally silver (if they are brand new and never used) or have a brown mid-dark discoloration around the brake track. If the brake track is mottled with black, see if you can very quickly clean the track with rubbing alcohol and a paper towel. If the black discoloration does not clean off, the rotor is fried and needs to be replaced. It will also likely be noisy and possibly offer diminished braking power, and if the owner has lived with the rotor in that condition, it would indicate the lack of attention to a simple and obvious thing on the bicycle.

Now, spin the wheel and look closely at the rotor in relation to the brake pads. Does the rotor wobble back and forth and rub on the pads? If so, note whether the pads actually slow the wheel, or if the rotor just barely makes a sound. A small buzz that does not actually slow the wheel is fine and is often expected on a used, or even brand new, setup. If you see the wheel slow dramatically or stop within a few rotations, the rotor is warped and needs to be either trued or repaired. Note that truing a rotor will not hold long term—it’s a stop-gap fix at best—and once long, hard braking is applied to the rotor, it will lose its true and return to the warped shape.
After this, rub your fingernail along the brake track from top to bottom (careful to not touch your skin to the track, as the oil on your skin will contaminate the brake surface). If you feel a deep groove in the rotor in the center, it needs to be replaced. If the rotor brake track seems flat, then it is fine for continued use.
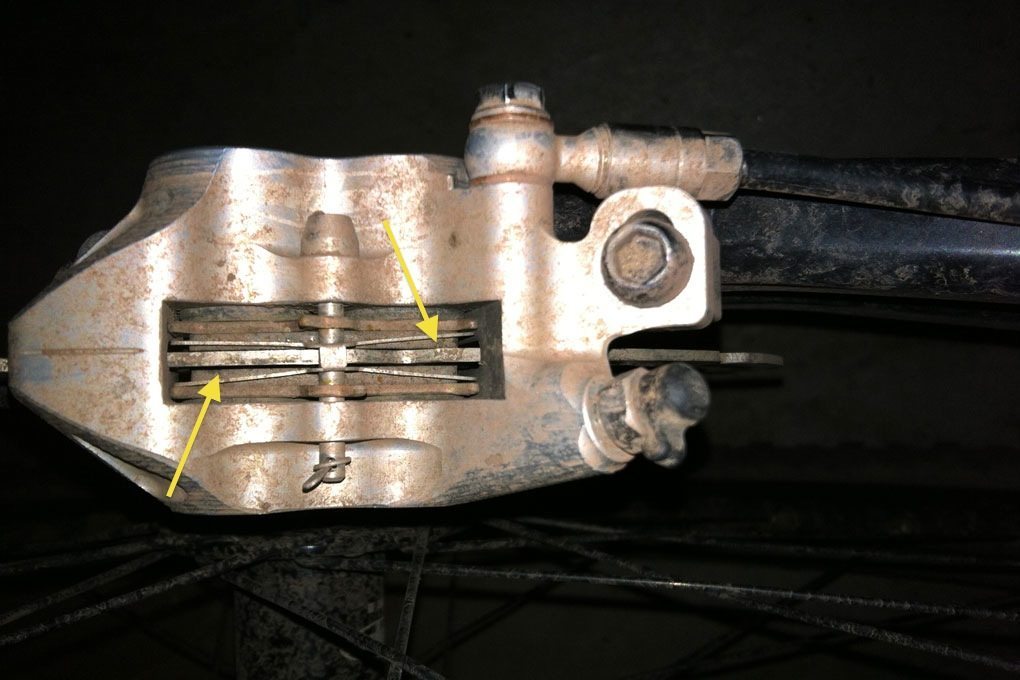
Next, look at the brake pads. You can usually see them well enough from the top to gauge thickness, or you can get a look at them by quickly pulling them off. Ask the owner when he or she last replaced them. Again, this speaks to how well the owner maintained the bike overall. Depending on the bike and usage, replacing pads once a season for a regularly used bike would be about average. Then make sure that the pads have some life left in them, and that they are not worn all the way down to metal and are grinding the rotor. If the pads are burned all the way down, you will likely need to replace the rotor, bleed the brakes, and get new pads.

Inspect the caliper, hose, and lever. You are looking for any sign of fluid leaking from any of these points. Certainly leaks can be repaired, but the cost may reach that of a replacement brake pretty easily.

Finally, get a feel for the brakes themselves. Pull the brake lever down once, slowly. Note how it feels and how far it goes. Then pump up the lever 10 times in rapid succession and hold the brake lever down. Did the initial pull go nearly to the bar? After pumping up the brake, did the lever feel firmer? If the brake firmness increased with pumping, the brake will need to be bled—there is air in the line. This is a pretty quick and easy repair, and one that is common with hydraulic brakes every few years with normal usage anyway.
Parts and Labor Estimates:
Brake Pads: $20-$30
Brake Rotor: $40-$75
Brake Bleed: $25-50 per side
NEXT: REAR DERAILLEUR AND HANGER
