
There are a lot of misconceptions about what can be done to a ski boot in terms of customization and modifications. But the first question should be, what should be done, given the boot you are currently in?
There are a lot of caveats that coincide with customizing a ski boot, and the first aspect that must be addressed is whether you are in the right boot to begin with. Second, is your foot supported and stabilized in a neutral position within that ski boot?
(If you’re questioning the former, it’d be worth checking out our Bootfitting 101 article on how to figure out your correct size.)
If you walk into a bootfitting shop complaining of something that seems very obvious or specific (e.g., your tailor’s bunion is getting crushed by the shell), don’t be surprised if the bootfitter starts ripping the boot apart or spending a bit of time getting to know your foot. It might feel as simple as just needing a bit of space in your problem area, but what if your foot is moving around excessively inside the boot and therefore causing excess pressure to that bony prominence? Making more space sure isn’t going to help.
If you are in the correct shell, your bootfitter has taken measures to stabilize your foot with a custom insole, and there is still a very obvious hot spot or pressure point, don’t worry — the options are pretty wide open to make that fit better / more comfortable.
In this piece, we’re going to discuss some of the common adjustments you and your bootfitter can make to your boots, what they generally aim to do, and some things to keep in mind with each one.
But first, let’s touch on some of the factors that go into figuring out which boot you should be in to begin with:
Ski Boot Selection: The Main Factors
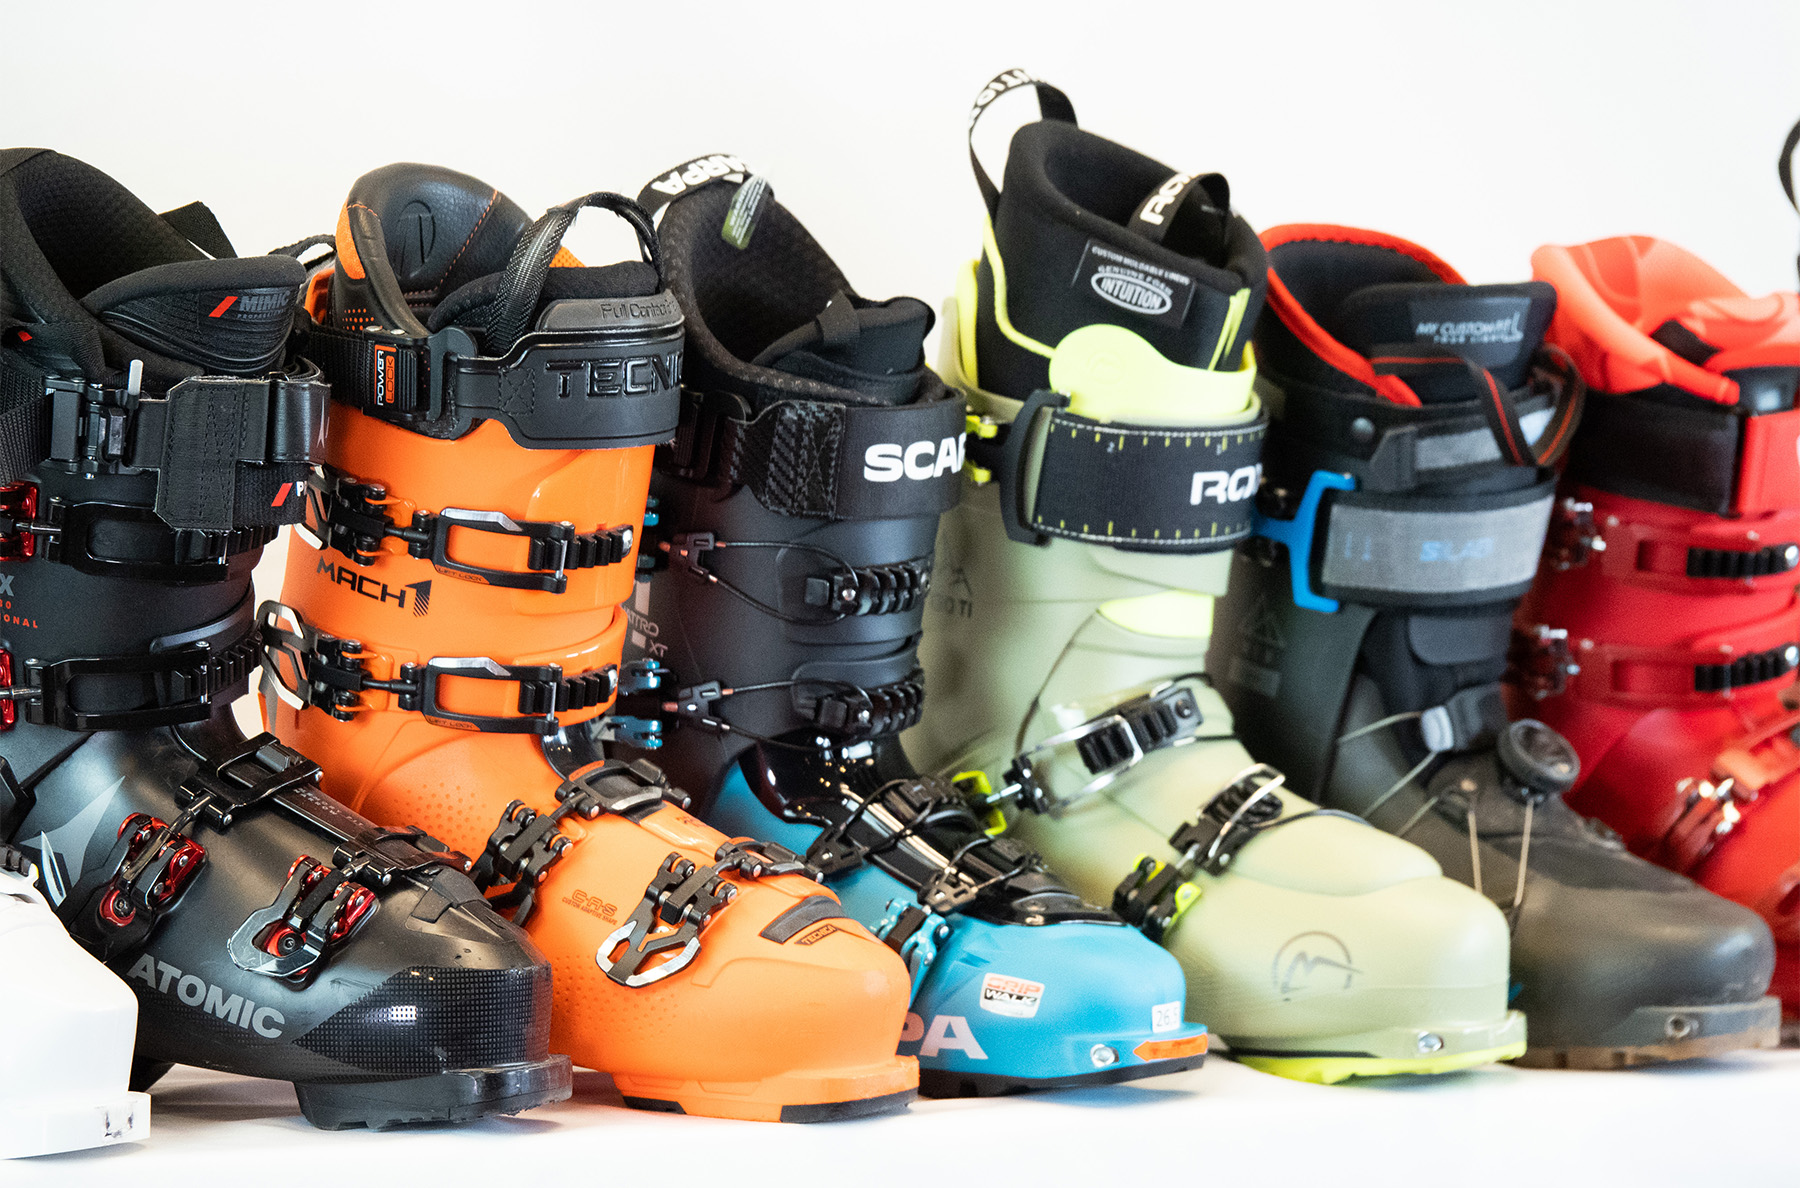
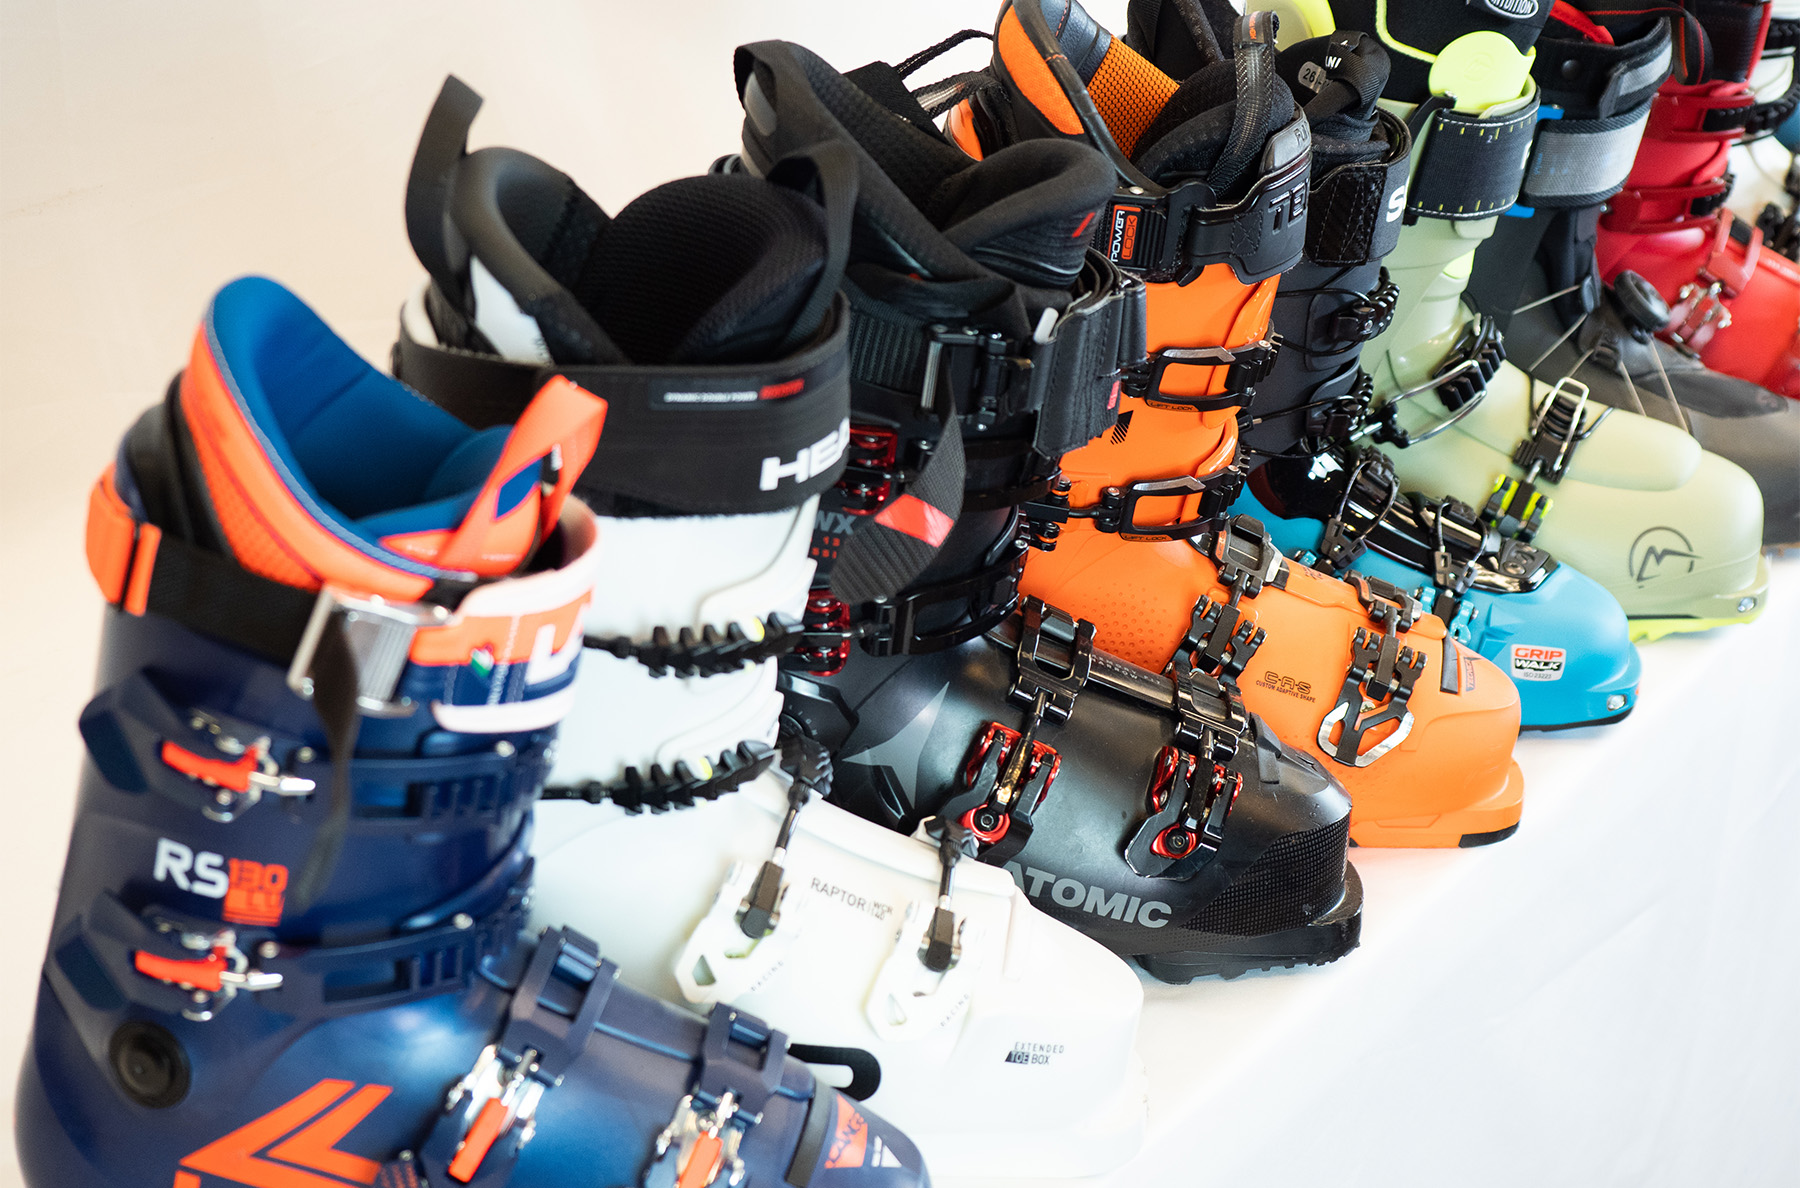
There are a lot of ski boot options out there. That’s good news. I often think about how much harder it would be to be a bootfitter even 20 years ago. Ski boots have gotten a lot better (more anatomical, more easily customizable, more diverse / varied, and so on).
Of course, all those options also mean that it can be trickier to sift through it all and find the right boot for you. You will likely have already talked with your bootfitter about what type of skiing you’ll be doing, which narrows it down a bit, but still leaves you with dozens of potential options. Ultimately, it will come down to which naturally fits your feet the best. Fit is the top priority when it comes to which boot is best for you, so even if a given boot has the specific features you’re looking for, if it doesn’t fit well, it’s likely not worth the investment.
That said, the choice should be somewhat intuitive when it comes to fit. You are essentially looking for the boot that offers the most consistent and uniformly snug fit out of the box, keeping in mind that a custom insole, additional heat molding, and other further customization will only make the fit that much better. (You can read more about what a “good fit” feels like in our Boofitting 101 article on sizing.)
That’s why any good bootfitter will work with you, have you try on a few models, and get your feedback to figure out which boot(s) seem most compatible with your feet.
While it’s almost a guarantee that you will need some further finetuning to make the fit just right, the boot should feel reasonably “comfortable” and you should at least be able to picture yourself skiing in it.
During this process and the back-and-forth with your bootfitter, they will also have assessed two other important aspects of selecting the right ski boot: flex and features. On that note…
Boot Flex / Stiffness
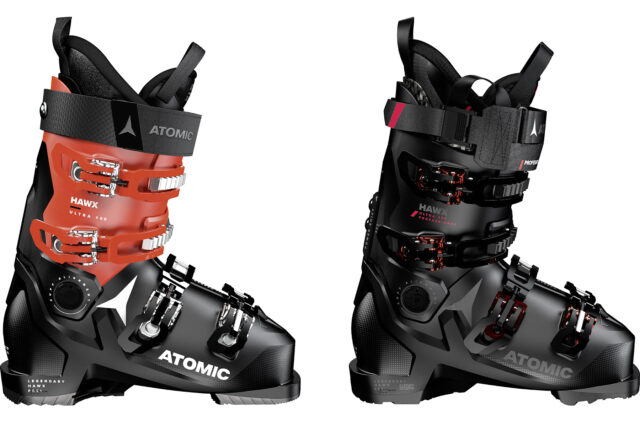
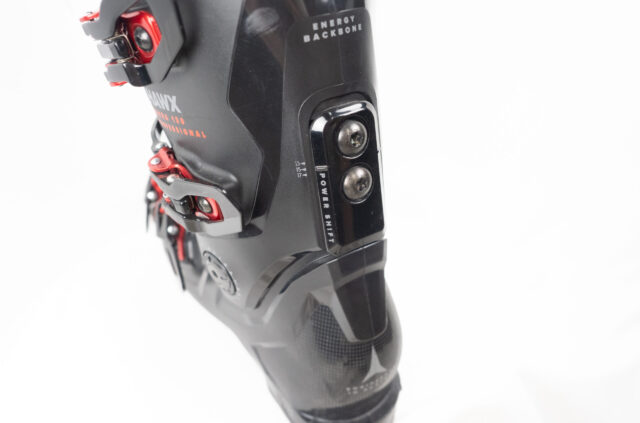
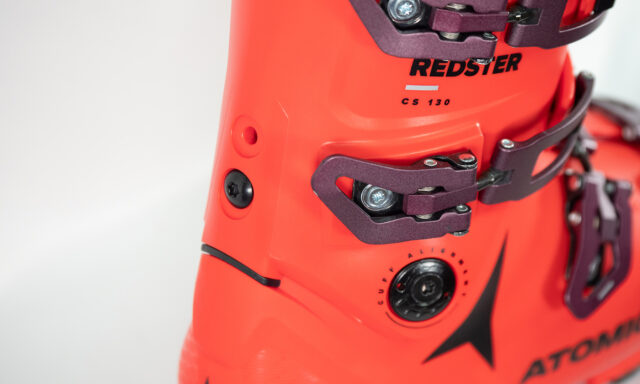
Many ski boots are listed with a number next to their name. E.g., Lange RX 130, Head Raptor 90, Atomic Hawx Ultra 110. These numbers are typically known as “flex ratings,” “flex numbers,” or simply “flex.”
However, boot flex / stiffness is a difficult thing to objectively define, since there’s no (currently publicly available) way to quantify or measure it from brand to brand. In general though, boot flex ratings / numbers are a means of indicating both how stiff a particular boot is and where it falls within a brand’s lineup. E.g., the 130-150 flex boots will always be on the top end of a brand’s lineup in terms of features and price, and will be on the stiffer end of things, whereas 70-90 flex boots are typically much softer, less expensive, and don’t include as many high-end features. Until there is a way to quantify these flex scales, bootfitters will be working to match the flex of a boot to you, and believe it or not, it’s not always based entirely on your ski ability level.
The main factors that go into choosing ski boot flex include:
- Skier ability
- The weight of the skier
- The height of the skier (the taller you are, the more leverage you have)
- Ankle joint range of motion (especially if your ankle is extremely mobile or extremely rigid)
- Personal preference
Stiffer boots support larger, taller, and/or more aggressive skiers since they’re putting more pressure on their boots, but those same boots can feel harsh, unresponsive, or too quick to respond to folks who aren’t able to pressure them enough. Softer boots make it easier to bend them (and therefore, engage your skis’ edges) with less pressure and effort, but the downside could be not enough support or responsiveness for people putting significant force into their boots. So as always, it’s a matter of finding the right balance for you. And if you’ve used some boots that were very clearly too stiff or too soft for you and your preferences, conveying that info to your bootfitter will be very helpful in the selection process.
On the note about ankle joint range of motion, this will be something any good bootfitter pays attention to, and mostly comes into play when determining ideal boot stiffness if you’re someone with extremely limited or high ankle mobility. Somewhat counterintuitively, people who are either on the side of hypermobile or extremely rigid will benefit from a stiffer, more supportive boot. People with rigid / limited ankle mobility benefit from having a more supportive boot that requires less energy and input to respond, while people with flexible / high ankle mobility need a supportive environment that will be stiff enough to prevent them from over-flexing.
Performance & Features
Despite fit being paramount, what most people hear about ski boots are bold claims about their features and performance. “It’s got ultra-hyper-new aerospace-grade alloy buckles!” “This one’s the lightest on the market!” “It has 180° of walking range of motion!” “This is what [insert pro skier name] uses, so you should too!”
However, as we just touched on, fit is the main priority, and no amount of fancy features is going to make a boot that’s a terrible match for your feet feel great when you’re actually skiing.
That said, certain boots still do certain things better or worse than other models, so performance traits such as stiffness, the nature of a boot’s flex pattern, its suspension / damping, its weight, sole norm, etc. still matter.
If you’re after some specific performance traits, our recommendation would be to do some research (our reviews & Winter Buyer’s Guide are great places to start), identify several boots that you think could offer the performance you’re looking for, and then work with your bootfitter to see which are viable options in terms of actually fitting your feet. Your top choice might happen to be the perfect fit, or maybe your 3rd choice is, or maybe it’s a boot you hadn’t even considered. Coming into the process with some potential ideas — while maintaining an open mind and being ready to defer to your bootfitter — will be a whole lot more useful in the long run, rather than being fully settled on a model you’ve never tried on.
And of course, you can always become a Blister Member, send us a gear question through the Member Clubhouse page, and one of our reviewers will work one-on-one with you to identify the best potential models to try on with your bootfitter.
So, now that we’ve talked about some factors that go into the selection process, let’s get into some of the ways a bootfitter can make a boot work better for you and your feet:
Fine-Tuning & Customization
Bootfitting is simply a process of matching foot shape to boot shape. While you can come quite close to achieving this purely through boot selection, there are many ways a bootfitter can make a given boot fit even better for your feet.
So, what can actually be done to a ski boot? The answer is — a whole lot.
Fortunately, you typically don’t need to do all that much to make a boot feel better. There are plenty of options for customization, but the adjustments often aren’t as drastic as you might think. In ski boots, it’s usually just a game of millimeters, and those minor tweaks will make all the difference.
Here, we’ll go over some of the common factors and methods bootfitters will use to optimize fit.
Custom Insoles /Footbeds
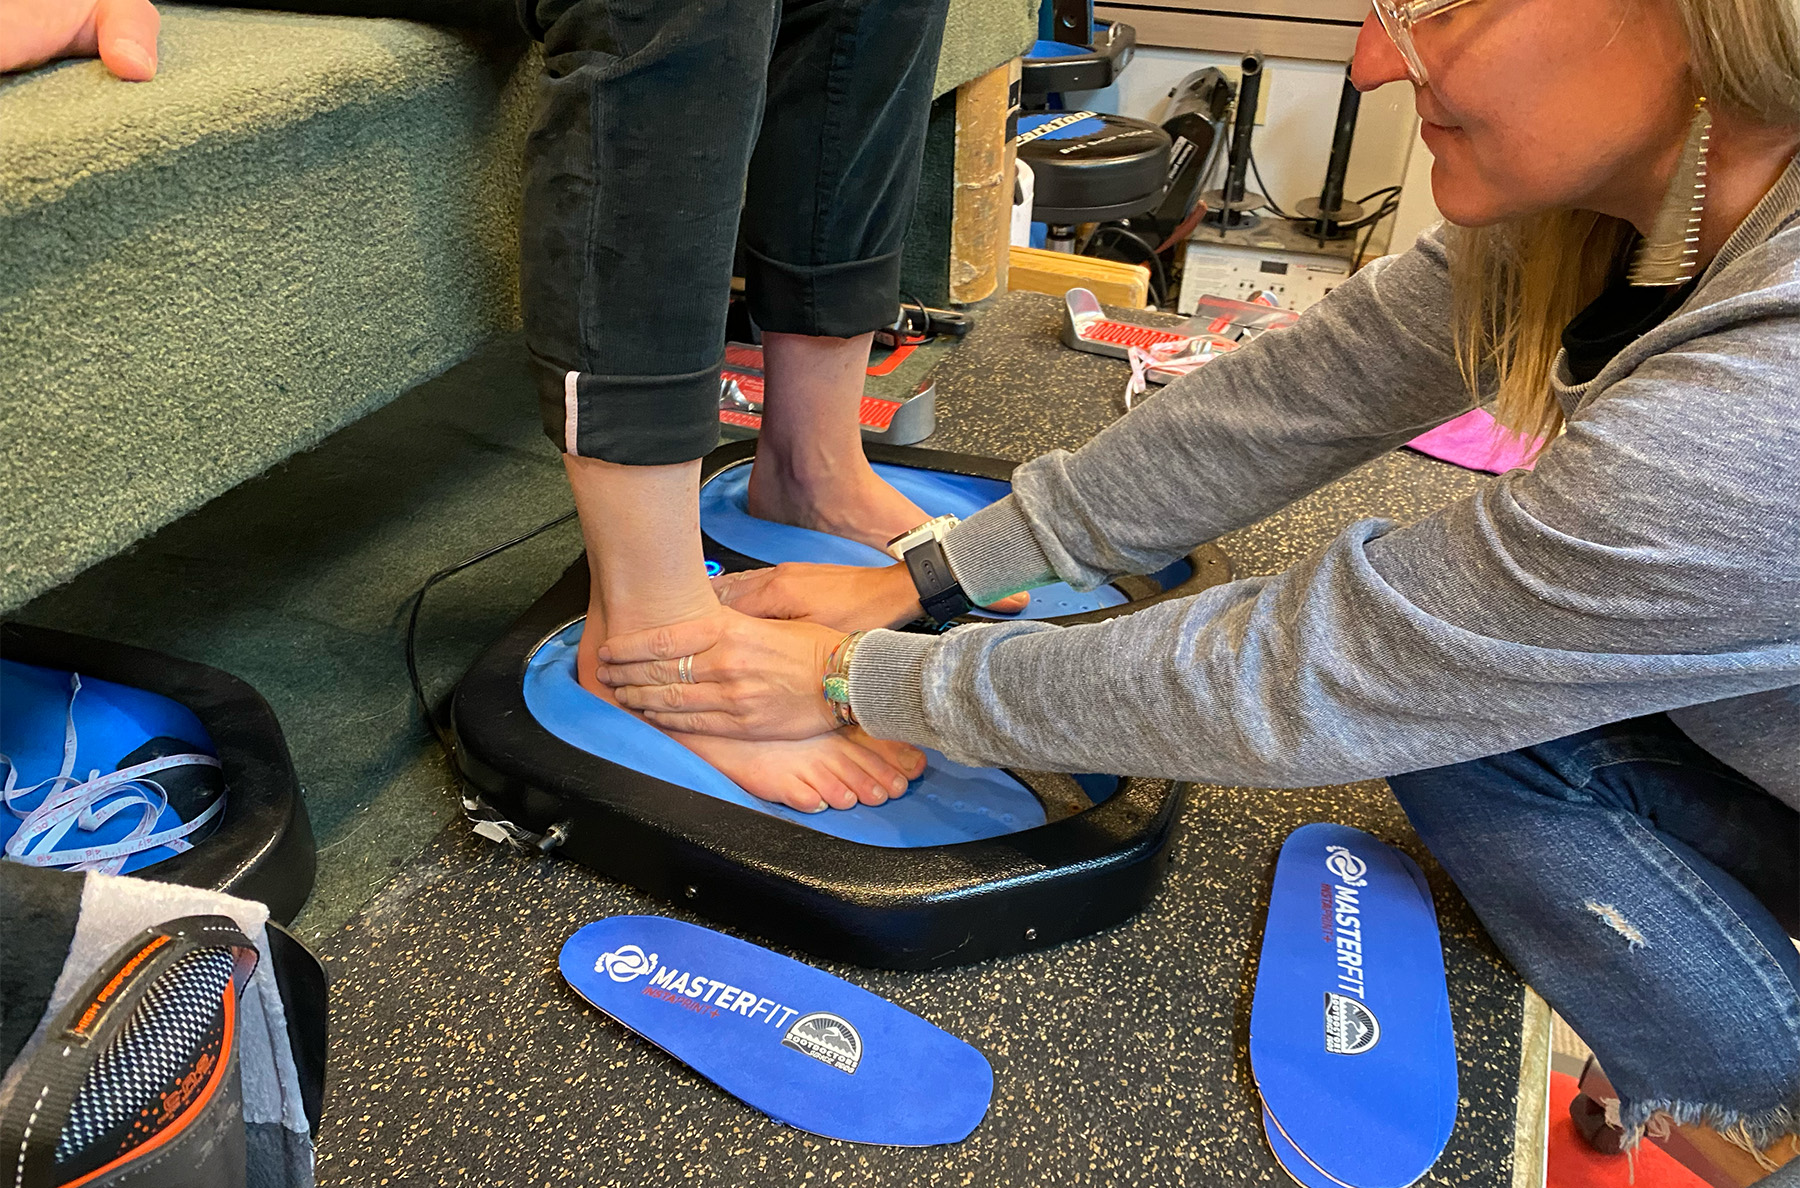
A good bootfitter will have brought up the topic of insoles quite early on in the fit process. Typically during the foot assessment and before you have even talked about ski boot models, custom insoles will become a focal point in the process. Why is this?
Ski boots are rigid environments, and as such, the less movement that occurs in them, the more comfortable they will be, and the better they will perform. An insole helps to stabilize your foot inside the boot, keeping it in a more stable, consistent position. Think of it as the foundation. Having a neutral foot position in your ski boots means your ankle joint isn’t rolling over your medial arch (pronating), or over your lateral arch (supinating). Even if you have a fairly stable foot, it’s quite reasonable to think that, as you drive pressure to your skis’ inside or outside edges, the force generated from this will translate to some movement or uneven pressure beneath your foot or throughout the boot. Custom insoles help to reduce the shearing forces that occur while skiing, both side to side and front to back.
Even if you’re in the correct size ski boot but lack the support from a custom insole, there is a good chance that you might end up dealing with black toenails or issues with your toes jamming into the front of the boot. Without proper support, your foot is constantly elongating and collapsing within the boot. You also have voids beneath your foot (especially under your medial arch) that allow for movement inside the shell when unsupported.
A good custom insole prevents your foot from elongating inside the boot, effectively keeping your foot in its shortest / narrowest / most stable configuration.
Plus, a relaxed foot is a happy foot. If you can fill the voids of your arch and your insole contacts and support your foot through its entirety, your foot is able to relax a whole lot more, leading to less foot fatigue or cramping.
Bootfitters have different approaches to building custom insoles, both from a standpoint of which position and posture they will position you in while building them, as well as the different materials used to craft the insole. While there isn’t one “correct” approach, there are several factors that should be kept in mind:
- The materials used to build the insole should match the rigidity or flexibility of your foot
- The insole needs to be interfaced with the boot so that it lies perfectly flat and doesn’t take up any additional space (other than where the voids of the foot existed before, like under the arch)
- It should feel like natural support beneath the foot (e.g., no lumps or bumps)
In my opinion, everyone should be using a custom insole, since it’s one of the easiest and best ways to avoid fit issues and maximize a boot’s comfort and performance.
Ramp Angle and Forward Lean
This section deserves its own article, which could likely happen at some point in the future. For now, here’s a basic overview and some things to keep in mind regarding ramp angle and forward lean.
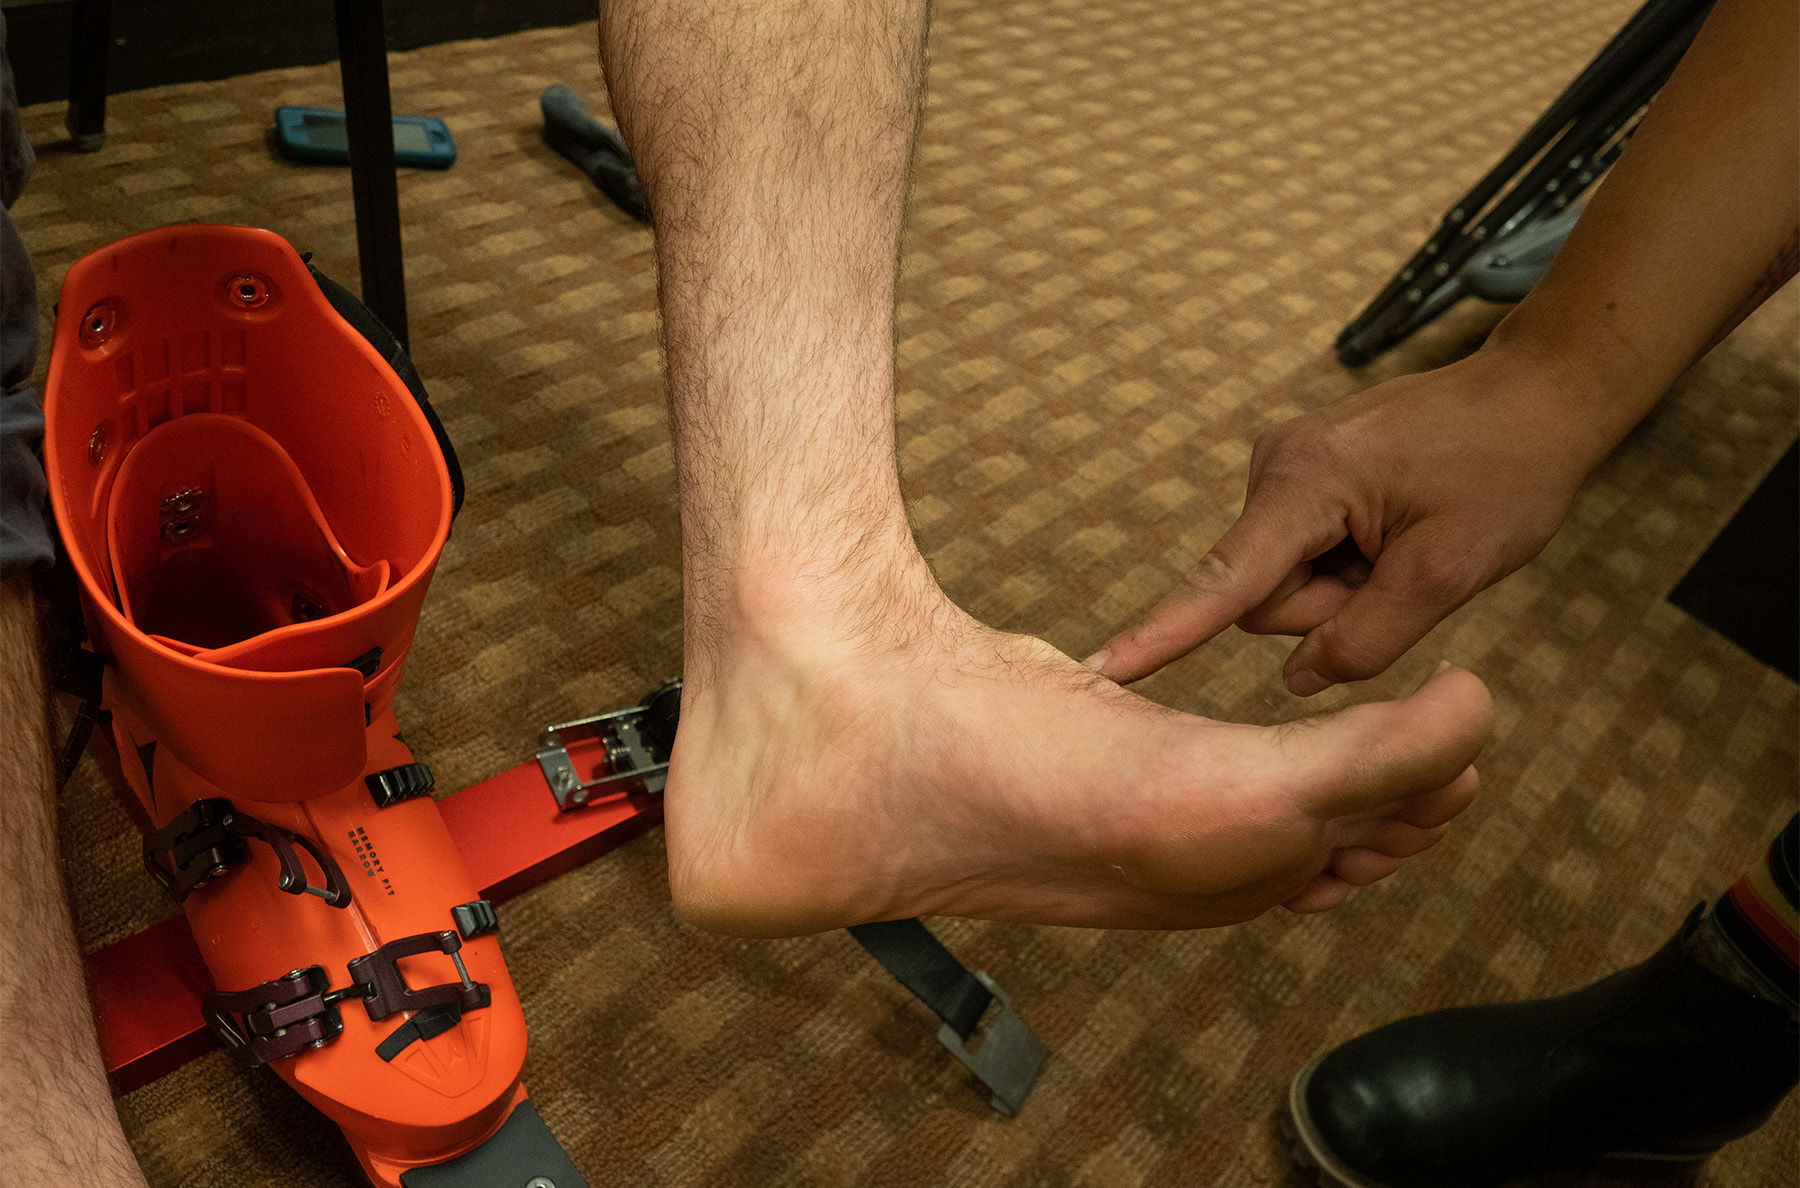
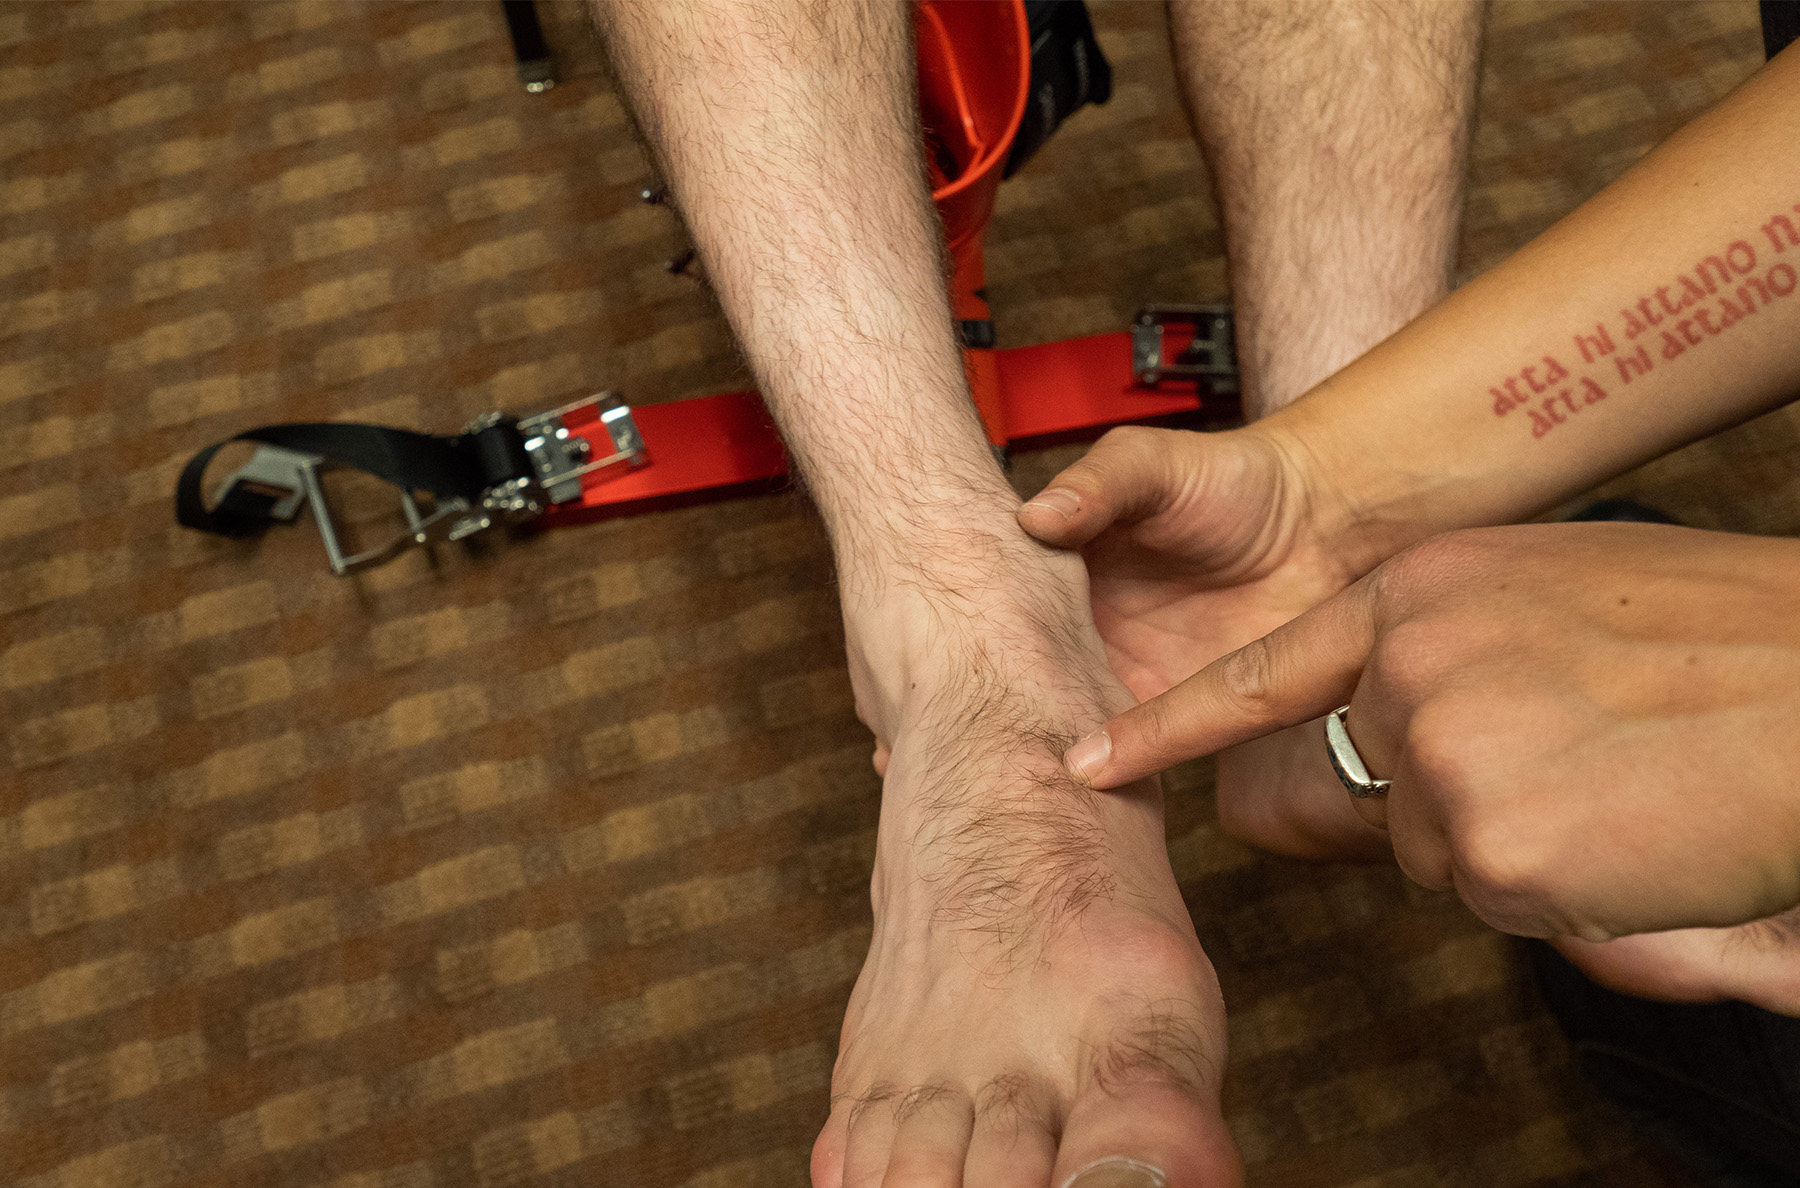
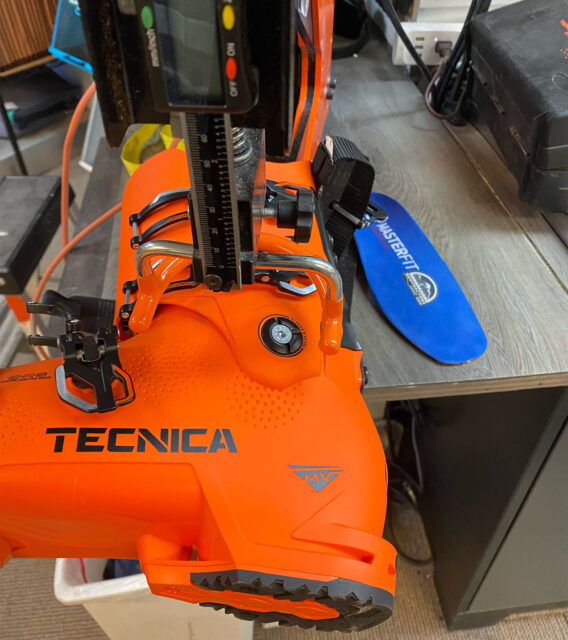
Ramp Angle refers to the angle of the boot board (or “Zeppa”), typically featuring a few degrees of drop from heel to toe. Forward lean refers to the fixed angle at the cuff of the boot. The difference between these angles is typically the angle that your ankle joint needs to match, in order to stand balanced within a given ski boot. Most ramp angles of boots range from 4-7°, and forward lean angles typically range from 9-17°
This is a critical part of the equation when it comes to getting dialed in a ski boot. In some cases, assessing ankle flexibility might be the biggest factor in making or breaking someone’s fit, especially if they have very limited ankle mobility (i.e., a “rigid” ankle). During an initial foot assessment, your bootfitter will likely be looking at your ankle dorsiflexion and beginning to consider how it’s going to affect the fit process.
Bootfitters have several easy tests that help gauge how mobile or rigid your ankle dorsiflexion is. From there, they can work to adjust your position either by choosing a boot with a specific forward lean, and/or altering the ramp angle via “ramp angle adjustment,” commonly referred to as heel lifts.
Simply put, achieving the correct angle in your boot is a matter of matching the angle of your ankle joint to that of the ski boot, while still having a few leftover degrees to be able progressively flex the boot, drive your skis, and absorb terrain.
For example: If a boot has a 4° Ramp Angle and a 12° Forward Lean, this means your ankle joint requires a minimum 8° of range of motion just to stand in the boot.
The end goal of altering the ramp angle and forward lean is to have a balanced fore-aft position in your boot. This means you have even pressure beneath the ball and heel of your foot, and you are able to pressure the tongue of the boot while maintaining even pressure on the ball and heel of your foot, in addition to just feeling balanced. Someone who is really rigid in their ankle joint will tend to shift their weight back (backseat skiing) in order to ground their heel, and then compensate for this by bending at the hips and bringing the torso forward. This is not a balanced fore-aft position, and it certainly makes skiing hard.
Rigid ankle dorsiflexion is somewhat common, even if it’s not extreme, but the problems this can cause manifest in a multitude of forms: skiing in the backseat, feeling unrelenting pressure at your toes (since it’s difficult to properly leverage your heel into the heel pocket if your ankle flexibility is maxed out), numbness or exorbitant pressure at the ball of the foot, excess pressure on top of the foot, shin bang… the list goes on and on.
While all of those issues listed above can be attributed to other factors than just a rigid ankle joint, I’ve witnessed so many cases where even just adding a couple of degrees of ramp angle to a boot has drastically changed someone’s fore/aft balance, and effectively, their ability to ski.
It’s also a low consequence and easily reversible process to adjust ramp angle, even just 1-2° at a time. Additionally, many boots have built-in adjustable forward lean in their cuff, or come with options such as removable spoilers to effectively adjust forward lean. Working through the process of getting a well-dialed fore-aft position in your ski boot is not only simple in terms of adjustment methods, but it’s also extremely rewarding to find the position that works best for you.
Heat Molding Shells
Many boots these days utilize plastic compositions that become flexible / malleable at certain temperatures, allowing for the expansion of the shell through the pressure of the foot inside it. Heat molding is generally used to create space, rather than reduce or remove it.
While heat molding can go a long way in some cases, it shouldn’t be treated like a silver bullet, and it definitely isn’t always the solution to problems within your boot.
Heat molding can be helpful in situations where you are trying to gain some volume in several places throughout a boot, especially in key fit zones such as the instep, which can otherwise be a difficult area to work with via traditional methods of stretching or grinding the boot shell.
There are different methods used to help achieve extra space during the molding process, such as placing pieces of foam over bony prominences in the areas in which you want to create more space or using toe caps to help achieve a roomier toe box.
There are a lot of heat moldable shells available these days, from stiff alpine boots to lightweight touring models, but not all boots are truly heat moldable. There are still companies such as Lange, Nordica, and Tecnica that have stuck with traditional plastics that are not heat moldable (instead relying on more traditional stretching and grinding techniques). That said, it isn’t really recommended that you choose one boot over another just because one happens to be heat moldable. Rather, choosing the boot with the best initial fit will still be better long-term.
However, if you do have extraneous circumstances, such as a very voluminous instep or foot, injuries or ailments that are significant, etc., heat-moldable shells can offer a lot of relief in a quicker timeframe than opting for a boot that requires traditional methods of stretching or grinding.
Heat Molding Liners
Similar to what we just said about heat-moldable shells, heat molding your liner can be a quick and helpful step in the process but it isn’t always the solution, and it can only do so much. There tends to be a misconception that heat molding a liner will make all your problems go away, and that’s generally not the case. Heat molding will generally just take a new boot and make it yours, by conforming the liner to the shape of your foot. Heat molding is best performed on a new boot, with its usefulness dropping thereafter.
Pretty much every liner these days is heat moldable, though there are varying degrees to which a liner is capable of being molded. Generally, by heating a liner and applying pressure, you are moving / compressing foam in certain areas. Heat molding liners is especially helpful when trying to accelerate the break-in process (especially in the toe box), dealing with little pressure points, or reshaping a liner to accommodate a new adjustment (e.g., you got a new custom insole or got a shell stretch for bony prominence and you now want that liner to better match the new shape).
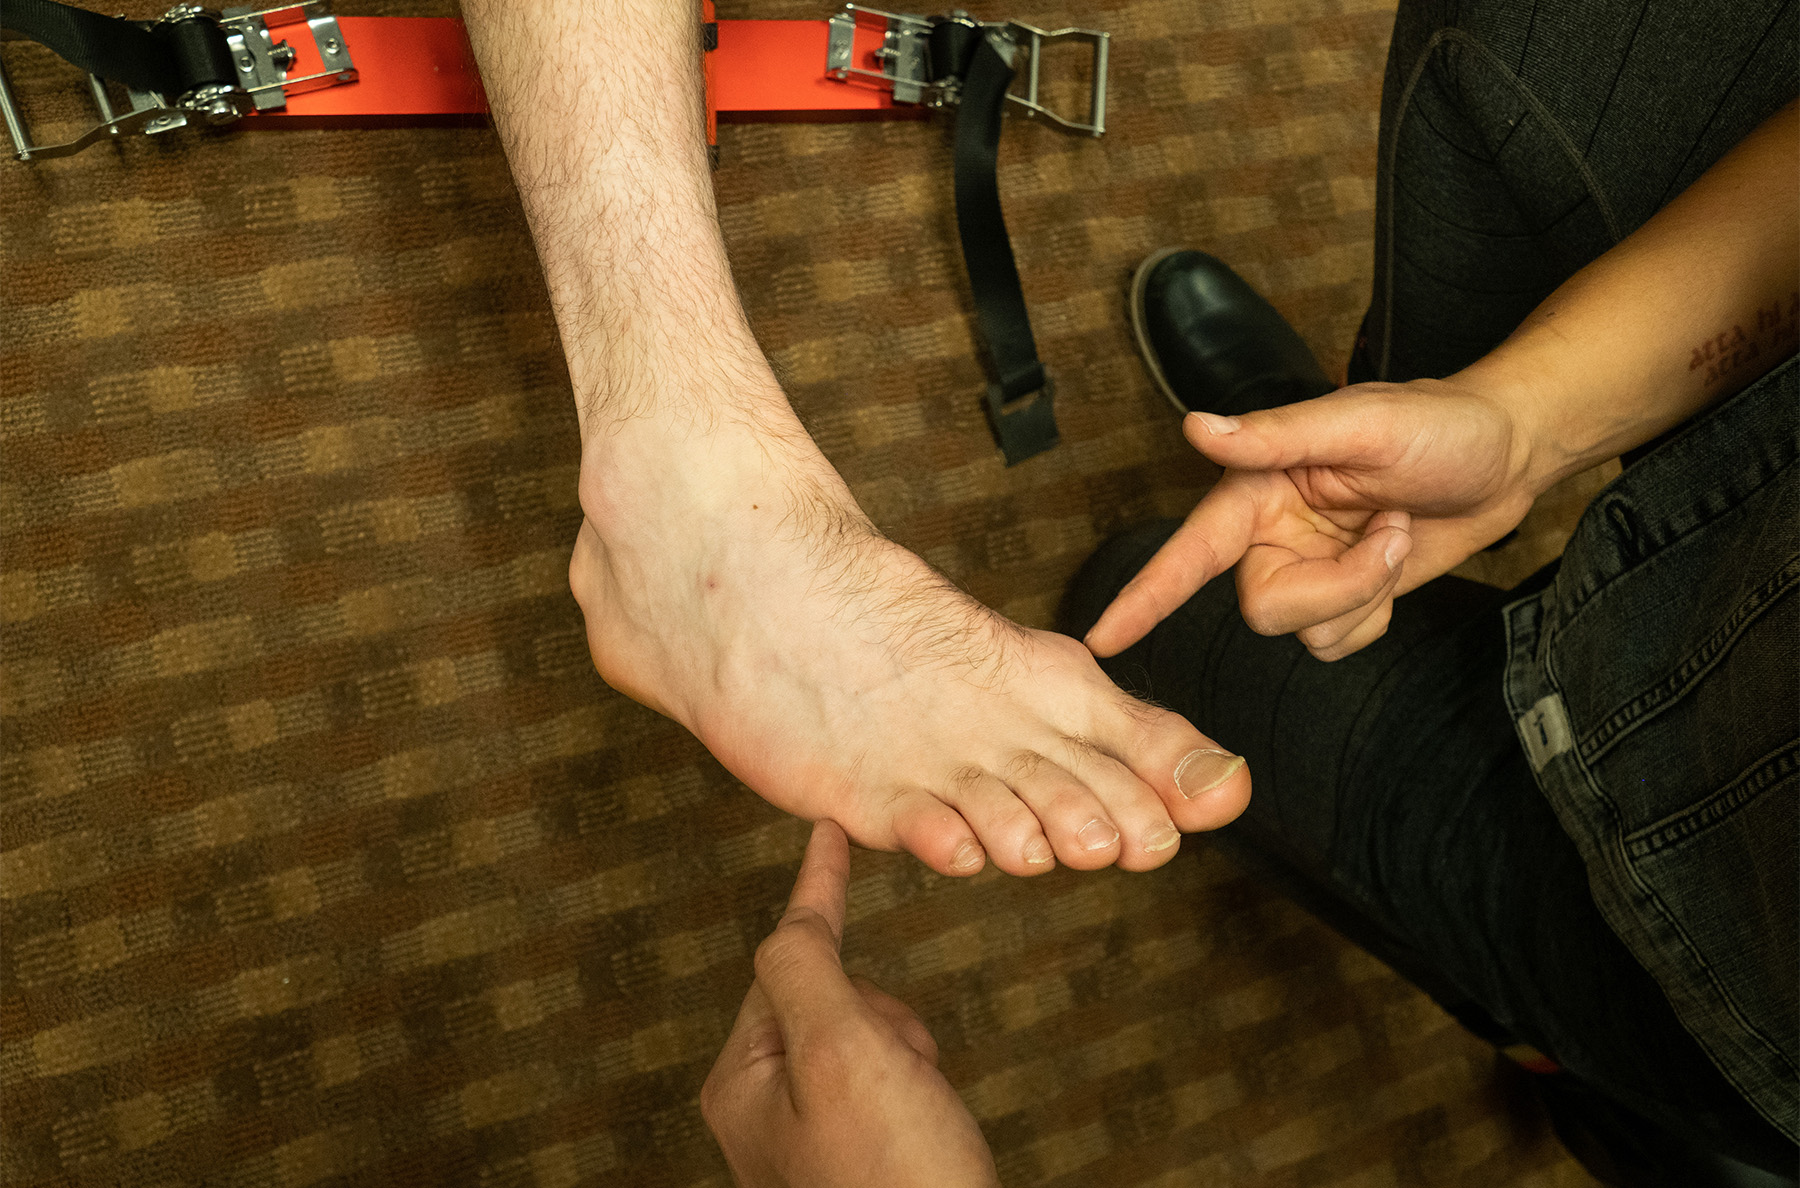
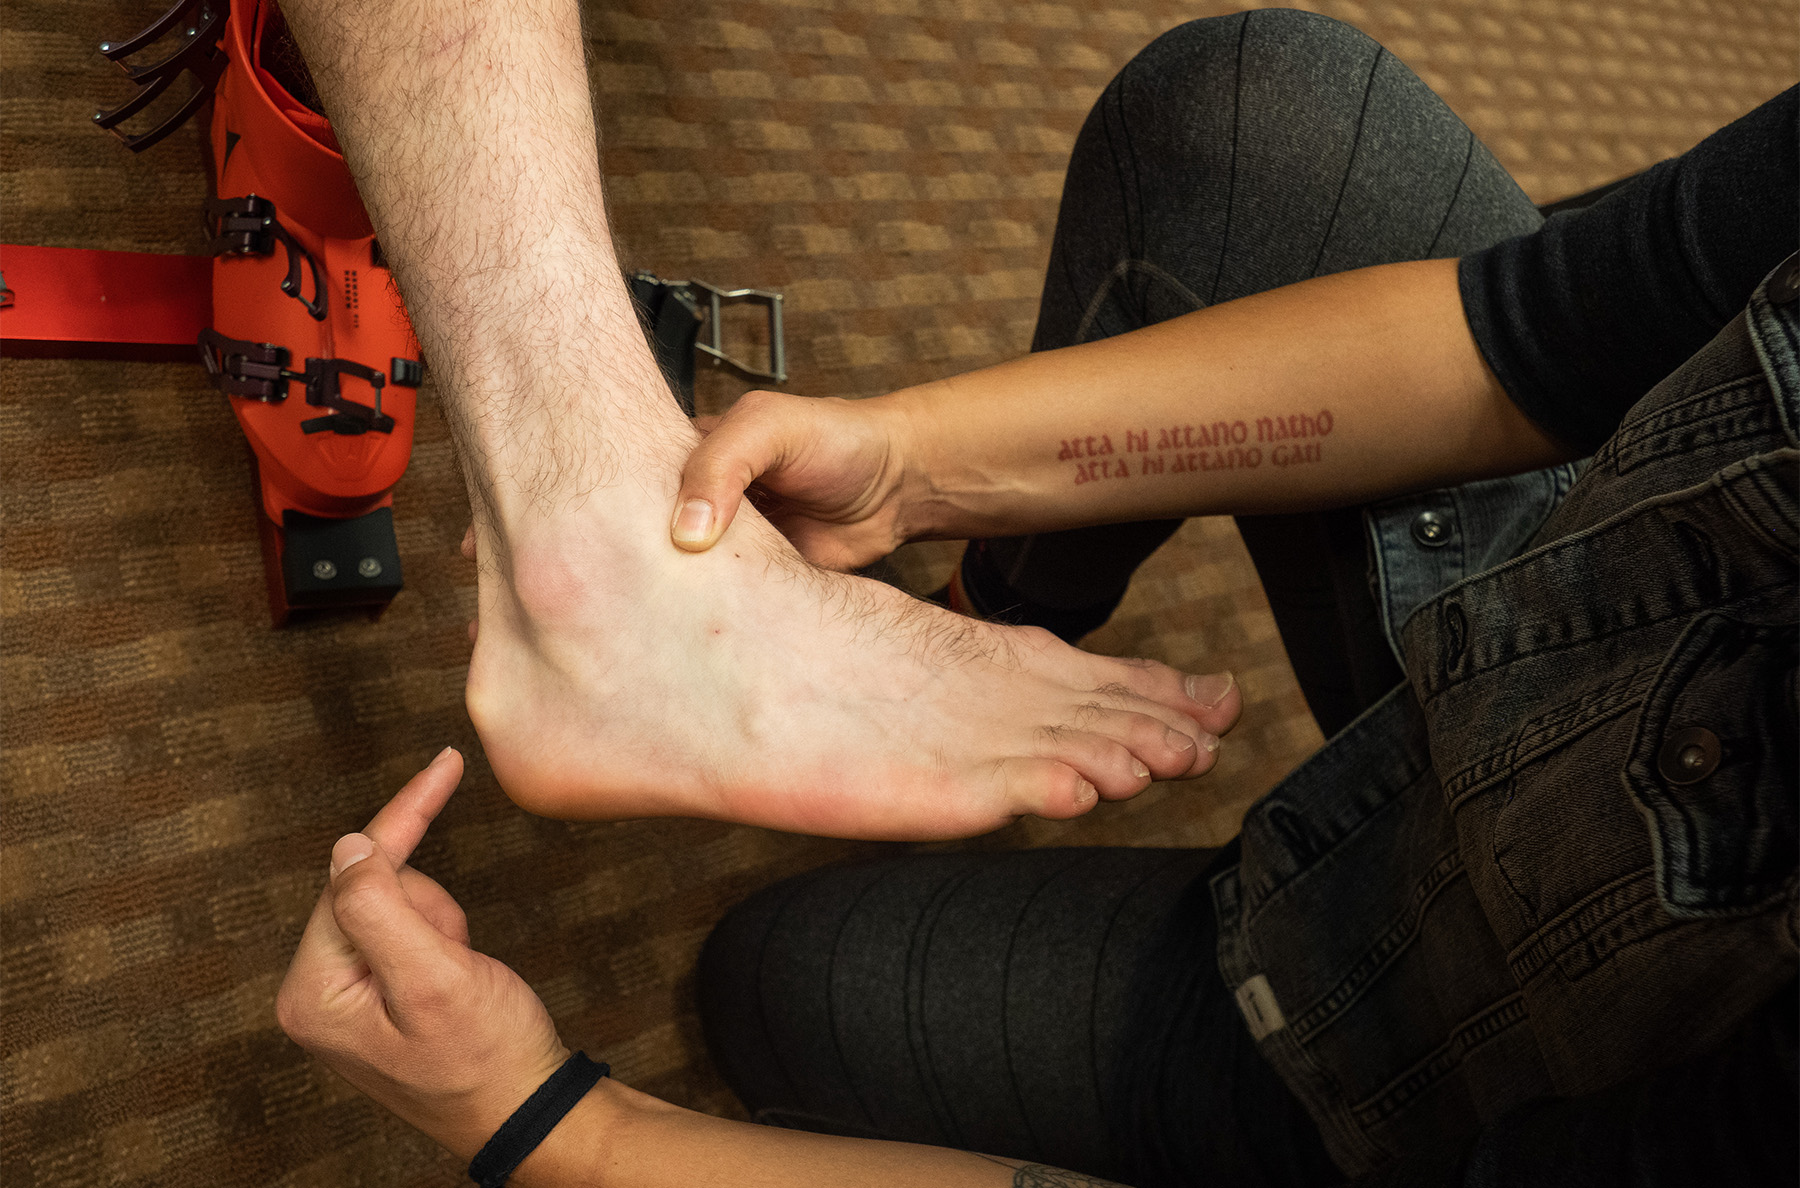
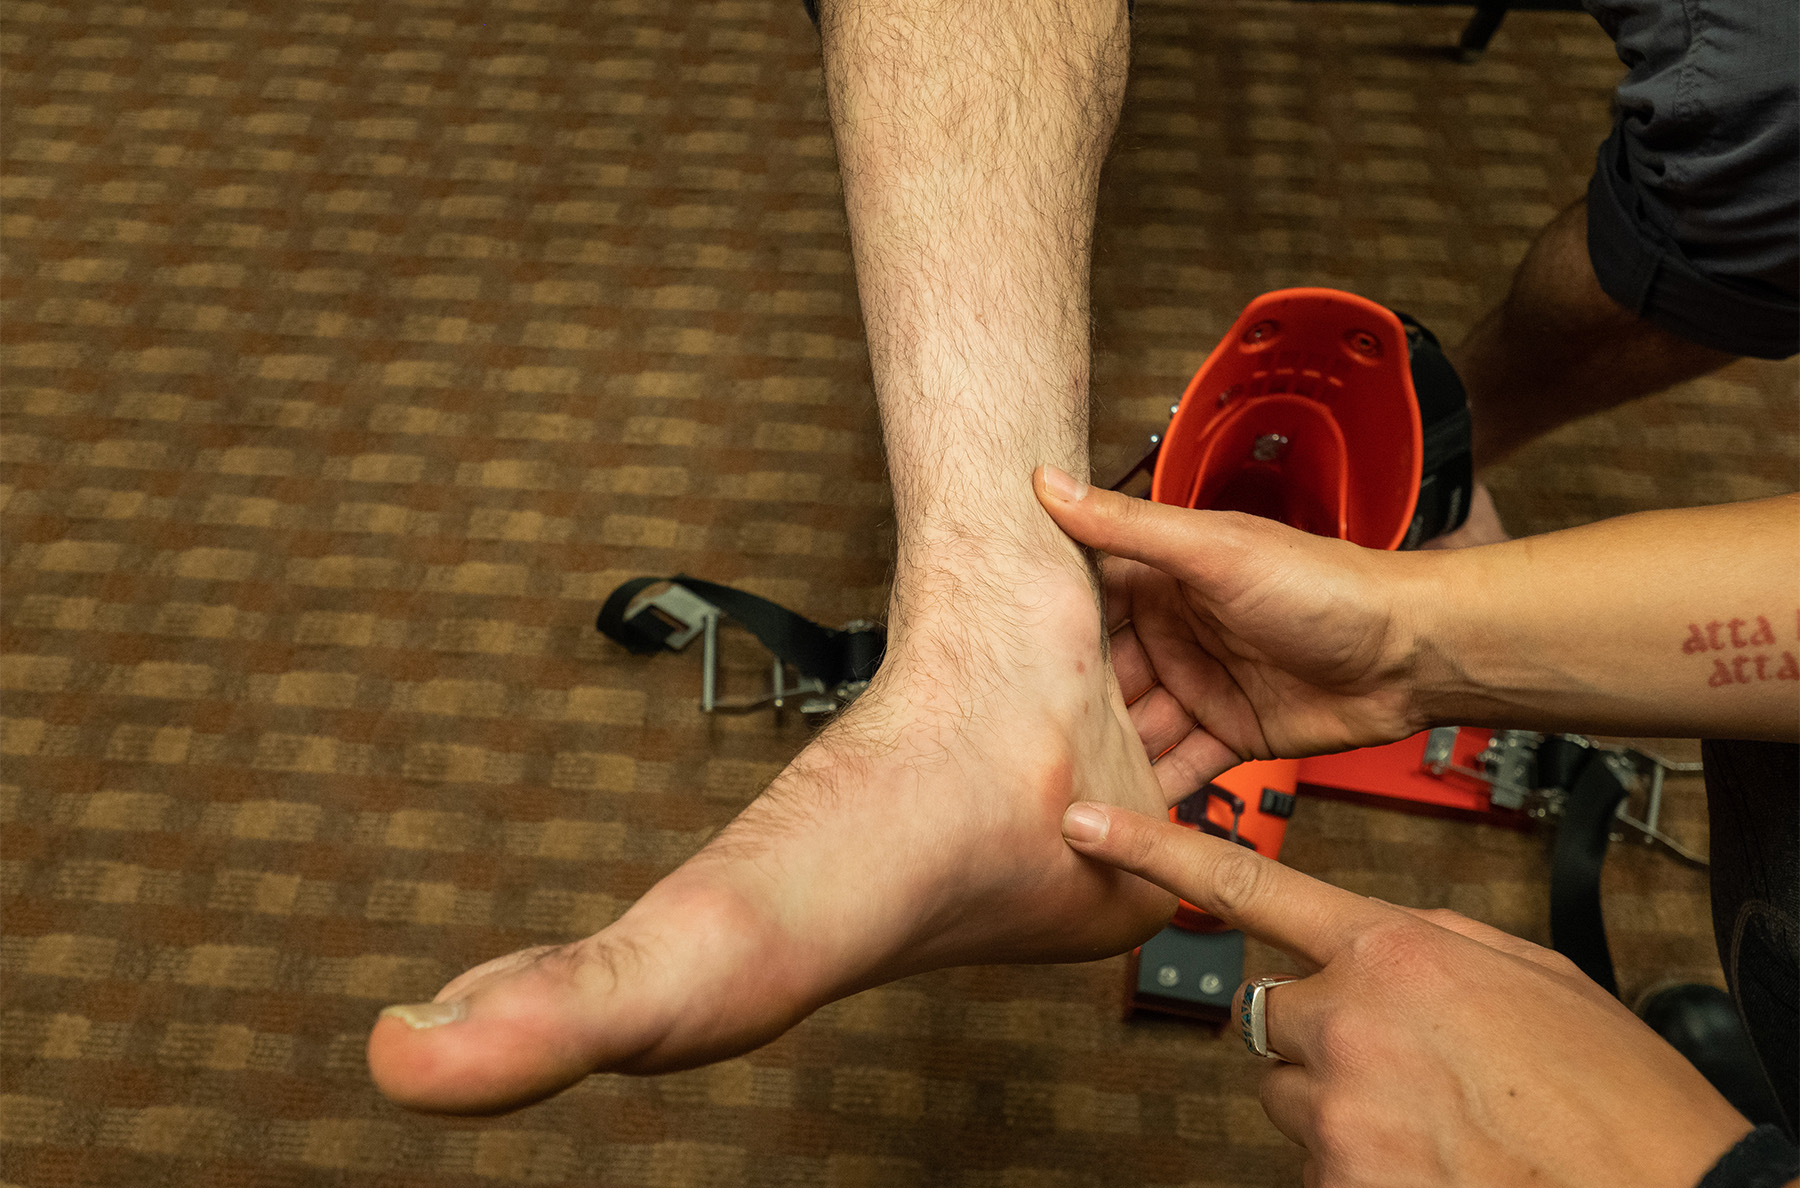
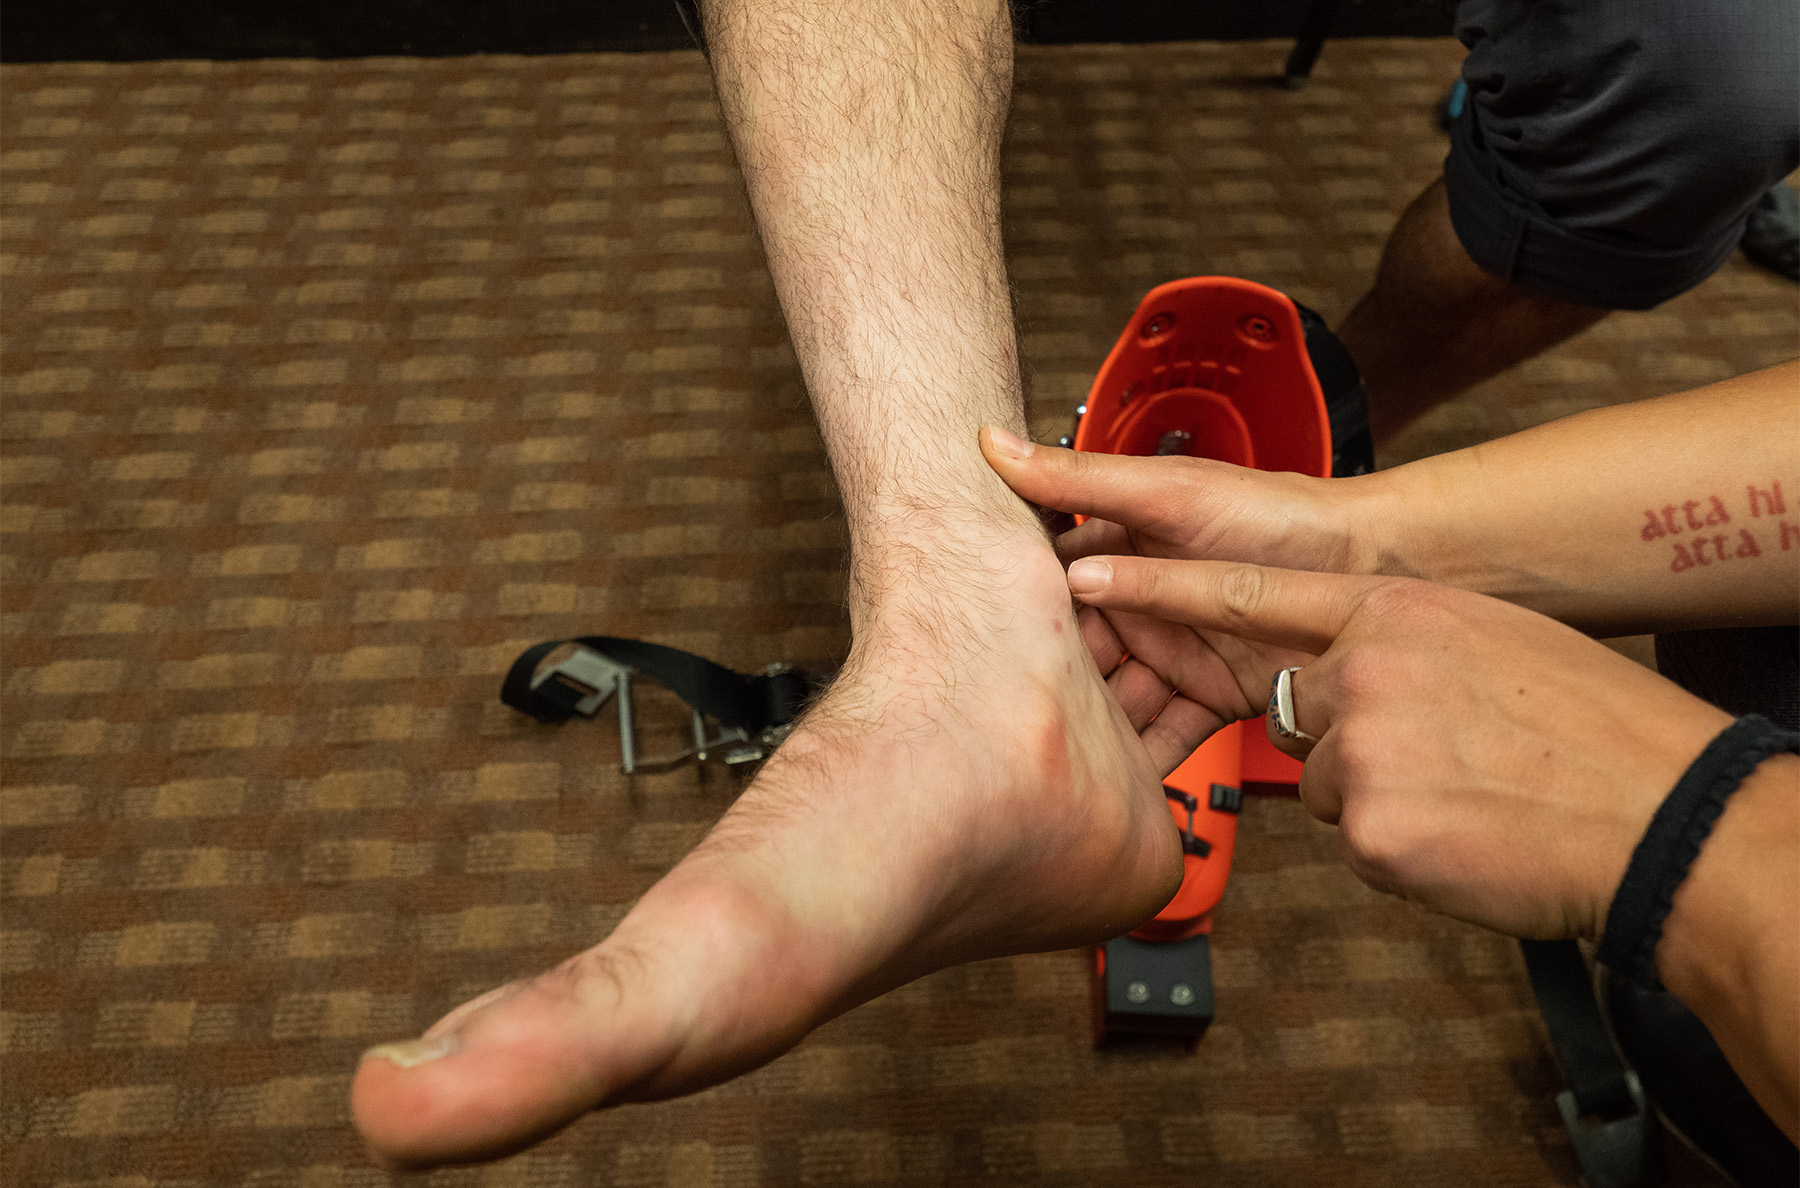
For reference, here are a few examples of some common bony prominences that might require some bootfitting work to address:
Many liners are preshaped to the shell, and through the molding process, you are shaping the liner to your foot. There aren’t many downsides to heat molding liners, though as mentioned, it does accelerate the break-in process of a boot. Molding liners is also a simple, not drastic, and quick approach that better makes your new ski boot, well, yours. If you are opting to heat mold the shell, the heat molding of the liner is the counterpart to this process, often happening at the same time. Together, these are two quick, relatively easy steps that will really help make a boot feel more comfortable, but there’s a limit to how much they can do when it comes to addressing specific fit issues.
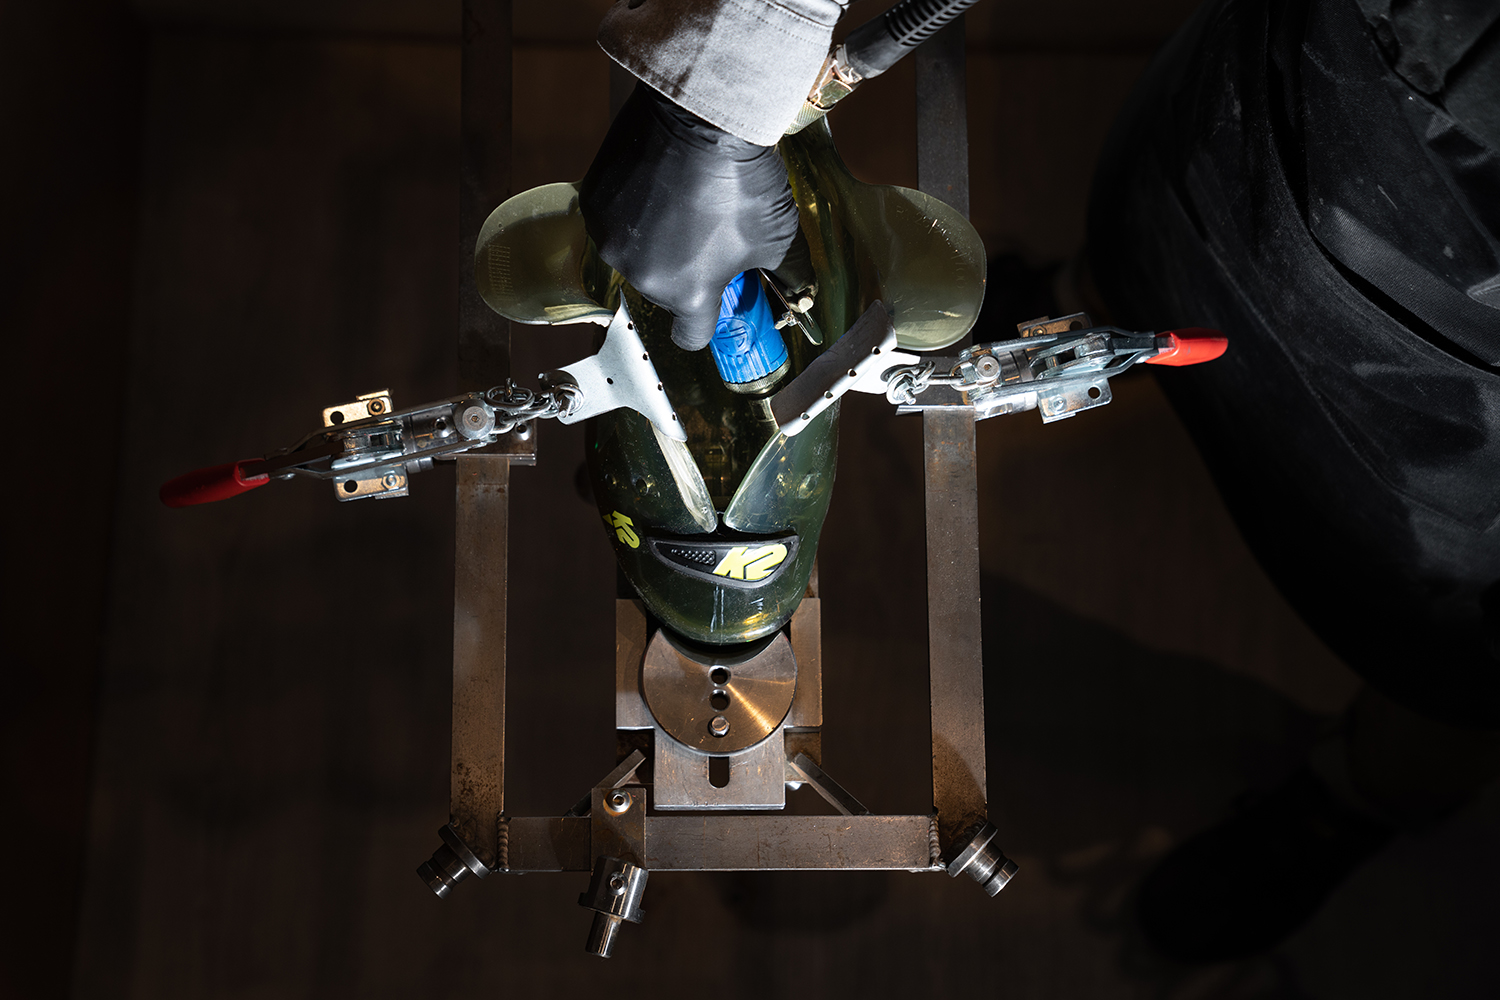
Stretching / Punching
Stretching a boot shell in specific areas is a longstanding method of modification that, in certain instances, is just totally necessary. Similar to the idea of heat molding an entire shell, the plastic of a ski boot can expand and reshape at certain temperatures and with applied pressure. Stretching works great for isolated, bony prominences (lumps, bumps, bunions, etc). While certain techniques lead to better results than others, even minor stretches can bring a ton of relief to these areas by providing volume.
(“Stretching” and “punching” are often used interchangeably to describe similar processes.)
If you know you have some of these prominences or your bootfitter just recently notified you of one you may have not noticed before, you likely won’t find relief in this particular area just by trying on a bunch of boots without further adjustments. In these cases, you can often count on a minor stretch to bring some relief.
For the really large bony prominences, it’s not uncommon that you will require both heat molding and stretching, which can be really effective for these isolated areas where volume is needed. Once you have stretches on your shell that are working well for you, it’s important that you don’t let your boot endure extreme temperature changes, and you definitely won’t want to heat mold the shell after stretches have been performed.
Some of the nuances of an effective boot stretch that your bootfitter should be taking into account include:
- Ensuring the correct location of the stretch (there are several methods for determining this)
- Providing enough space to relieve pressure on the hot spot
- Not making too much space, since doing so can cause increased movement, which will actually make the problem worse
- Ensuring that the plastic is being slowly heated and cooled consistently, to avoid rebounding or disappearing stretches
- Having clean transitions and not creating big divots or bumps where stretches start and end
Some manufacturers have created systems that help bootfitters ensure cleaner and more effective stretches, the biggest being the ability to heat boot plastic from the inside. This ensures that the plastic has been heated to the correct temperature all the way through, which will create the best end result.
Grinding
Another tried and tested method for creating space, grinding boots can work really well in some situations and scenarios, though it comes down to the particular boot. Grinding is typically performed with a Dremel device, which a bootfitter uses to grind away plastic from inside the shell in small areas (such as the toe box, 1st and 5th metatarsal areas, navicular bones, etc).
Race boots, plug boots, and other shells with thicker plastic walls are built for grinding. As some boots have become lighter and built with thinner walls of plastic, grinding has become a bit less of a go-to technique.
But for the boots that do have relatively thick plastic, grinding works well for excavating spaces, especially for small bony prominences and even smaller features of the foot, such as protruding tendons, or screws from past surgeries.
Based on which boot you are in and what you are looking to achieve, your bootfitter might opt to do some grinding. Of course, the major downside to grinding is that it is irreversible (as opposed to stretching or even some forms of heat molding).
Shimming / Volume Reduction
Typically, volume reduction is not the direction bootfitters like to go, but it is certainly necessary for some situations. The need for this can happen as a result of packing out the liner of the boot, or if you have an extremely low-volume foot / lower leg, or as a band-aid solution to make up for a boot that is too large to begin with (the last one being less ideal than the others…).
There are a plethora of materials that can be used to reduce volume and they can be placed in different configurations. Perhaps the quickest fix for dealing with too much volume is placing a shim between the liner and shell (on the “Zeppa,” or boot board) or underneath your insole within the liner. Many boots include a shim in the box (they look like a flat, thin insole / footbed, and are sometimes referred to as “volume reducers”).
There are also a whole lot of foam pads that can be used to take up volume in particular areas. Bootfitters often refer to these as “L” pads, “C” pads, butterfly wraps, etc.
Pads such as these can also be great when trying to even out pressure around a large bony prominence such as the ankle joint. Creating a void or gap where the bone is and then surrounding that bone with cushiony material can really help to take the pressure off the bone itself.
There are many caveats to adding padding for volume reduction. The pads themselves pack out over time, they can shift or move in ways that are very uncomfortable, and they sometimes create pressure points. That said, I have seen firsthand how people with very low-volume lower legs or feet benefit from volume-reducing pads, even right out of the gate in a brand-new boot.
A more long-term solution would be to look at an aftermarket liner, which will be discussed in an upcoming segment.
We’re going to leave it at that for now, but there are still some more bootfitting adjustments that we haven’t yet touched on, so stay tuned for more.
Thank you for the article Kara, find this really insightful and helpful when it comes to thinking about the conversation to have with a bootfitter.
Great article quite informative
How does bending you ankle engage edge that is lateral move?
Why does the ankle have to bend to be in balance?
Hi Joshua,
Bending the ankle joint is how you transfer energy from the boot to ski in order to initiate turns. By bending the ankle you will be in a forward, athletic ski position, which is how to pressure the tip of the ski, steer, and roll your ski onto its edge. Bending the ankle is how you match your body position to the angle of the ski boot, so ensuring that this feels natural (rather than fighting against it) helps to feel more balanced in the proper ski position. That’s what the forward lean and ramp angle modifications mentioned above work to achieve. Hopefully, that helps! Let me know if you have other questions.
I have a high instep (cuniform bone) and have always had problems getting a correct fit, even in everyday shoes), my HV Technica 130’s have been worked on for weeks (I am an expert skier, 64 days last year), can the top of this boot be ground. I have fitted insoles and got rid of the stock liners and have Palau’s from my old boots and am thinking of going to new Intuitions. Any ideas. Thanks.
Hi Al,
That’s a tough area to work a boot such as the Mach1. Without seeing what has already been done to relieve pressure on the cuneiform, it’s a little hard to say what is still possible. While there isn’t much material to grind, I would see if an experienced bootfitter feels comfortable performing a stretch over the instep. It’s not the easiest stretch to make, but it can be done. How does the boot fit otherwise?
In the future, a heat-moldable shell, such as the Atomic Hawx Prime, might be a better option. You could mold it with a lot of extra foam positioned on top of the cuneiform, and the heat molding process will create space over that bone in a pretty easy way. If you’re looking to stick with the Mach1 for a while, a liner like an Intuition could improve the fit (secure other parts of the foot and mold with a bit of a void over the instep). However, if it seems like a shell problem, I wouldn’t necessarily count on an aftermarket liner to solve the problem entirely.
Let me know if you have any other thoughts on this. Thanks!
I have tiny ankles and can’t find a touring boot that will hold them. Padding out seems to be my only option, but I haven’t gotten the sweet spot yet. (I don’t like the stiffness of Intuition liners)
I was curious if I could spot heat mold the ankle and pinch it in a bit to decrease the volume a bit…?
Hi Katalina – bootfitter here – unfortunately no, doing that would hurt the strength of the boot in the heel area. Padding, shimming/lifts, or using a different boot would likely be your choices. Heat molding works to expand the shell but not contract it.
I have a new pair of 2023 Atomic Hawk Ultra 130’s. I have narrow feet, and I’m an old ski racer so a 98mm last is right up my alley. My question is this: there is some online discussion out there that heat molding a shell can alter the boot’s out-of-the box fit. Thoughts? I had been skiing a 2021 Salomon X/max previously, but fought the low instep and narrow toe box continually (I’m one of those who have both a high cuniform bones and high instep + an ankle injury). Eventually I tossed the Salomon liner and went with Zipfits. I also thought the 130 flex was very overstated, ie the boot felt more like a 110 to me (and I’m 60yo, 6′, 185lbs). I had out shop heat mold both my Atomic liners and shell, given I simply did not want to begin the battle anew for the rest of the season. The next day I put them on at room temp, and the flex felt the same to me, if not a teeny bit softer that the out of the box flex. Would love you hear your take on the mold. I’ve not skied my Hawx yet, but from what I can tell thus far I totally love the fit. Eventually when the liners pack out I’ll swap for the Zipfits.
Any thoughts or info about 3 buckle vs 4 buckle boots? Currently in a pair of dalbello with three buckles. She’ll size is correct, have had a couple fitters check. I am thinking of getting a high volume zip fit because the front of my foot moves a bit when my boots are warm. My heel does sit well. I guess my question is should I should different shells or could a zip fit in the current shells be a good move. Thanks!