Intro
Most of our reviews are pretty long — and take a long time to produce — because we want to provide enough info for you to actually determine whether the gear we tested will work well for you.
But we get asked to check out an increasingly wide range of products, and sometimes, we just want to tell you about something we’ve been using and loving lately.
So that’s where this monthly series — Stuff We Like — comes in, where we keep you current on a broad range of stuff we’re currently digging.
And if there’s something you love that you think we ought to check out, drop us a note in the comment section below.
Hope R22 Chainring
MSRP: $57 to $89
David Golay: Chainring compatibility on mountain bikes has gotten way more complicated in recent years. Not only are there a ton of different direct-mount interface standards (with separate ones for mountain bikes and e-bikes, no less), but chain tooth profiles have also diverged. Shimano’s Hyperglide+ 12-speed setups are different from SRAM’s original Eagle 12-speed systems, and the newer SRAM T-Type groupsets use yet another design.
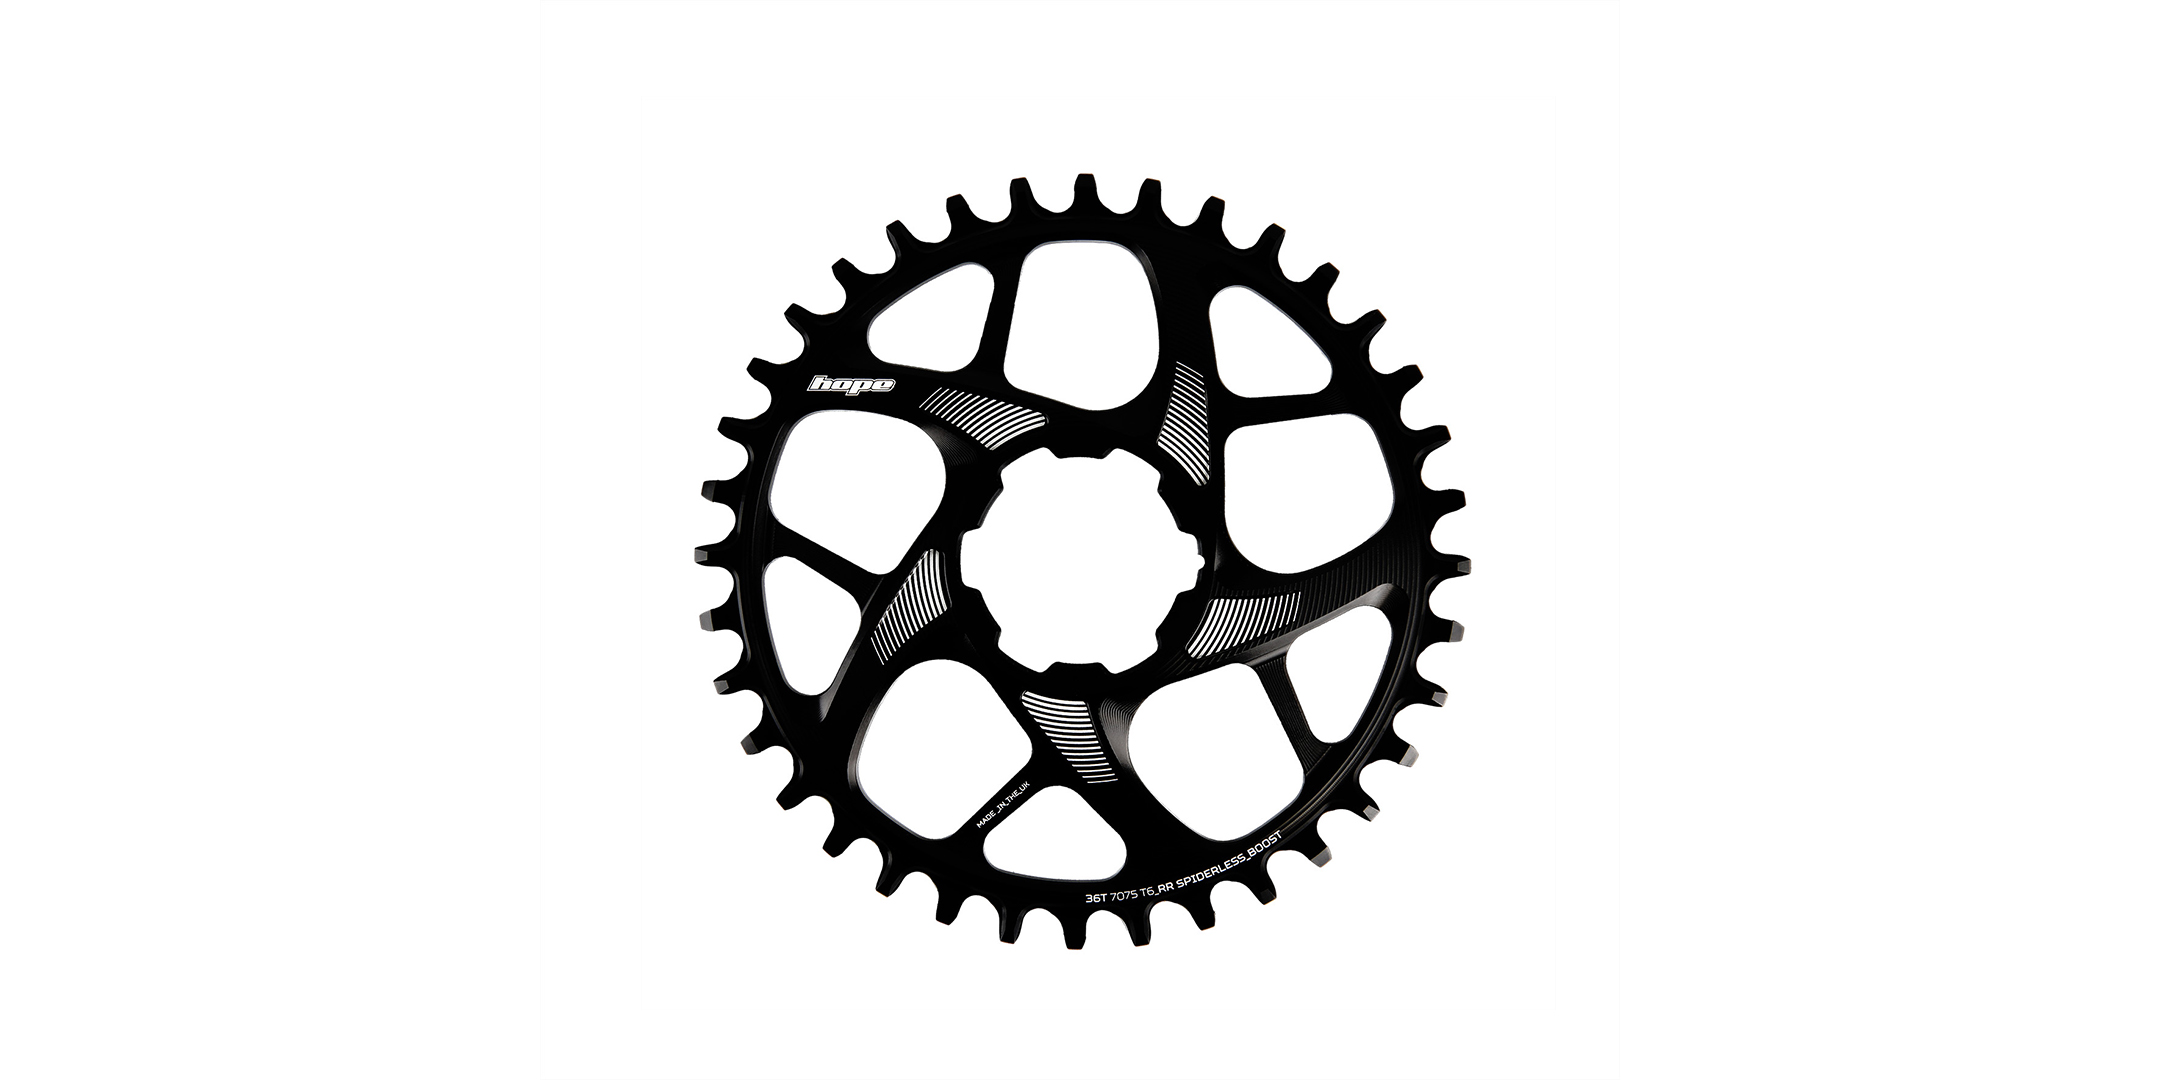
Hope hasn’t magically resolved the former issue, but they’ve come up with a clever solution for the latter. Their new R22 chainrings feature an asymmetric tooth profile that’s designed to work with 9, 10, and 11-speed chains, as well as all three major 12-speed versions. I’ve used an R22 chainring with a SRAM Eagle chain, a Shimano Hyperglide one, and a SRAM Transmission setup, and it works nicely on all three. The chains all mesh nicely and run quietly, chain retention is good, and I’ve promptly forgotten about the ring as soon as I started riding, which is really the most I can ask from a chainring.
Hope offers the new tooth profile on direct-mount chainrings for their own cranks, as well as SRAM three-bolt interfaces, direct-mount options for a variety of e-MTB motors, and 104 mm BCD four-bolt options. That opens up some nice options for running a SRAM Transmission setup or Shimano 12-speed drivetrain on a bike that came equipped with something else without needing to buy a new crank. And while it’s not the only way to skin that particular cat, it’s always nice to have more options. Hope’s standard palate of colors is available too, if that’s your thing.
All that said, the biggest reason that I’m personally jazzed about the R22 ring is that, while I really like SRAM’s new T-Type groupsets, I don’t love the wide Q-factor of their cranks (the narrow XX SL version presumably excepted, though I haven’t tried that specific one). So I’ve been running the R22 chainring on a Hope Evo crankset with a standard Boost spindle on an X0 Transmission, and my knees are happier for it. Doing that does produce a slightly narrower 52 mm chainline than the standard 55 mm T-Type setup, but it works fine (and if anything, the chain is straighter in the lower gears where I’m doing the bulk of my pedaling anyway). It’s admittedly a subtle change, but makes for an overall more comfortable setup for me personally, and I’m glad to have the option.
Tindeq Snow Saw
MSRP: $199
Paul Forward: I’ve dug a ton of snow pits in my life, between being a near lifelong backcountry skier and currently being in my 12th season as a full-time lead heli-ski guide in Alaska.
One thing I’ve always struggled with, especially in our deep maritime snowpack, is quickly isolating larger columns for Extended Column Tests (ECT) and Propagation Saw Tests (PST). I’ve tried all manner of cords, from commercially available products to homemade setups, and I’ve never found anything that I felt could consistently and easily cut through the various crusts and dense layers of our deep maritime snowpack. I’ve also tried a variety of saws and extension products like those from BCA and Black Diamond and none of them have worked well for me.
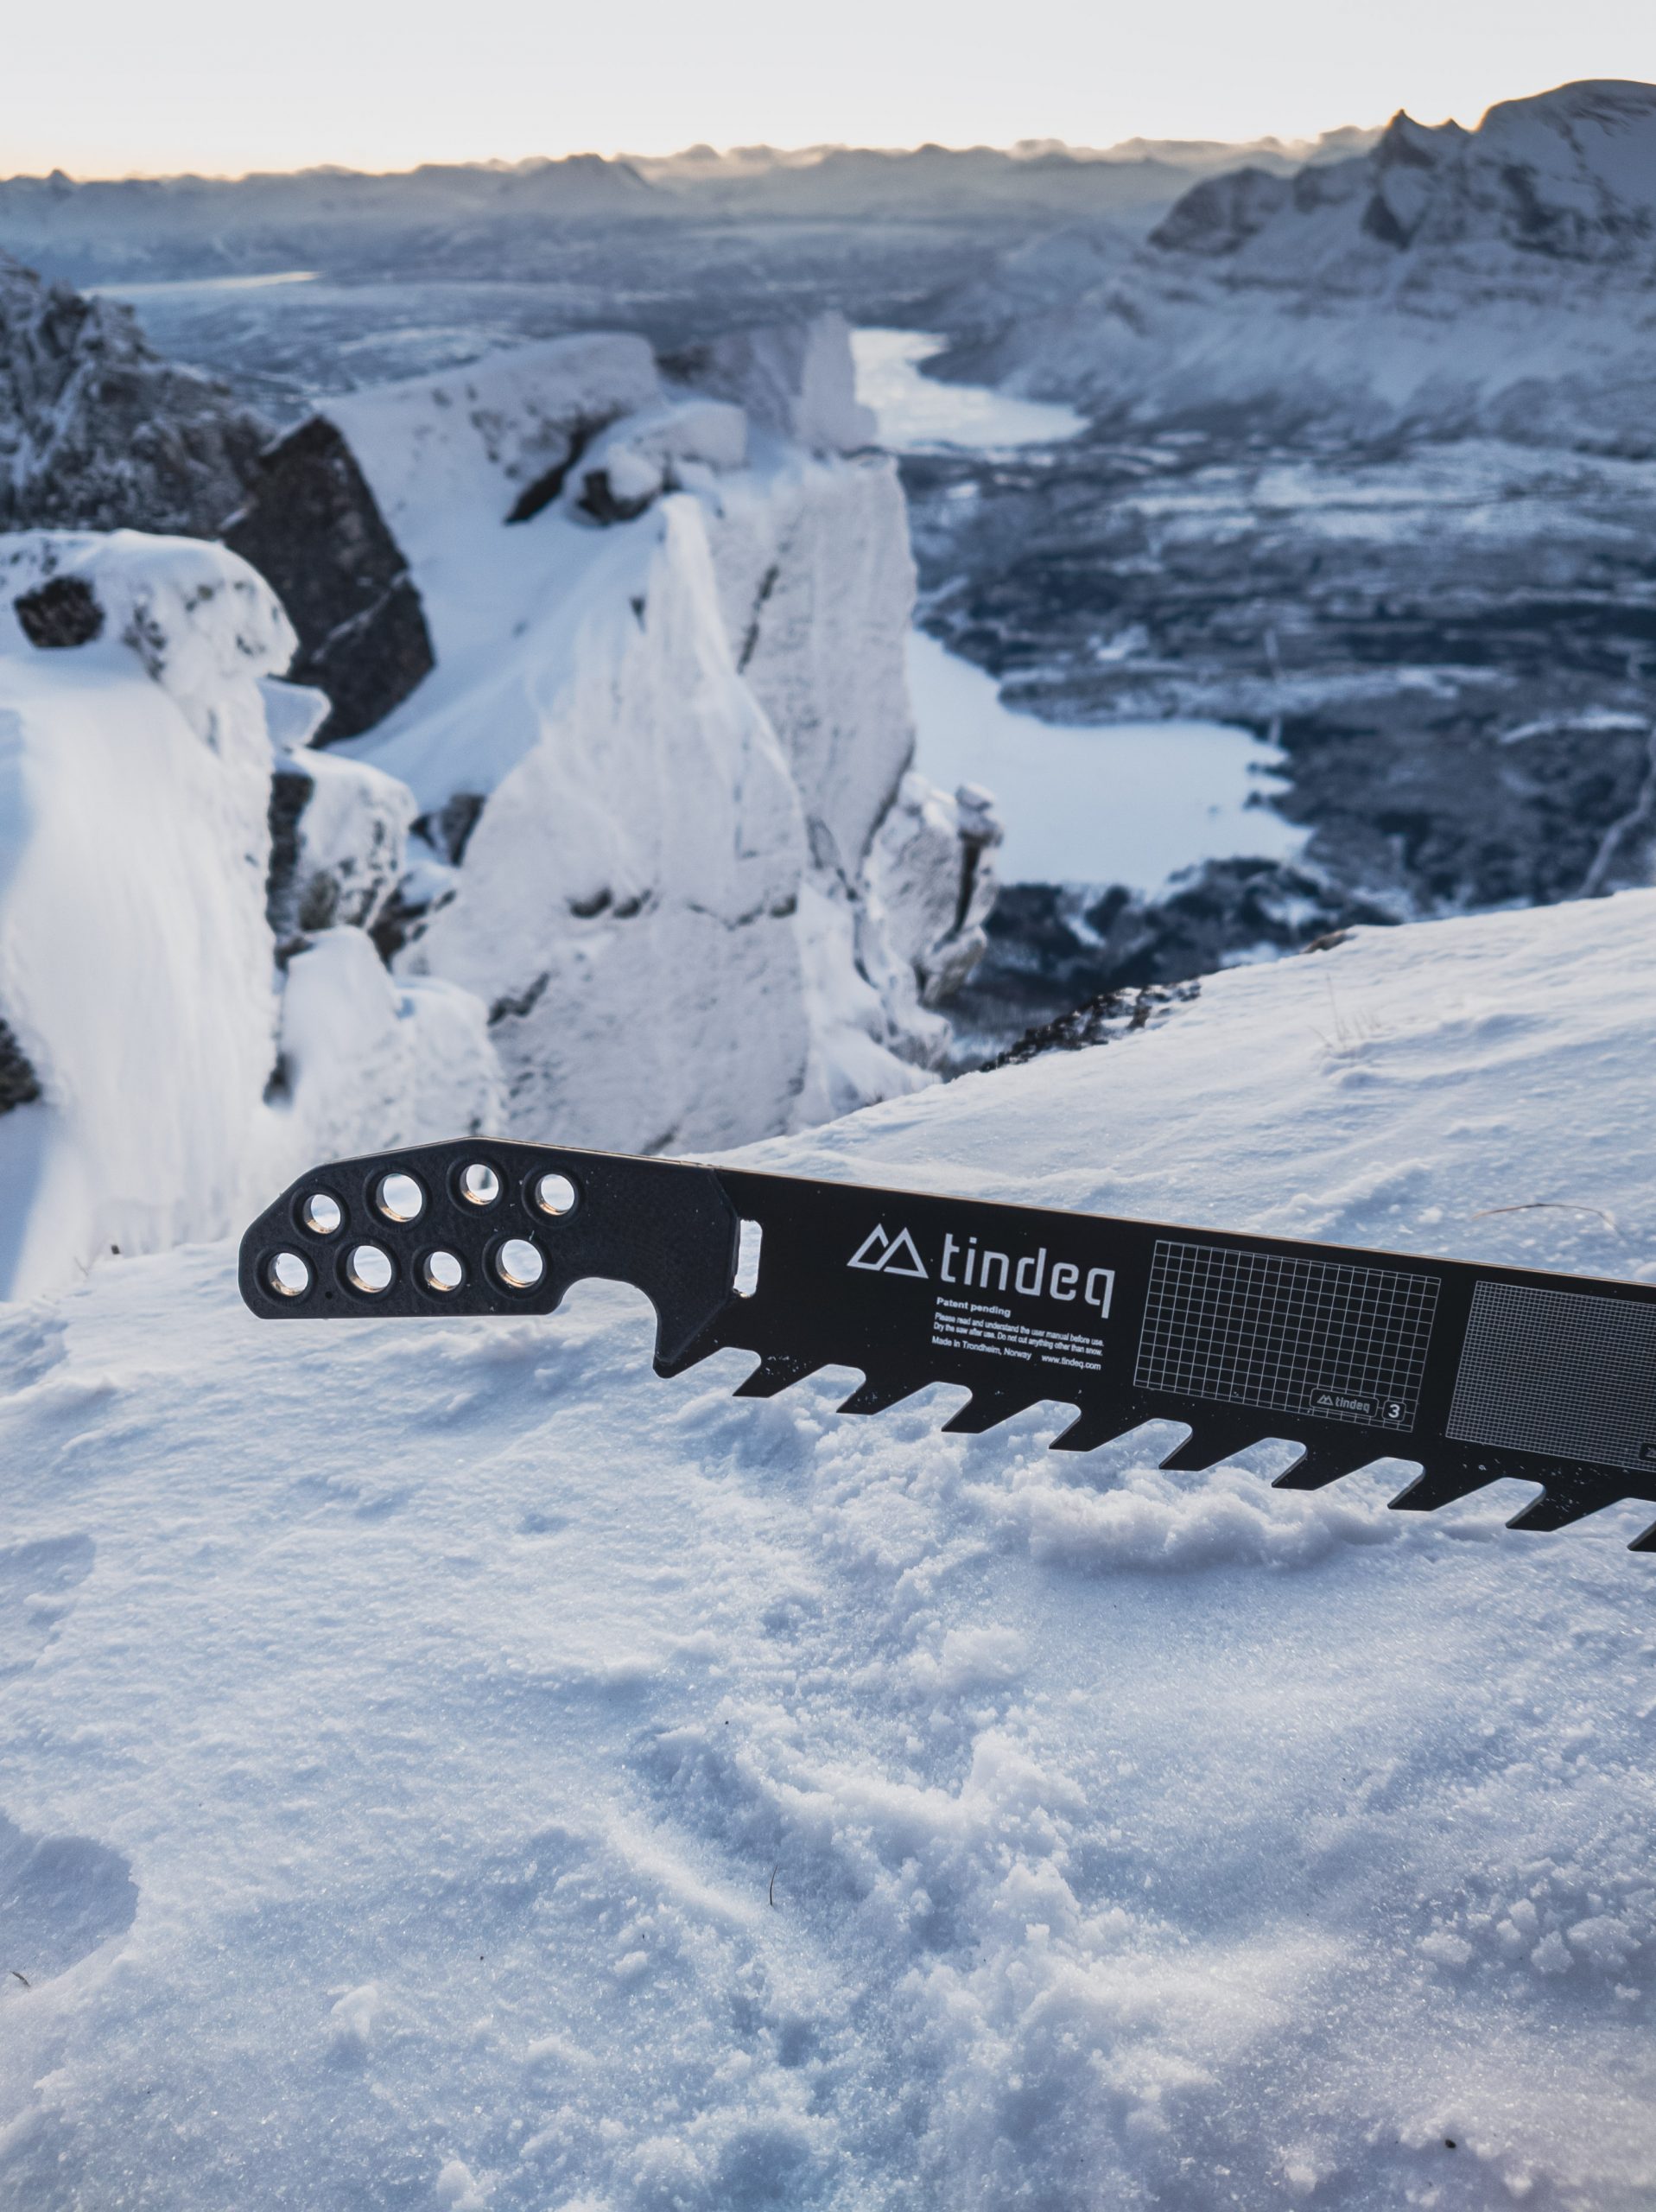
Last season, I got my hands on the Tindeq Snow Saw, and it is easily the best solution I’ve encountered so far.
After a little practice, the Tindeq saw’s three segments assemble quickly, even with gloves on, and the etched-in ruler makes it easier to quickly mark dimensions. The actual isolation of the columns is very quick and the saw is robust enough that I’ve had no issues driving it through centimeter-thick rain crusts that I never could have gotten through with a cord setup.
Overall, the Tindeq Snowsaw is one of the best snow study products I’ve ever used and I highly recommend it for anyone who finds themselves needing to regularly assess deep snowpack.
Kaenon Arcata & Burnet Sunglasses
MSRP: $175 each
Noah Eckhouse: I’ve been using two pairs of Kaenon sunglasses since late summer and I’ve enjoyed getting to know this brand of eyewear. Designed in California and made in Italy, these glasses feature high-end polarized lenses in more fashion-oriented frames.
I started with the Arcata SR Polarized, a blade-like frame with black nylon trim around the upper half. I immediately noticed the optical quality and airflow around the lens: these frames sat differently on my face and were much less prone to fogging than other sunglasses I own. The tradeoff, of course, is more light leakage on, say, a bluebird powder day. But for driving, cycling, or other activities where incidental light is not a big concern, that is great.
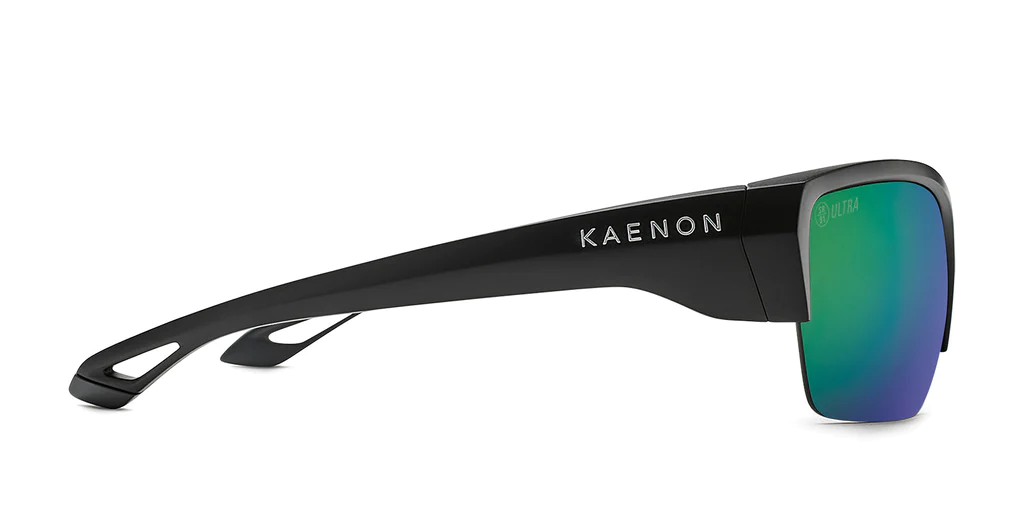
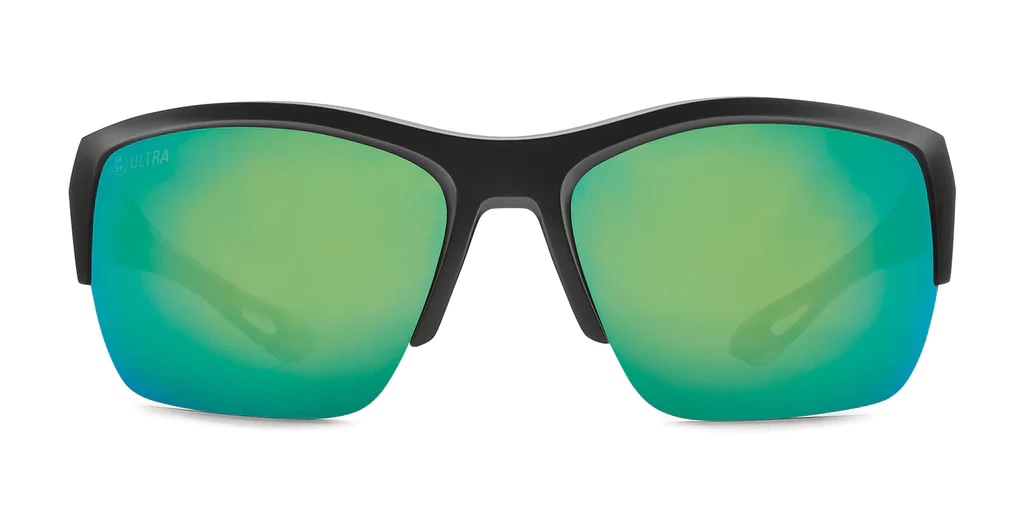
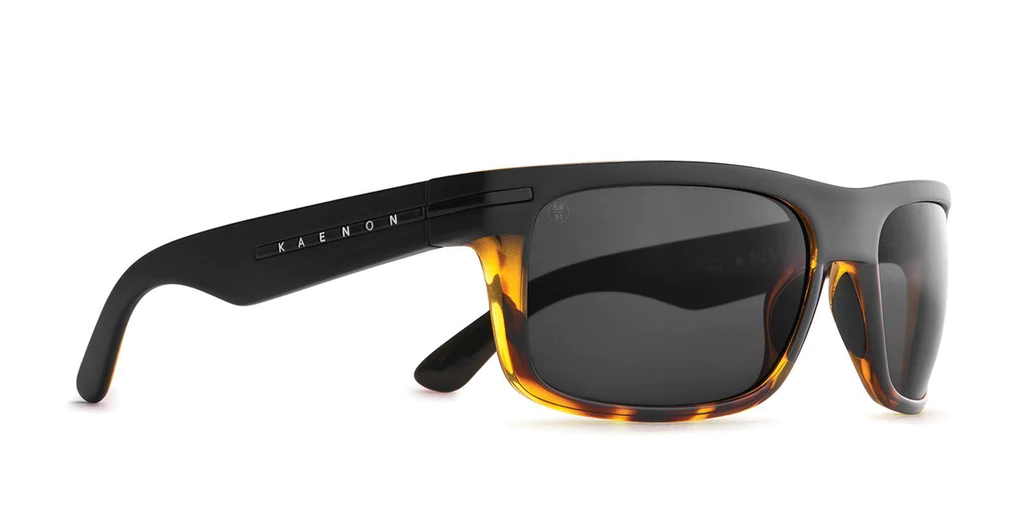
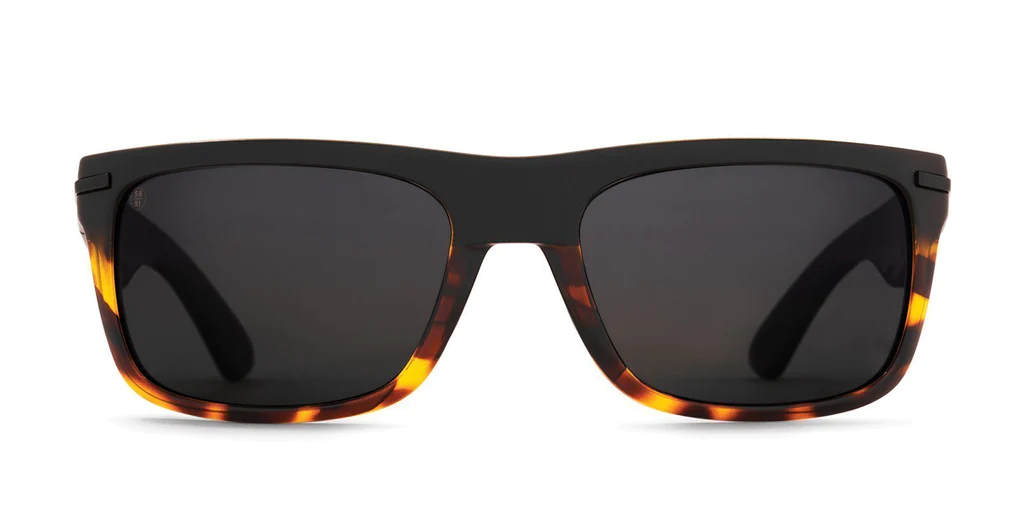
The second pair was the Burnet Full Coverage Polarized. This chunkier, more wrapped frame is in an interesting black/tortoise combo, which looks really sharp paired with the Ultra Gray lens. I put them on and felt more Italian movie star than Pit Viper teenager. The Burnets went with me diving in the Caribbean and out on the boat when I was at the helm. They handled sweat well and the thicker arms sat nicely on my temples.
In our super-tech world of precision optics and broad-coverage frames, it’s nice to have a more fun pair of glasses that don’t compromise on the optics but allow for more individuality. I have come to really enjoy my two pairs of Kaenon glasses (and the durable hard case they come in).
TempSafe “The OG” Temperature-Regulating Phone Case
MSRP: $29.99
Dylan Wood: We’ve had some very cold days lately, and it’s not uncommon for my iPhone 12 Mini to get so cold that it loses all battery and dies. This is annoying, especially when I am listening to music, using GPS, or trying to catch up on emails in the lift line or on the lift. But lately, I’ve been using TempSafe’s “The OG” temperature-regulating phone case, and it’s done an excellent job of preserving my battery life, even during long, cold days on the mountain.
The TempSafe case was originally designed with Saunas in mind, after TempSafe’s founder became sick of his phone overheating when listening to podcasts. But since insulation works both ways, it turns out that this case also works well for keeping things warm in cool environments.
It has a pretty simple design using neoprene for most of the body, a stitched-in nylon grab loop, a smaller loop for attaching a keychain or something of the sort, and a rubber port for attaching headphones. It’s all enclosed by a water-resistant zipper, protecting your phone from sweaty saunas and wet days on the ski hill.
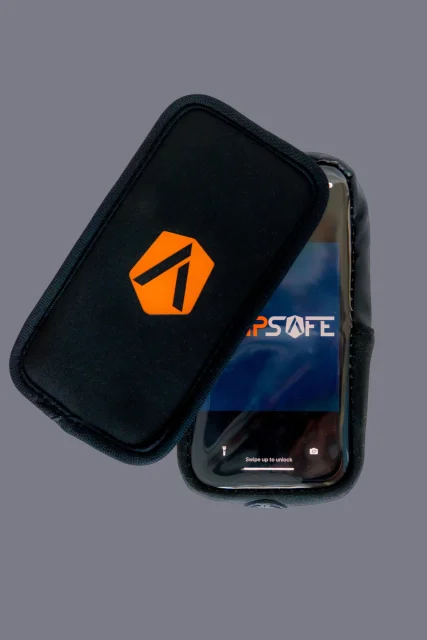
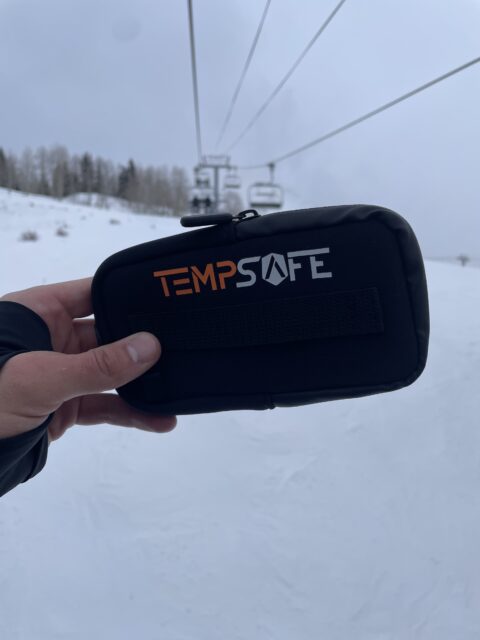
TempSafe also has another model, “The Scroller,” with a see-through sleeve that allows you to access and use your phone in cold or hot environments. Both work for almost all regular-sized phones (but won’t fit an iPhone Max), though a larger version is reportedly in the works.
So far, this case has done exactly what it promises to do. To test it, I’ve gone out for a couple of hours on days with very similar weather, one day with my iPhone 12 Mini in the TempSafe OG, and the other with the phone just stored in my jacket pocket per usual. The TempSafe case provided a significant increase in battery preservation, with a loss of 30% battery with the case compared to 60% without it. I like to take photos and videos, coordinate with ski partners, and do other things with my phone throughout the day, and it always sucks when it dies. I’d recommend this case to anyone looking to improve their battery life and not have to deal with a cold, dead phone out on the mountain.
Helly Hansen Odin BC Infinity Shell Pants
MSRP: $500
Blister’s Measured Weight: 478 g (size M)
Jed Doane: The ever-present tension between waterproofing and breathability is rarely more significant in my experience than on high-output touring days in the Pacific Northwest, where membranes are bombarded with sweat from the inside and rain / heavy snow from the outside.
These lightweight, breathable shell pants from Helly Hansen are my go-to option for long, high-precipitation touring days. I’ve loved other ultra-breathable pieces like Beringia’s Täsmä fabric and Strafe’s air-permeable Cham kit, but those shells have not held up to PNW rain days, and so on stormy touring days, I generally have to choose between more breathable shells and a less-breathable Gore-Tex Pro membrane that will keep me dry.
Lifa Infinity is one of Helly Hansen’s newest waterproof-breathable membranes (the other being the DWR-free LIFA Infinity Pro), and I’ve found it to be pretty comfortable on the ascent in most conditions. It uses a PFC-free DWR that has proved durable throughout the season.
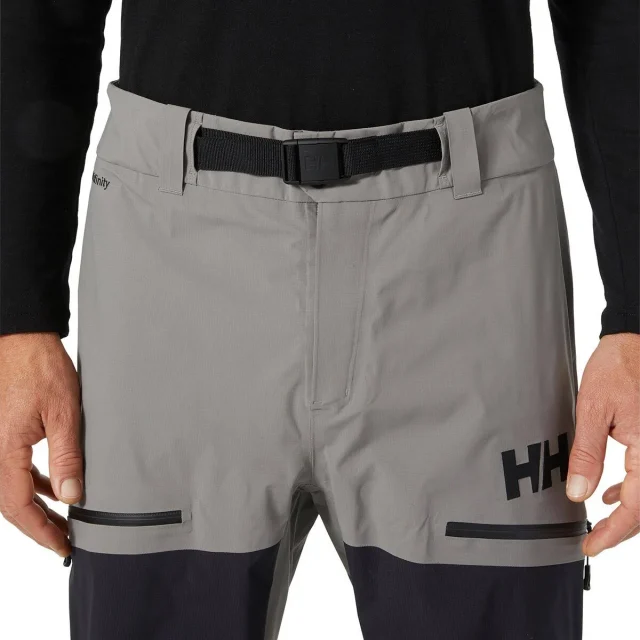
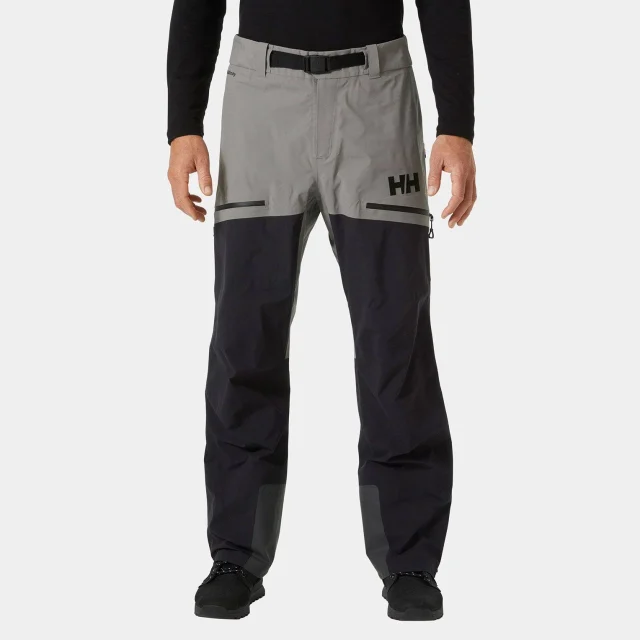
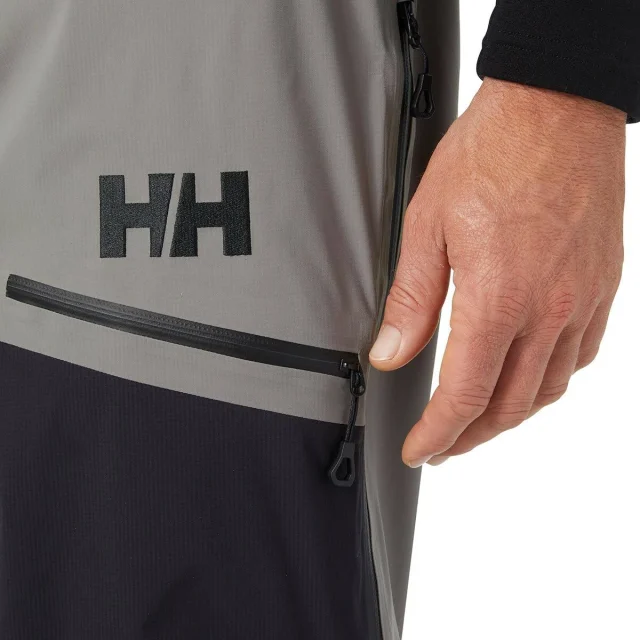
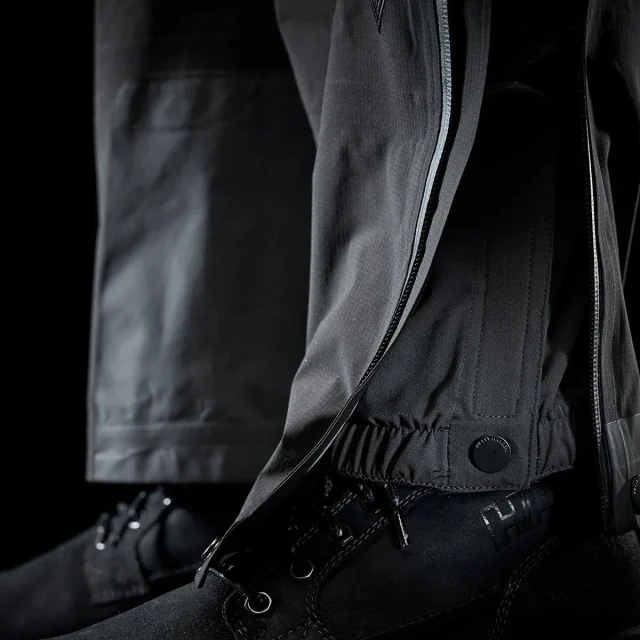
It’s not quite as breathable as Polartec NeoShell or Beringia / Torya’s Täsmä, but the Odin BC Infinity Pant’s large full-length vents make up for that. I found that the Odin BC pant’s membrane was much more waterproof than other similarly breathable membranes, and kept me dry throughout a soggy start to the season, including a half day in full-on rain.
Lifa Infinity is one of Helly Hansen’s newest waterproof-breathable membranes (the other being the DWR-free LIFA Infinity Pro), and I’ve found it to be pretty comfortable on the ascent in most conditions. It uses a PFC-free DWR that has proved durable throughout the season. It’s not quite as breathable as Polartec NeoShell or Beringia / Torya’s Täsmä, but the Odin BC Infinity Pant’s large full-length vents make up for that. I found that the Odin BC pant’s membrane was much more waterproof than other similarly breathable membranes, and kept me dry throughout a soggy start to the season, including a half day in full-on rain.
My only design gripe is that they feature a pretty narrow cuff that makes it difficult to put over snowboard boots, especially on the uphill. I do like the built-in belt, which is durable, easy to adjust, and doesn’t use elastic, and the two front thigh pockets are well-placed and comfortably store my transceiver.
Pit Viper Synthesizer & Try Hard Sunglasses
MSRP: $129.69 each
Luke Koppa: I’ve been on the hunt lately for high-coverage sunglasses that block out enough wind to effectively replace goggles while ski touring (and mountain biking). This is mostly so I don’t have to carry a more breathable, uphill-friendly set of eyewear and another, more protective set for the way down. I’ve used Pit Viper’s standard “2000s” frame for this for years and have generally been pretty happy with it, but I wouldn’t mind some more coverage when it’s cold and/or snowy, and I’ve come to appreciate swappable lenses since I typically end up using this sort of eyewear for everything from night skiing to bluebird days.
Pit Viper’s new Synthesizer and Try Hard frames seemed like they could be what I wanted, and I’ve now been using them for the past couple months.
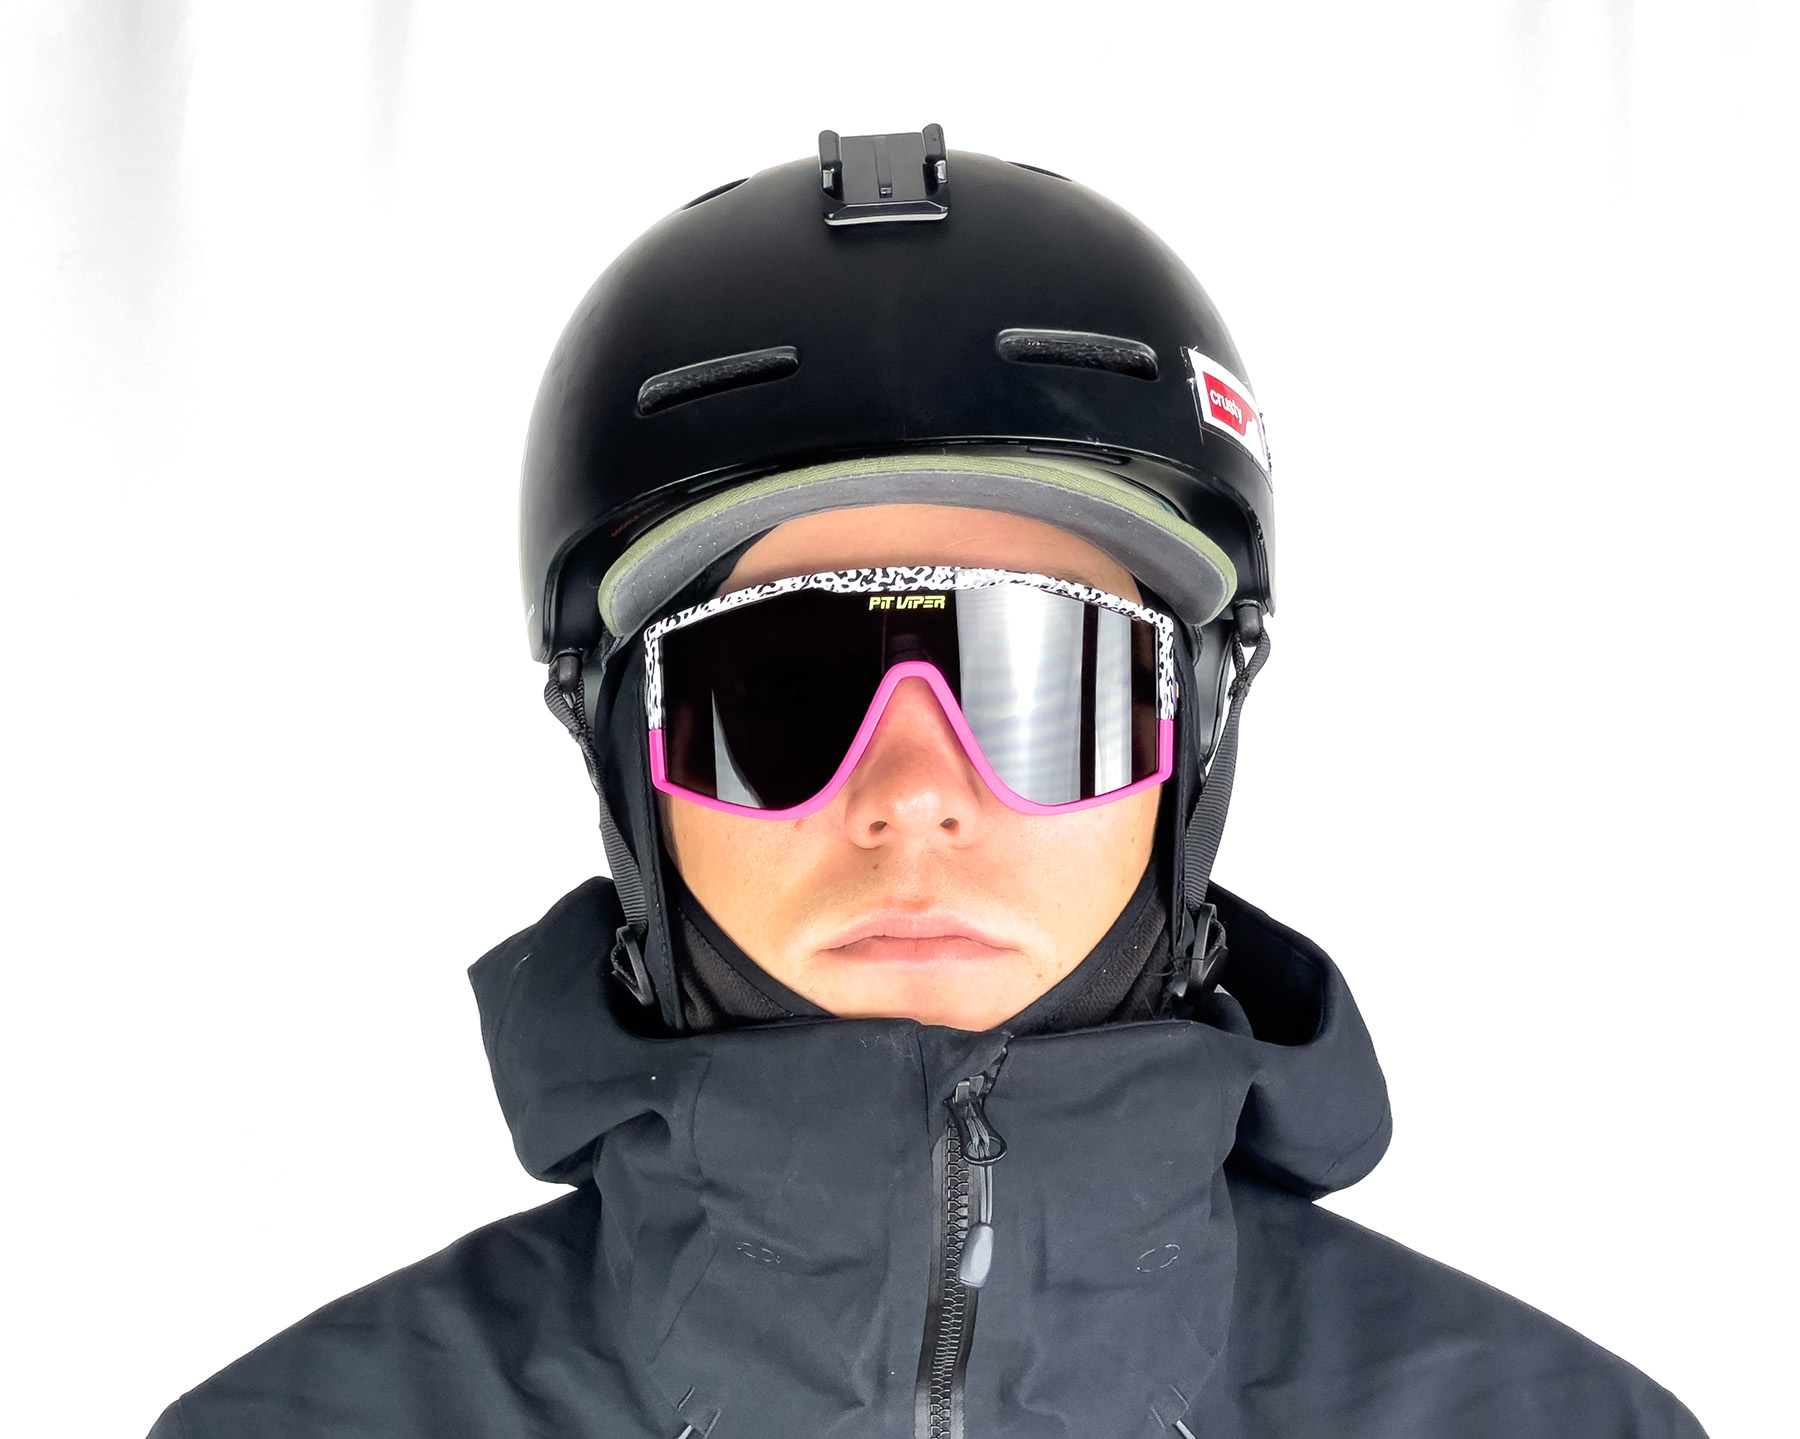
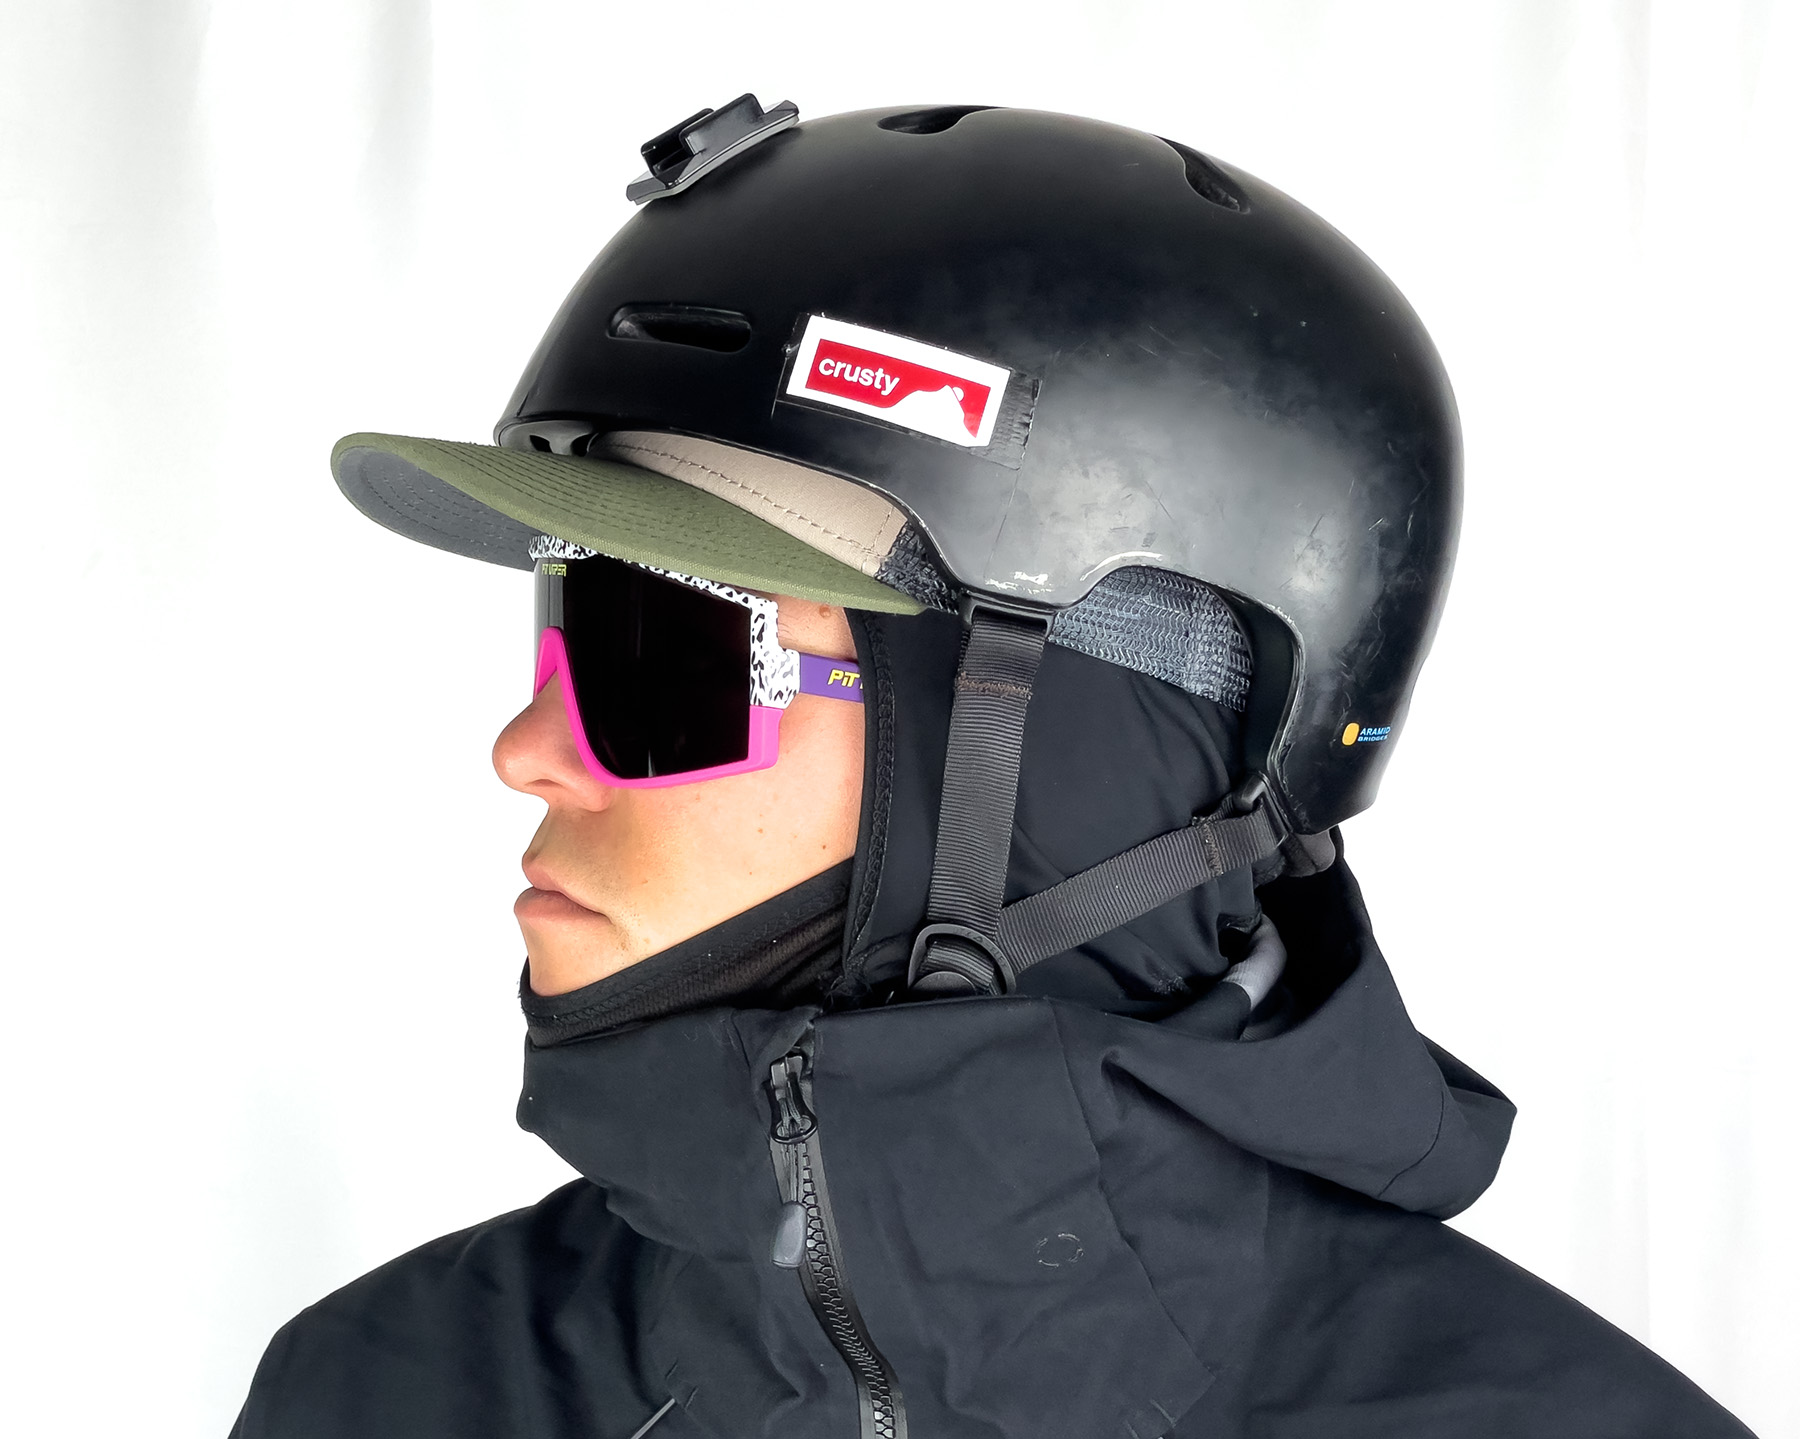
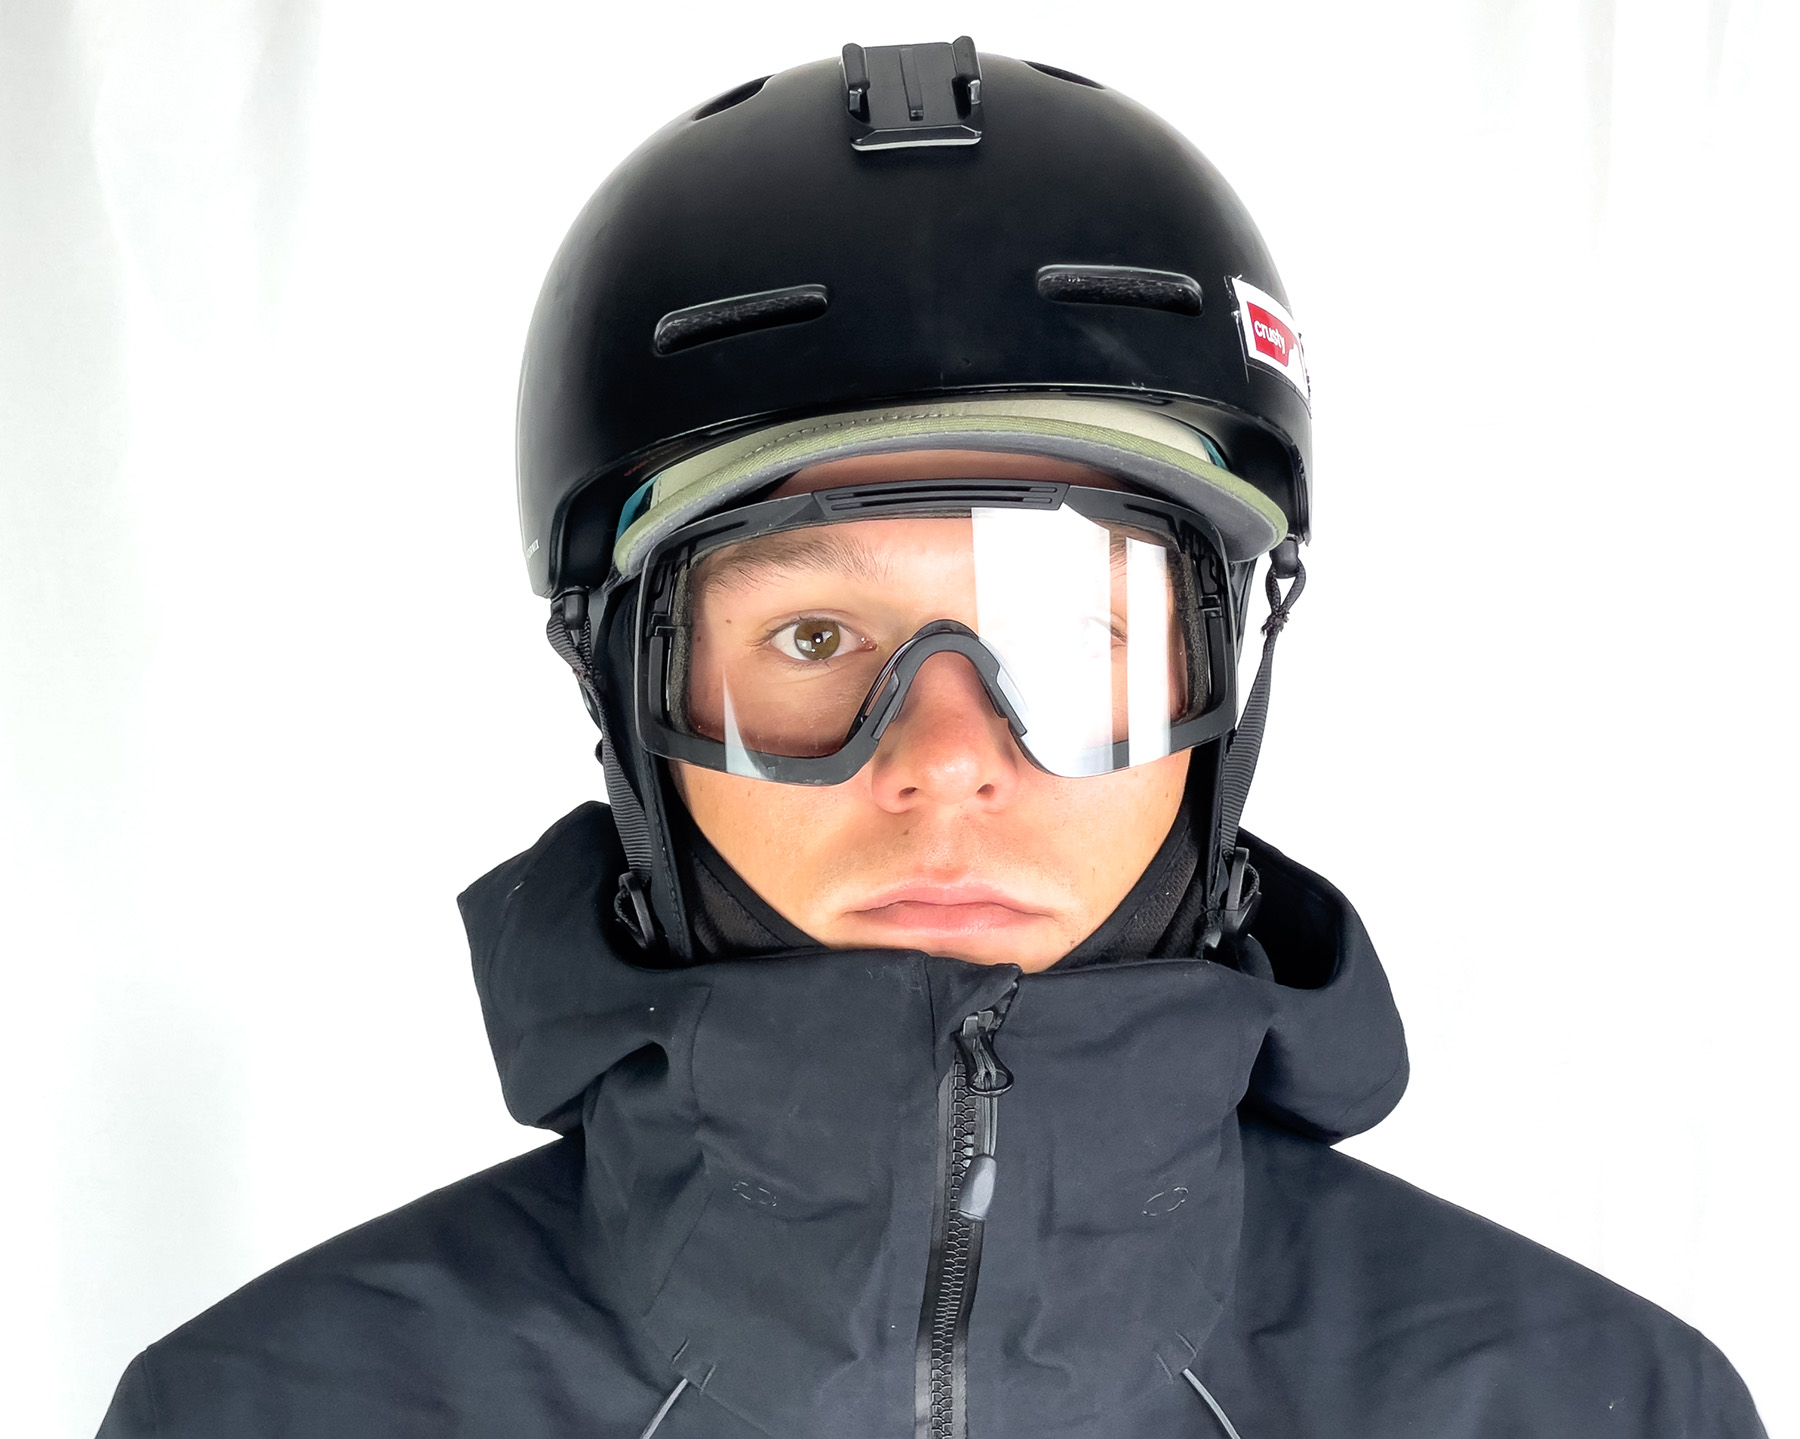
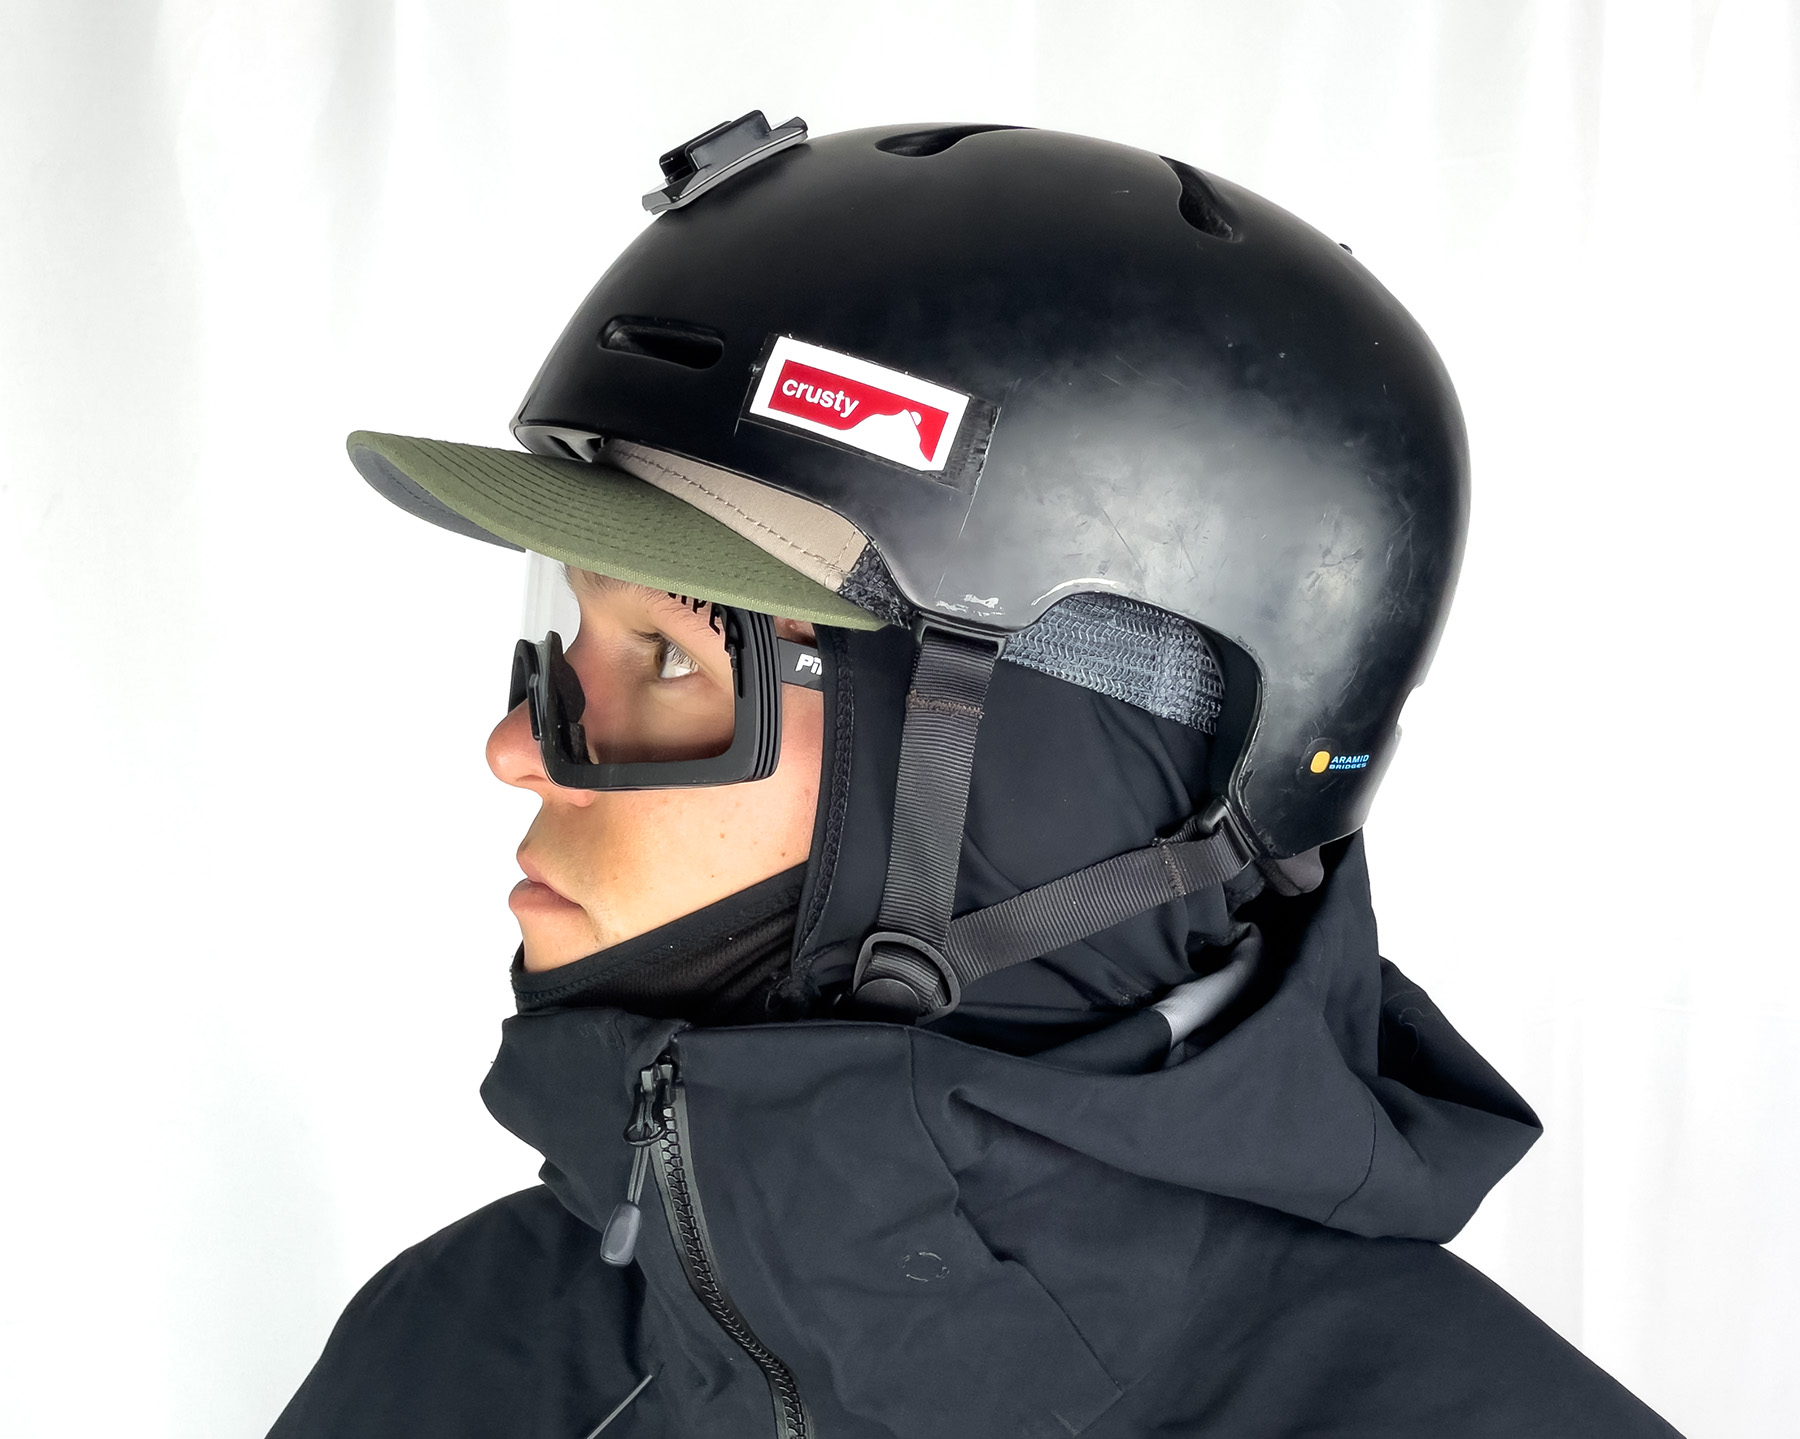
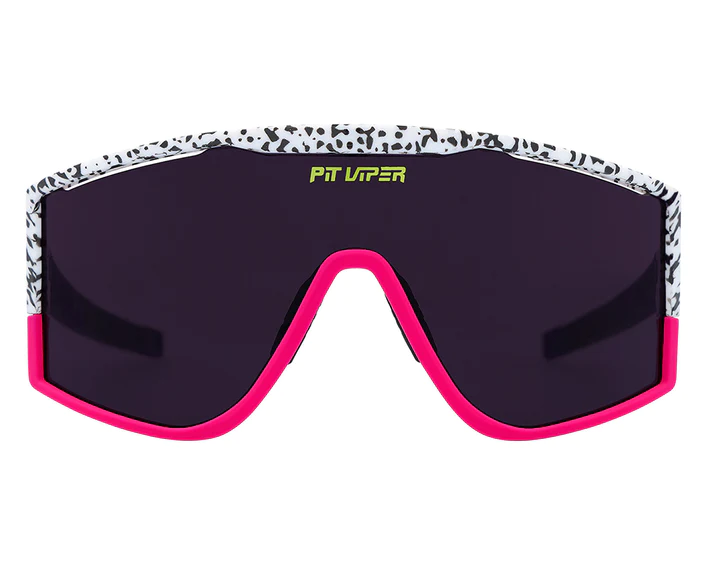
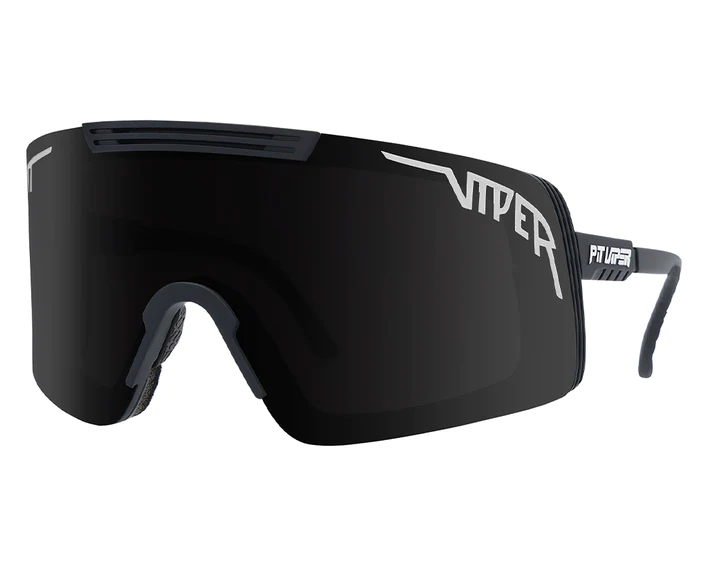
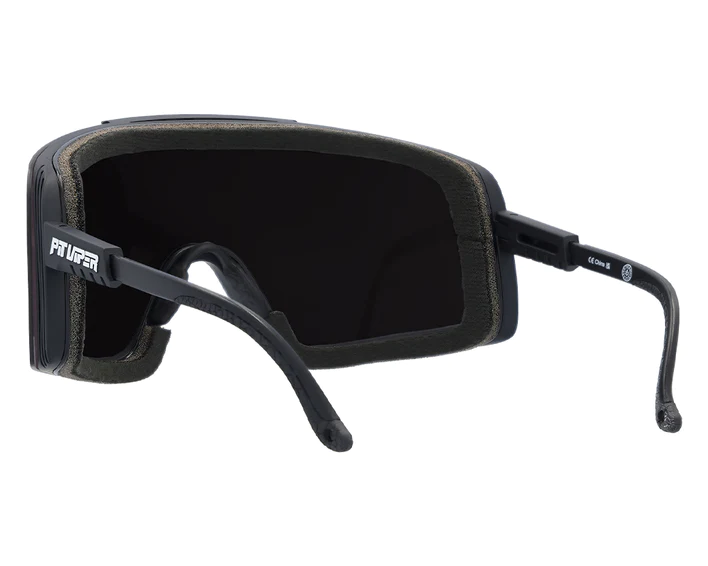
The Try Hard came out about a year ago and features a pretty tall, but not super wide frame and straight arms that tend to work better for me when under a helmet or hat. For reference, the Try Hard frame is 5.55” / 14.1 cm wide and 2.48” / 6.3 cm tall.
I’ve really enjoyed them for biking and ski touring — my eyes don’t tear up easily and they generally stay quite stable on my face. The straight but bendable arms also work better than curved ones when stashing them in the vents / visor of a helmet.
The Try Hard comes standard with two lenses (low-light & high-light); swapping them isn’t the absolute quickest process but it’s quick and easy enough that I frequently will do so, depending on the conditions of the day. It features adjustable nose pieces that click through different settings and I’ve found them to work pretty well. I do wish the material was as sticky as the one used on the nose piece of the 2000s (which isn’t as widely adjustable, but does seem to stick a bit better on my nose).
The Try Hard quickly became my go-to pair of bike sunglasses because of their coverage, multiple lenses, stability on my face, and nice compatibility with bike helmets. I’ve also ended up using them quite often for skiing, especially in warmer, drier conditions where breathability and on-face stability are more important than blocking all wind and precipitation.
Meanwhile, the new Synthesizer is a sort of glasses / goggle hybrid. It comes with removable foam inserts and is even bigger and more goggle-like in terms of fit than the Try Hard, with the Synthesizer sitting at 5.62” / 14.3 cm wide and 2.91” / 7.4 cm tall. It features adjustable nose pieces, though they’re malleable / bendable instead of clicking through different fit settings like the Try Hard. The Synthesizer features adjustable-length arms similar to the Pit Viper 2000s, with curved ends.
Overall, I really like the concept of the Synthesizer — get the breathability of glasses but with a nearly goggle-like seal while skiing in the wind and snow. Unfortunately, for my particular face, I’ve had a hard time getting the Synthesizer to sit where I want it, and stay there. This is really subjective, but something about my fairly average-sized nose, fairly wide face, and very small ears just doesn’t line up ideally with the frame. It’s fine most of the time, but its fit limits the usefulness of the Synthesizer’s face foam and broad coverage cause I rarely achieve a really uniform, “sealed” fit on my face.
However, if it did fit my face better, I’d use the Synthesizer for nearly all my ski touring outings. It breathes far better than a goggle but offers better coverage and protection from wind and snow than pretty much any pair of sunglasses I’ve used. And it comes with two lenses to cover just about any light condition.
Chopper Mill Mittens
MSRP: $69
Kristin Sinnott (& Linden): I am a big fan of mittens — for myself and my son. When I find a good pair, it makes me quite happy, and there are so many reasons to love Chopper Mill’s mittens.
Since they arrived, they have been the only mittens my son will wear while skiing because they are warmer than his others and they provide better dexterity; that latter point is becoming more important for him, now that he uses poles and can zip his own jacket. The mitt’s goat leather exterior, waterproof / windproof insert, and 3M Thinsulate insulation have proven to be a versatile combination. The mittens aren’t very bulky and yet every time I take his mittens off, his hands are warm. And we’ve had some really cold days lately, with temperatures sticking in the single digits Fahrenheit (about -17 to -12°C).
The Chopper Mill kid’s mitts come in 5 sizes and are based on hand measurements, not ages. I measured my son’s hands and used their size chart to settle on the size 2. They fit well and there’s still room for him to grow into them throughout the season. Chopper Mill also makes adult mittens; when I measured my own hand for those, I ended up with a slightly too large size. I can confirm they are a warm and wonderful mitten but I’m hoping to downsize before I provide a full review.
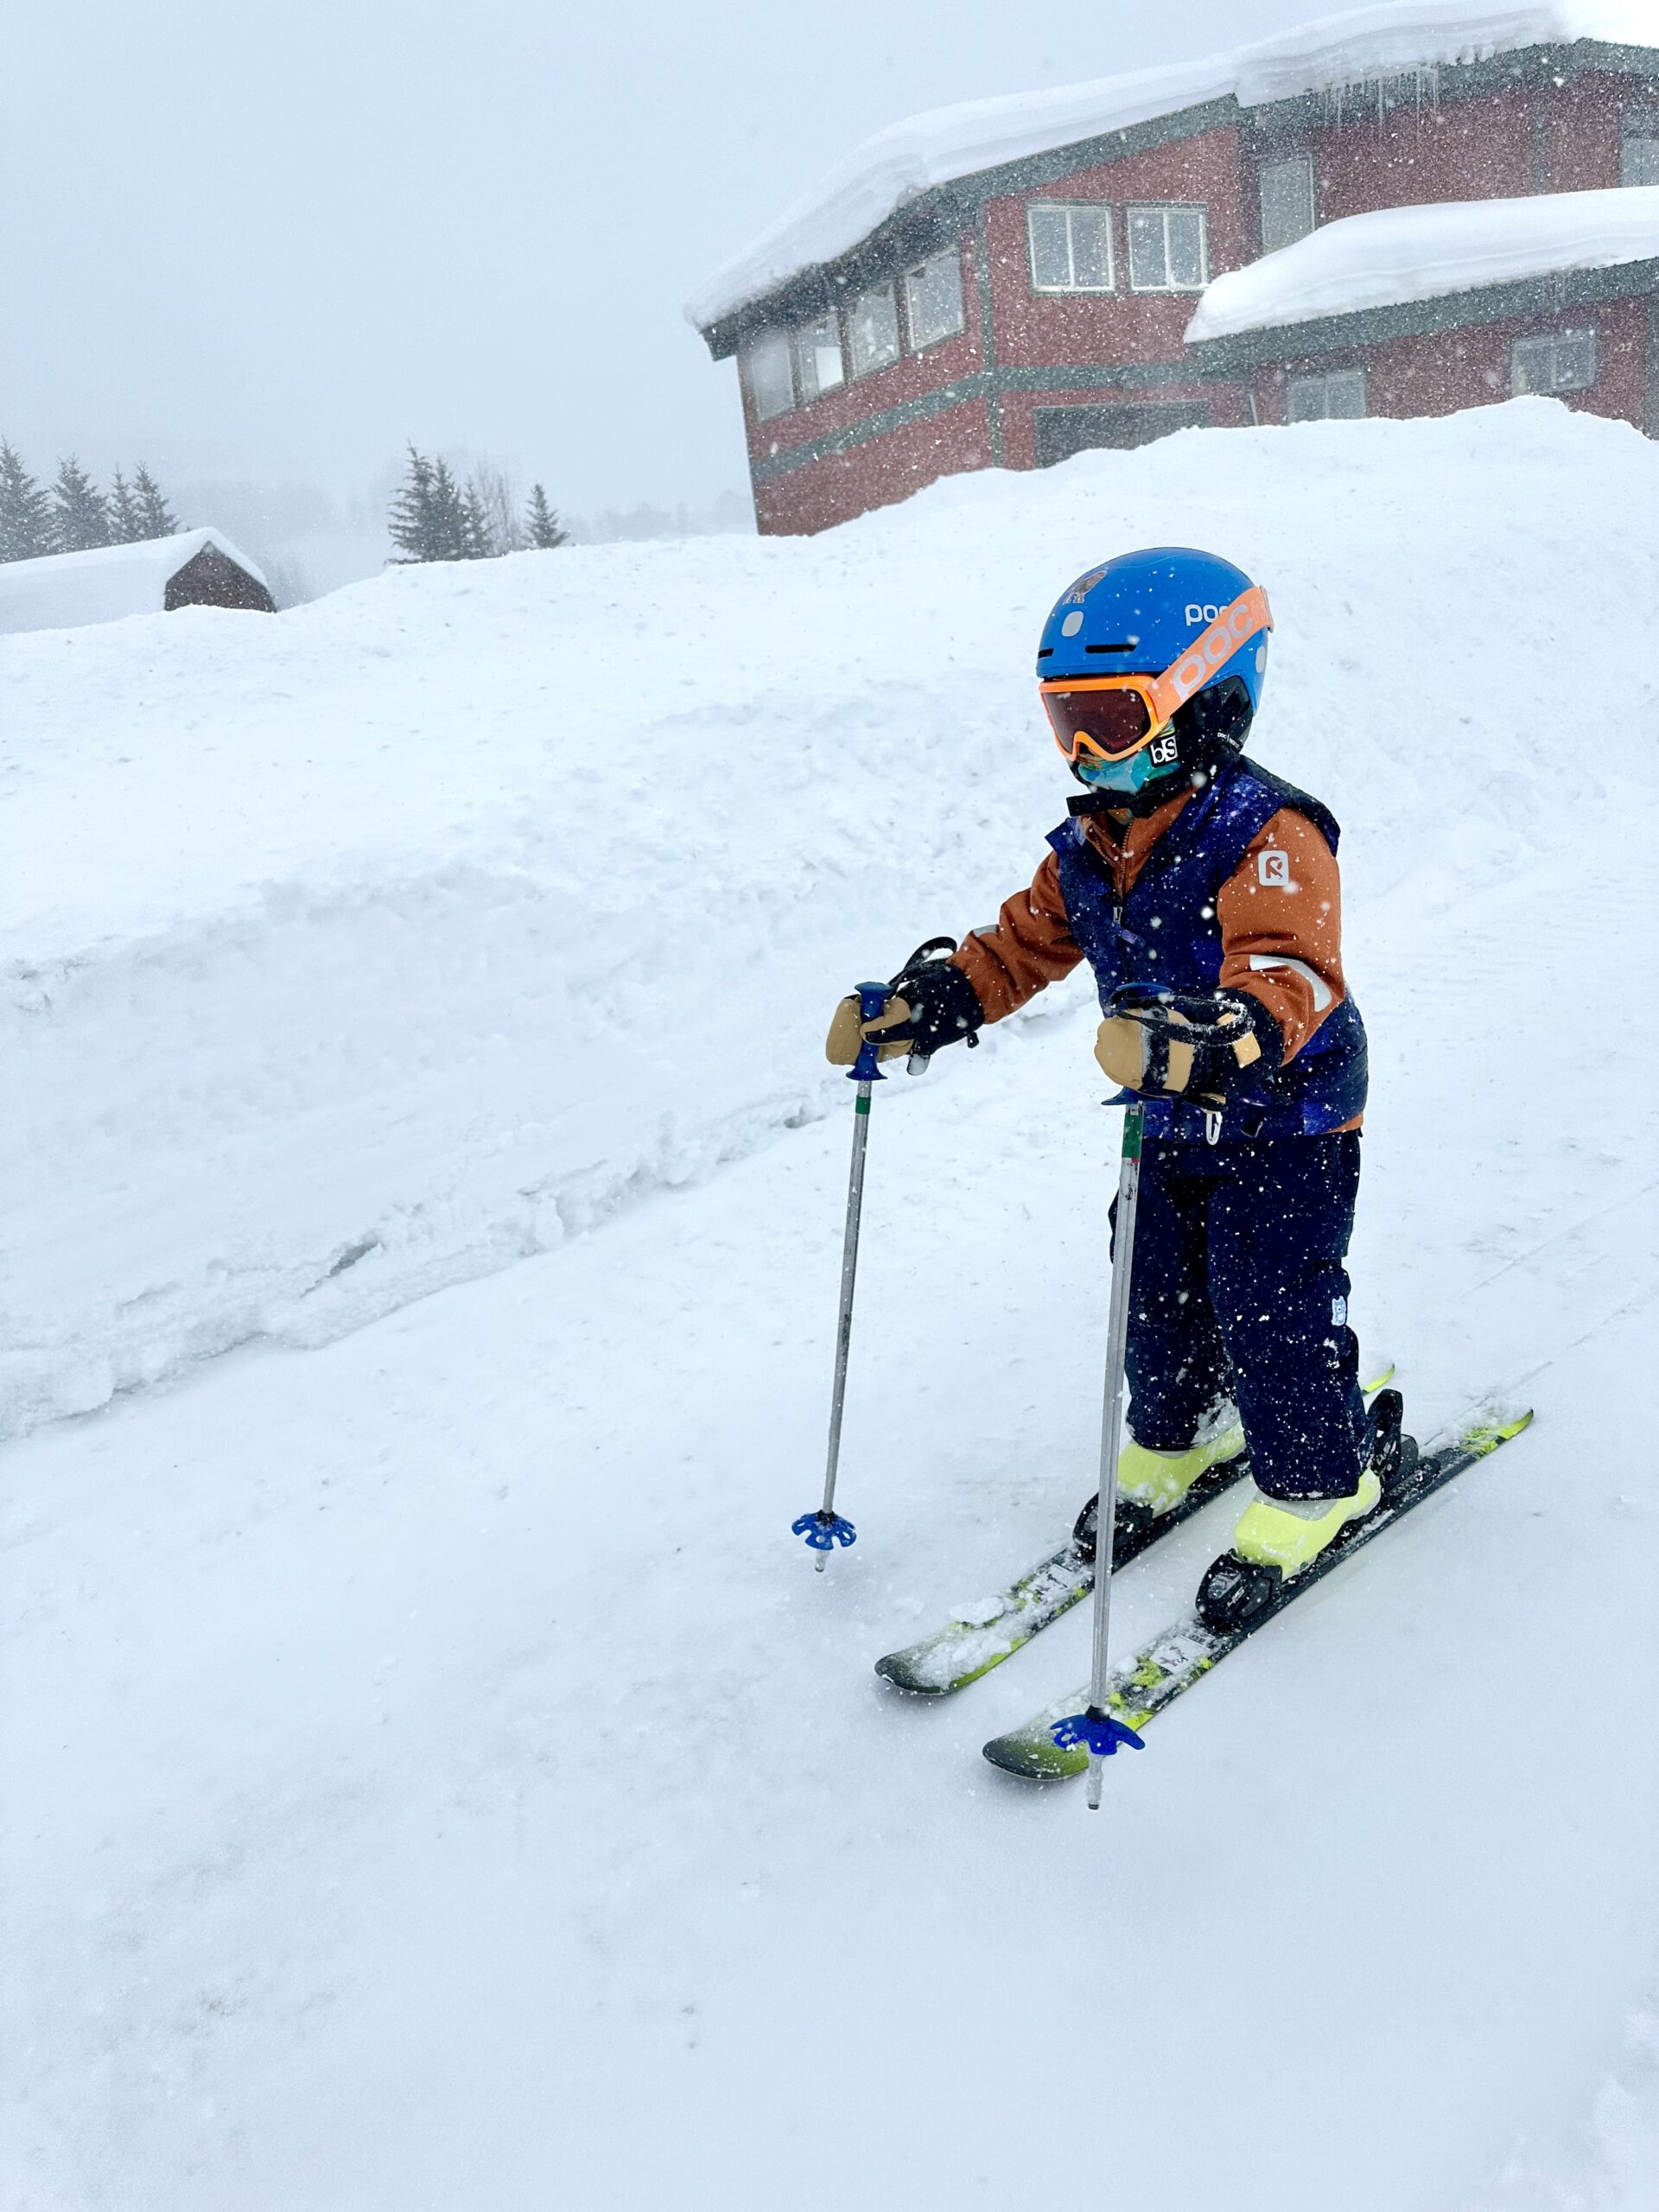
The Chopper Mill kid’s mitts come in 5 sizes and are based on hand measurements, not ages. I measured my son’s hands and used their size chart to settle on the size 2. They fit well and there’s still room for him to grow into them throughout the season. Chopper Mill also makes adult mittens; when I measured my own hand for those, I ended up with a slightly too large size. I can confirm they are a warm and wonderful mitten but I’m hoping to downsize before I provide a full review.
The cuff of the kid’s Chopper Mills mitts is plenty long enough to go over his jacket, but the cuff is not as wide as other mittens like those I’ve tried from Stonz. Regardless, it’s still easy to pull the mittens over his jacket sleeves. The cinch at the cuff and Velcro strap at the wrist keep the mitten in place and keep out drafts.
I’ve also come to love Chopper Mills because of several of their other features: personalized leather name patches, mini carabiners on each mitten, and their lost mitten policy. The patches are Velcro and included in the cost of the mitten. My son loves seeing his name on his mitten and I love that they will be easier to keep track of. Plus, replacement patches can be ordered if / when the mittens become hand-me-downs.
The mini carabiners make clipping the mittens to a backpack or jacket pocket easy — a nice feature that makes it less likely to lose a mitten. Lastly, the replacement policy. Chopper Mills calls it their re/PAIR(™) plan and here’s how they sum it up: “the first Chopper Mill you lose, we mail you a replacement free. And you can purchase a single replacement anytime without buying a new pair. Just click ‘Replace’ and move on.”
We have only ever lost one of Linden’s mittens but I am still frustrated that we could no longer use the lone mitten. This policy helps eliminate this potential frustration.
Crank Brothers F-Series Multi-Tools
MSRP: $40-60
David Golay: Designing a multi-tool requires a tricky set of compromises. The general idea is to cram a whole bunch of features into a small, lightweight package. But if you go too small, the tool gets to be dainty, lack leverage, and be tough to use; go too big, and you quickly run into issues fitting it in to reach certain fasteners while still being able to turn the thing. Crank Brothers’ new F-Series tools have a couple of clever tricks in store and come in a variety of options with different features, depending on what exactly you need.
The range starts with the F10+, which is a fairly standard folding-style tool with 2, 2.5, 3, 4, 5, 6, and 8 mm Allen keys, plus a #2 Phillips and #1 flat blade screwdriver, and a T25 Torx. The tool stows in an aluminum sleeve with a magnet in its base to hold the tool, and a bottle opener on the face. That case can be used as a handle to add leverage to the base tool by inserting it partway into the case.
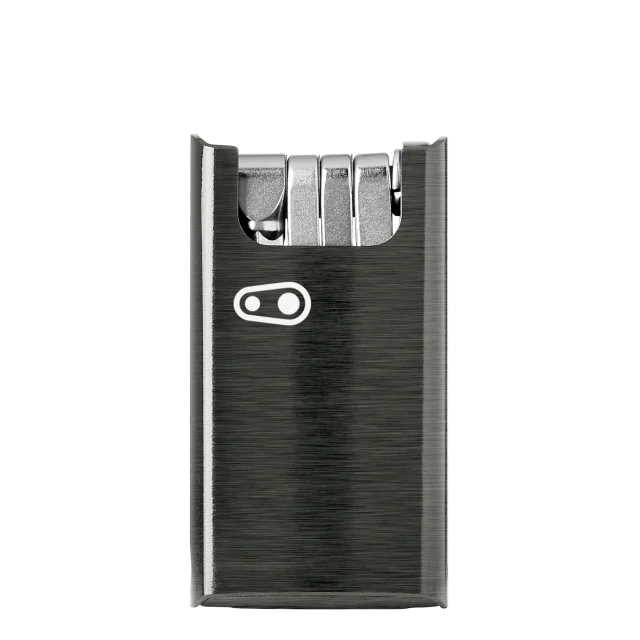
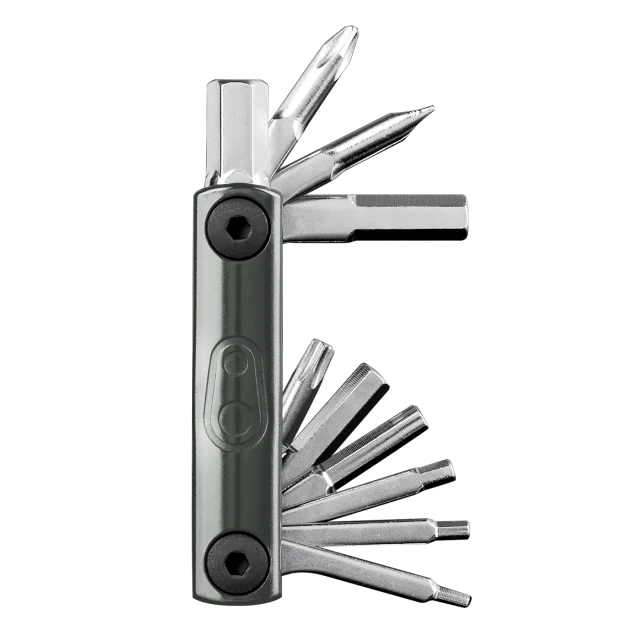
There are three more F-Series tools, all of which use the same base tool as the F10+, with a variety of extra features added on. In short, the F11 adds a slide-on plastic panel to the outside of the case, containing a tire plug tool, three plugs, and a holder for a spare chain link. The F15 extends the case from the F10+ to make room for a chain tool (which uses the 4mm Allen wrench on the main tool to drive the pin), plus #0, 1, 2, and 3 spoke wrenches on the underside of the magnetically stowed chain tool. And then the F16 adds the same patch kit as the F11 to the F15, for the most fully-featured version.
I’ve tried a couple of the F-Series tools, and have liked the range. The base tool itself is great — it’s nicely compact, easy to open and close, and the individual tools feel solid and fit well. Unlike a lot of other multi-tools, the F10+ tool’s various Allen wrenches are all laid out in order, so it’s easier to find the size you need. Good stuff. The ability to use the case as a handle is especially welcome when removing and installing pedals — it makes for a notably long tool with good leverage, without making the whole package unwieldy and huge when it’s all folded up.
The plug kit on the F11 and F16 works well enough, but it’s not as easy to use as my favorite plug kit, the Dynaplug Racer Pro, and adds a substantial amount of thickness to the case, which makes it a bit less nice to use in handle mode. The chain tool on the F15 and F16 isn’t going to replace my shop one any time soon but works plenty well for a trailside fix. It would be improved with a slightly deeper bolt head for better engagement with the 4 mm Allen tool but gets the job done.
So my favorite option of the range might just be the humble F10+. It’s small, light, easy to use, and has most of the tools you need to do basic adjustments on a modern mountain bike. It’s an especially good option for rides where I’m not going to be that far from the trailhead and mostly want a tool that I can drop in a pocket when I’m not wearing any sort of pack. E.g., for when I might want to make minor setup tweaks or straighten my bar in the event of a crash, but don’t need the most fully-featured tool in the world to bail me out of every possible mechanical failure miles from anywhere. It’s a nice little tool.
RUX Essentials Set
MSRP: $393 ($298 for RUX 70L only)
Luke Koppa: Over the past few years, I’ve been trying to arrive at a more dialed-in system for storing, organizing, and accessing all the gear that I keep in — or frequently move in / out of — my car. This ranges from automotive things like ratchet straps and battery jumpers to camping essentials; all my gear for fishing, biking, and skiing; as well as groceries and other stuff I’m grabbing while running errands.
The RUX 70L first caught my attention when Kristin Sinnott wrote about it in one of our earliest editions of Stuff We Like (July 2021). In short, it’s meant to combine elements of both hard and soft storage solutions in order to maximize each’s upsides while minimizing its downsides.
The resulting product is “part bin, part bag.” It’s a 70-liter bucket-like shape made of 840D TPU-coated waterproof nylon, with a foam base, rigid composite nylon rim / rails around the opening, removable lid, and lots of different potential setup options.
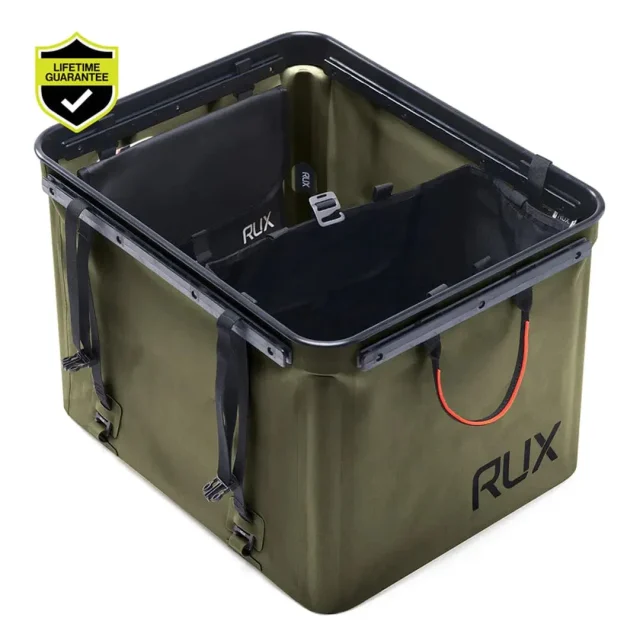
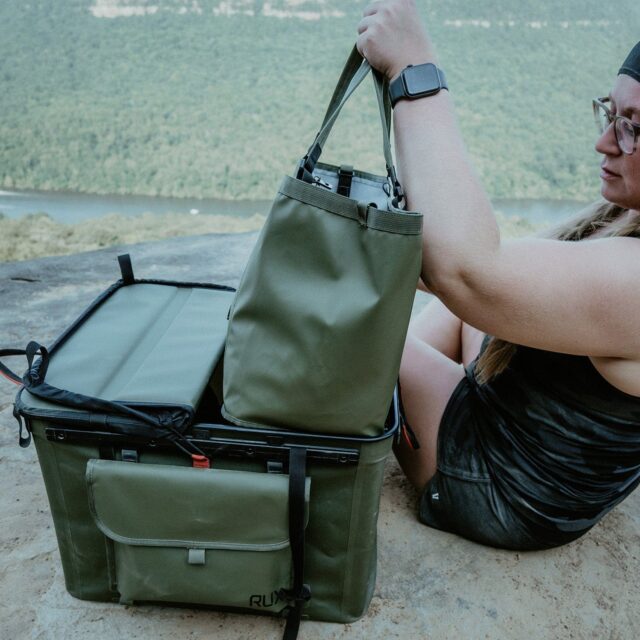
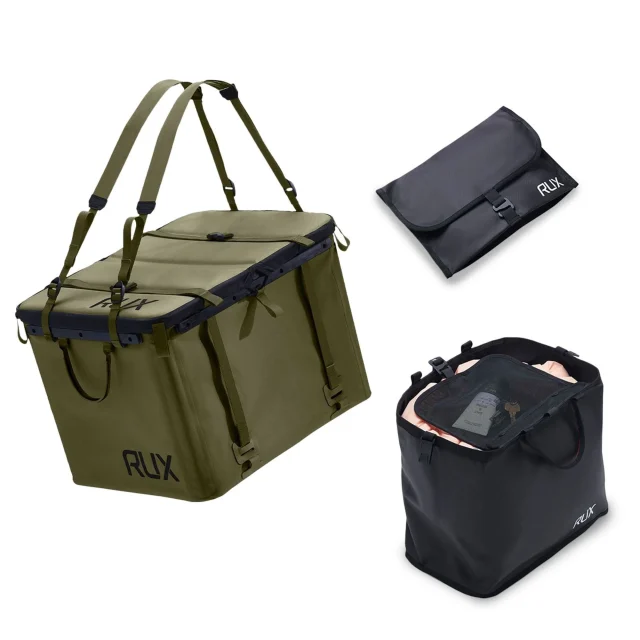
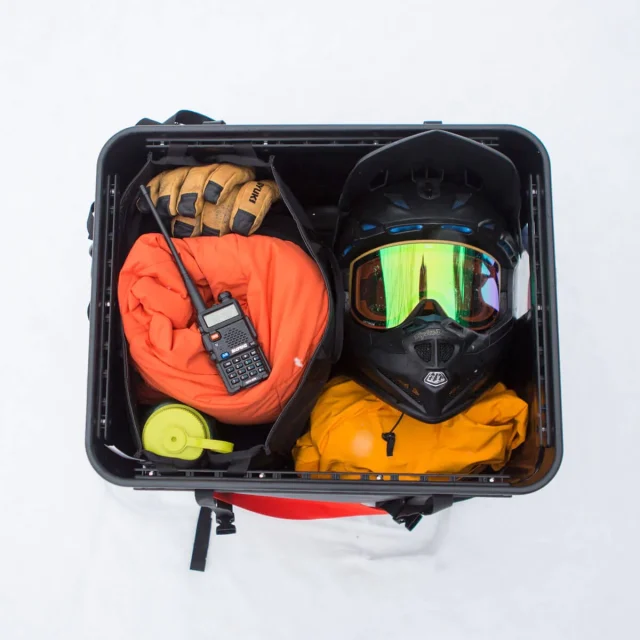
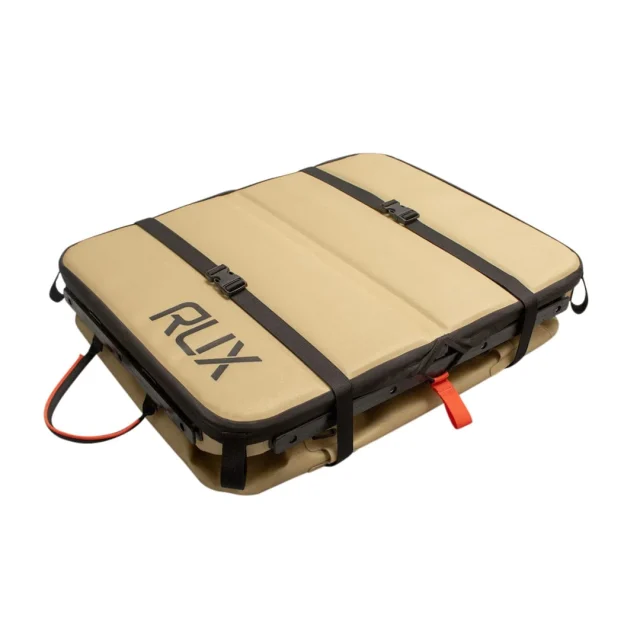
For the past several weeks, I’ve been using the RUX Essentials set, which includes the original RUX 70L and adds their 25L RUX Bag and 3L RUX Pocket for added organization potential. And overall, I’ve been a big fan.
Compared to my Patagonia Black Hole Gear Tote 61L that I still use on a regular basis (see my writeup), the RUX system is definitely a better option, if you plan on carrying it in various ways, have things that you need to stay flat, and/or prefer to separate your gear, rather than the “one big bag” approach. The RUX’s rails and included straps allow for a lot of potential ways to organize the gear inside, lash more stuff to the outside, or secure the RUX to something else. Meanwhile, its handles and removable straps let me carry it as a backpack, shoulder-bag style, or just by carrying it with two hands via the standard handles.
My favorite aspect of the RUX is probably its rigid rim — it keeps it open and makes it a lot easier to find items inside, relative to a soft tote, especially when you add the RUX’s removable corner struts, which can keep it fully expanded. However, that rim does make it less comfortable to carry via a shoulder strap when there’s lots of gear inside, since the rim won’t bend / conform to my hips like a soft tote. If I’ll be hauling the RUX for more than a few minutes, I’ll go the backpack-strap route.
The other obvious comparison, given how RUX describes their system, would be rigid bins of some sort. I happen to also have some SidioCrate bins, which are basically fancy milk cartons; I still keep one or two of those in my car for the smaller items I use on a less regular basis — they’re basically a part of my car that I can easily access, but that I don’t frequently move in / out.
The RUX system isn’t as ideal in terms of separating and organizing really small items, and you can’t sit / stand on it when there’s nothing inside, but it’s obviously a lot more versatile if you need to haul whatever’s inside for any significant distance. The RUX setup also compresses down very small and flat when not in use, it can be smashed into small corners since it’s not a rigid box, and it’s quieter / rattle-free on rough gravel roads.
As for the add-ons in this “Essentials Set,” I’ve found both to be useful. The 25L RUX Bag is especially nice for things that I don’t want to get crushed by other gear (e.g., eggs on grocery trips) since it hangs inside the main bag but is a bit elevated from the base. The 3L RUX Pocket has become the home for my small, quick-access items like a headlamp, small liner gloves, etc.
After my time with it so far, I don’t think the RUX system is the perfect, truly best-of-both-worlds solution for both rigid bins and soft bags — as is often the case, each of the three still has its own pros and cons. But the RUX Essentials Set is definitely the most versatile of the three that I’ve used, and if you’re willing to pay for that versatility, it’s a pretty sweet solution for storing, organizing, and hauling various gear.
Fischer One Ski Boots
MSRP: $219.99
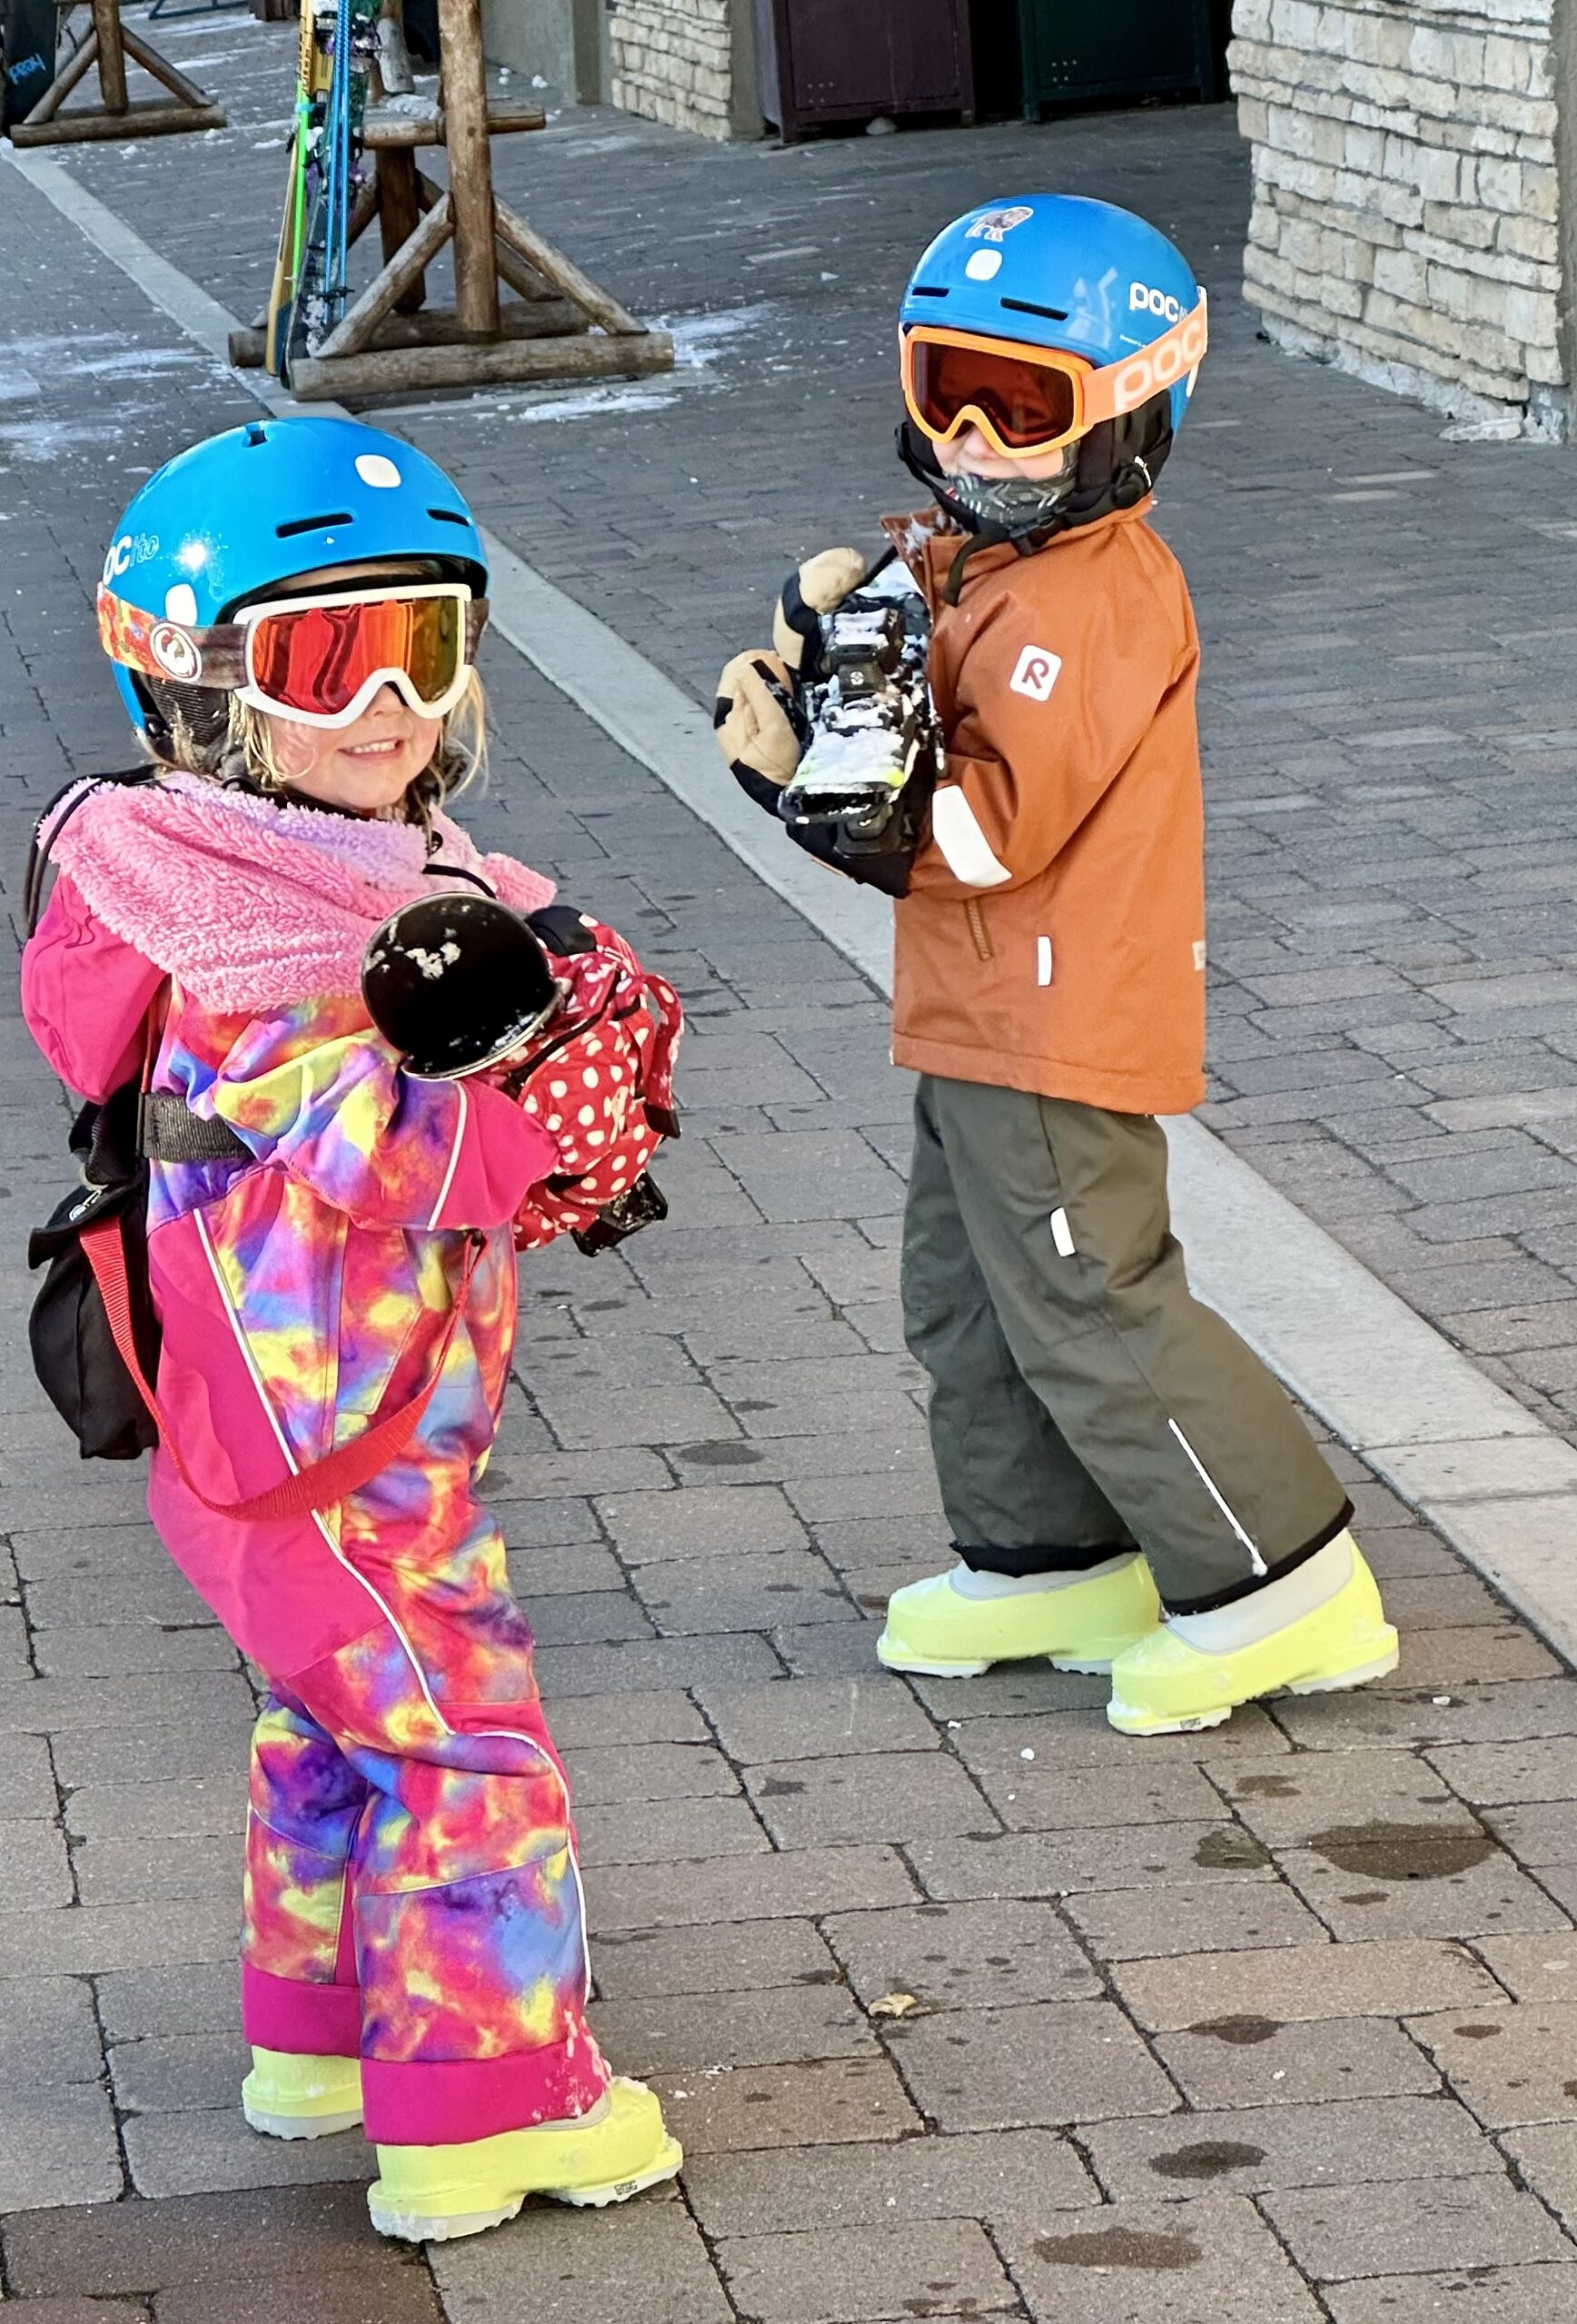
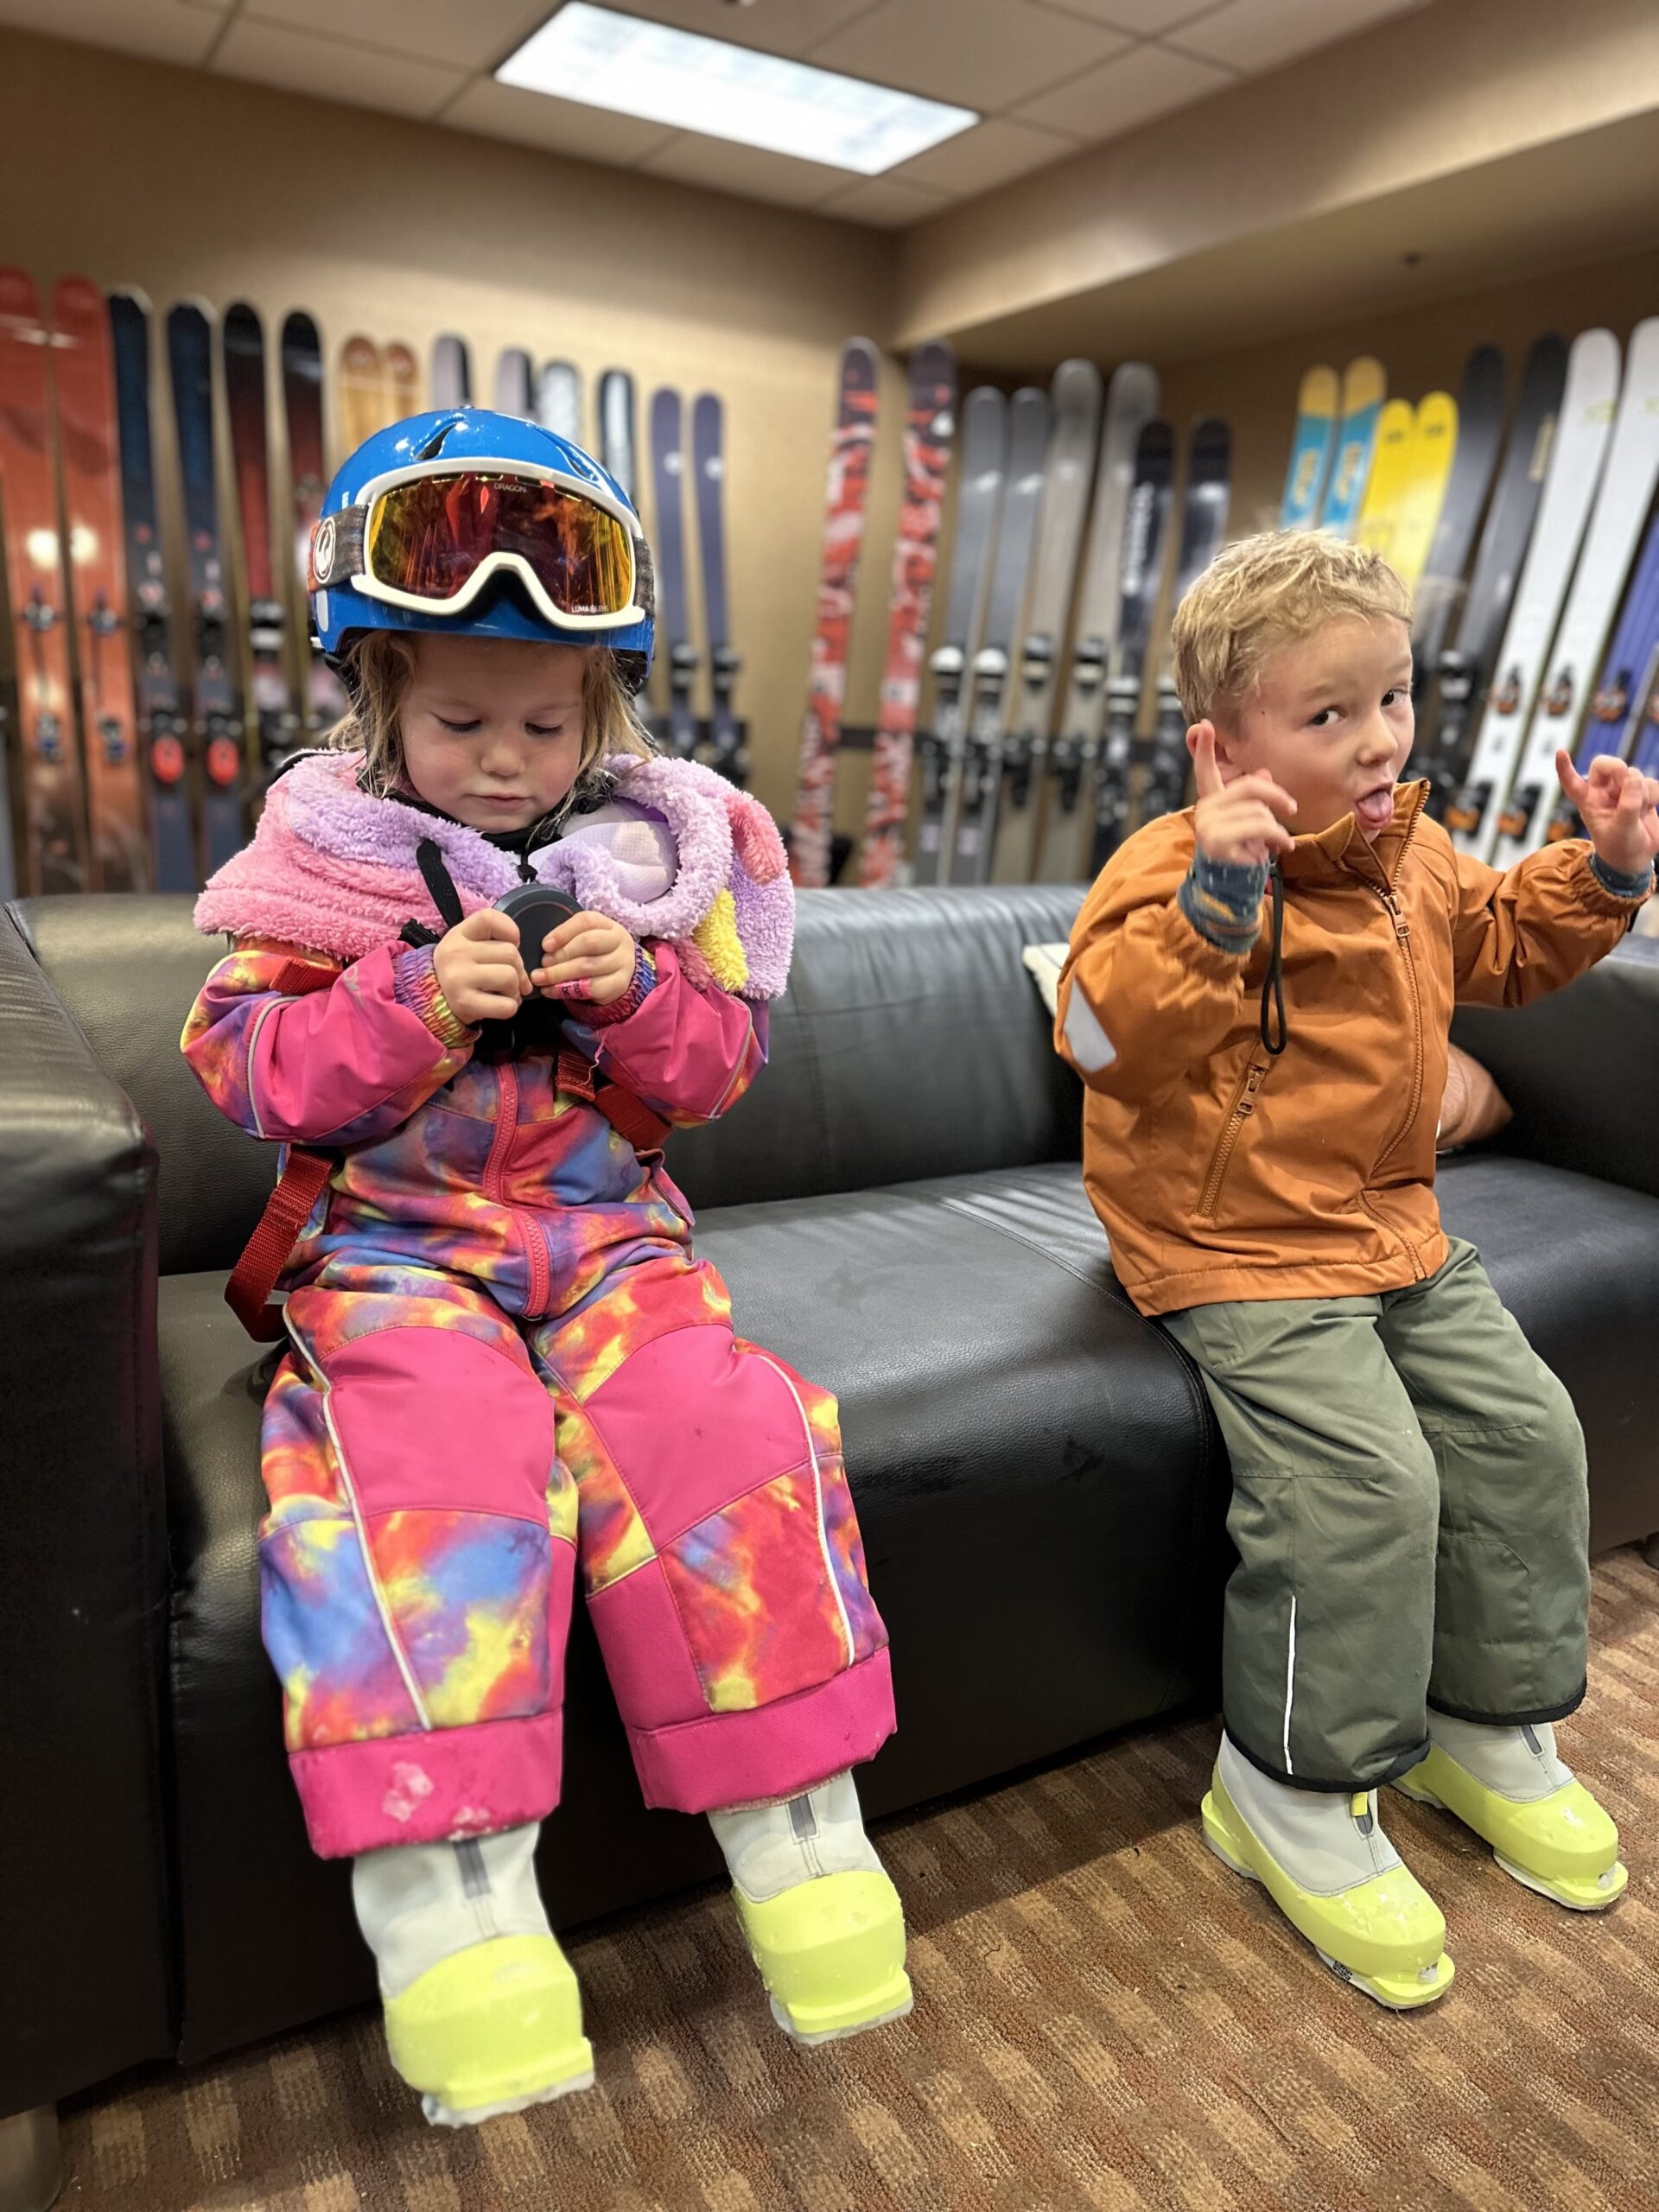
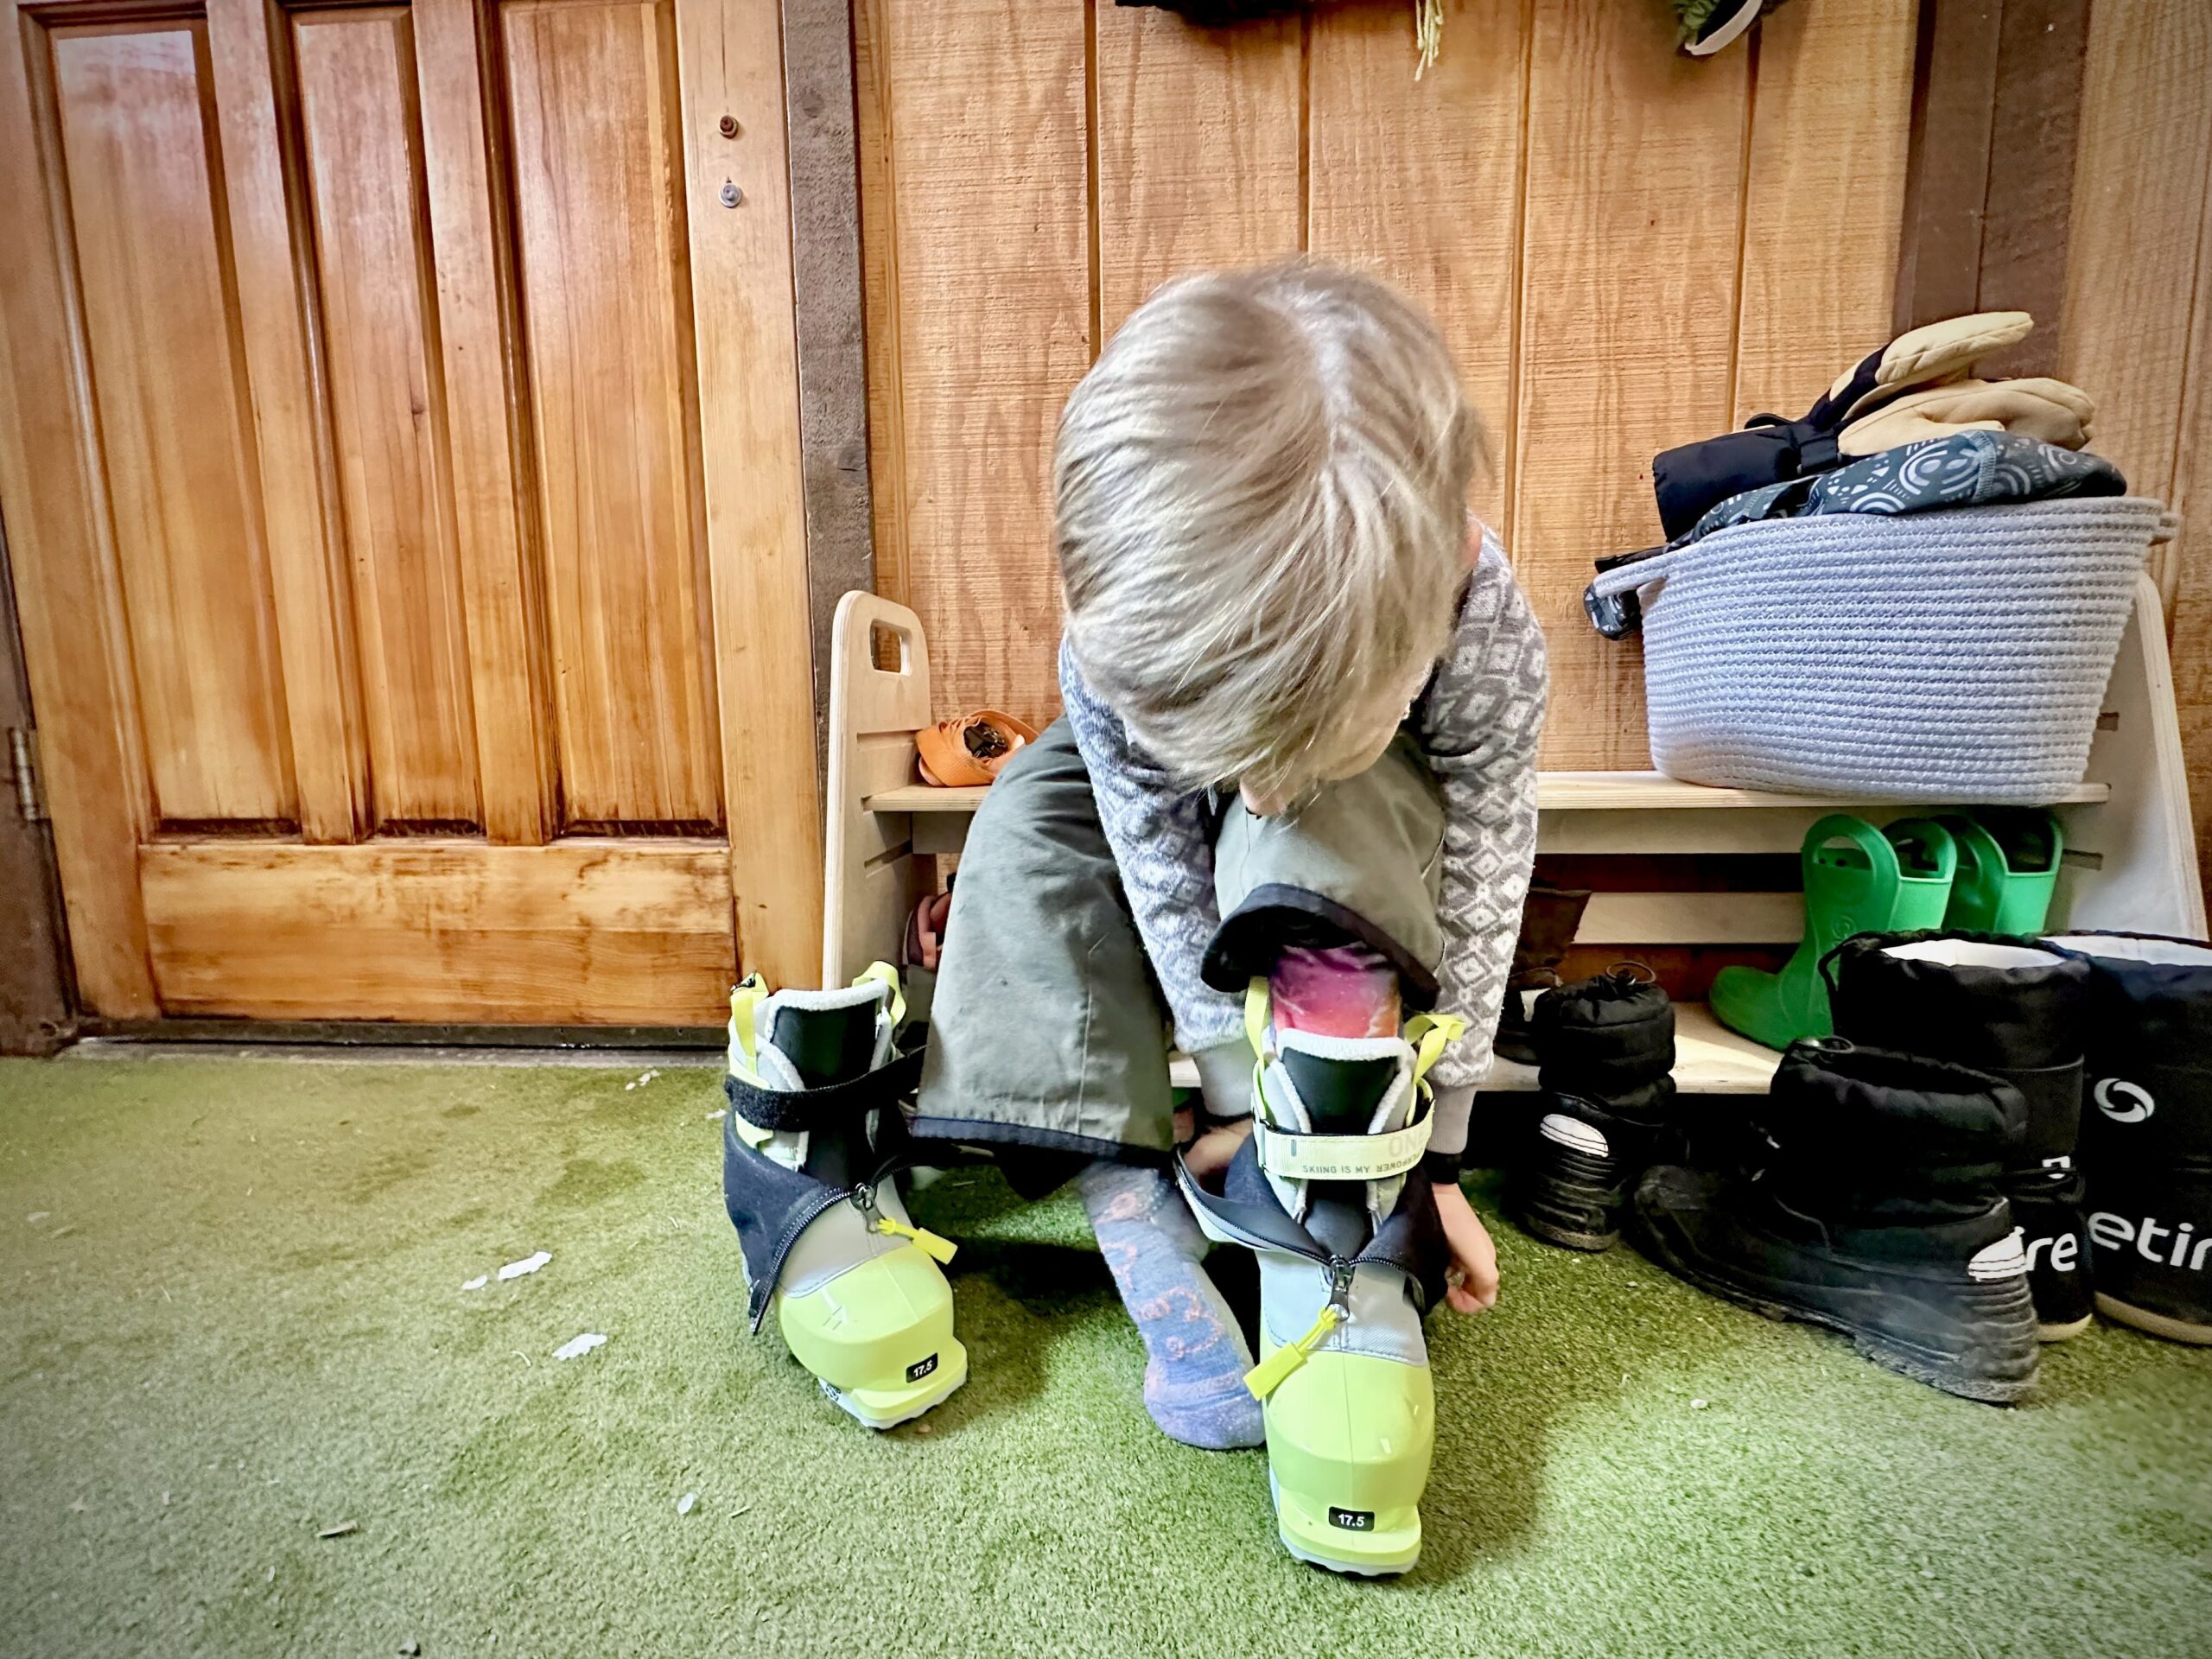
Kristin Sinnott (& Linden): Linden has never had any issues with ski boots. He’ll happily put his foot into any of them and even if they are snug (i.e., properly fitted), he’ll just tap his heel and make it work. This is all to say that it wasn’t a need to find a more comfortable boot that made me intrigued about the Fischer One (and Fischer Two) kid’s ski boots. But to those parents and caregivers who struggle with getting (and keeping) their kids in ski boots, the Fischer One and Two will likely solve that problem.
What interested me the most about these boots was the idea that my son could actually flex them. Prior to the Fischer One, my son was in hard-shell boots. We tried both rear entry and front entry and quickly dismissed the former since my son went straight to the backseat in rear-entry boots. But between the large cuffs and stiff upper of the front-entry models, I always wondered if my son would have a better skiing experience in something a bit softer.
When we first introduced my son to skiing, I had heard great things about the Nordica Nordy boots. They had a similarly soft upper cuff design to the Fischer One model, but finding a pair was impossible since they were discontinued.
So we had him start using the new Fischer One boots, and it’s been a great experience so far. The Fischer One’s GripWalk sole, lighter construction, and soft upper cuff allow my son to move quickly in the boots when walking. And the fit seems more dialed, at least for him. The boot liner is much more snug on my son’s foot / leg and the strap can be cinched and fitted to his lower leg in a much more precise fashion. In general, my son has really liked these boots. And I love that he can get the boot on and off by himself.
Smith Pursuit Sunglasses
MSRP: $305 for photochromic / $285 for non-photochromic
Luke Koppa: Along with the two above options from Pit Viper, I’ve also been spending a lot of time using Smith’s new Pursuit sunglasses, which are Cody Townsend’s new signature model.
The Pit Viper Try Hard and Synthesizer are great bang-for-the-buck options in this high-coverage category, whereas the Pursuit is a very high-end model built to excel on both the uphill and downhill portions of backcountry skiing / riding and mountaineering.
The Pursuit’s $305 price tag (for the photochromic versions) still makes me grimace, as someone who’s broken and lost a lot of sunglasses, but it has been seriously impressive during my time with it so far.
The Pursuit frame has several features that make it ideal for human-powered travel in snowy environments. For starters, it has removable side shields to block light and wind on the peripheries. This seems in part targeted at glacial travel, where exposed skin / eyes can easily be damaged by the harsh light, but it also makes the Pursuit feel more like a goggle on the way down in terms of minimizing the air that sneaks in from the sides.
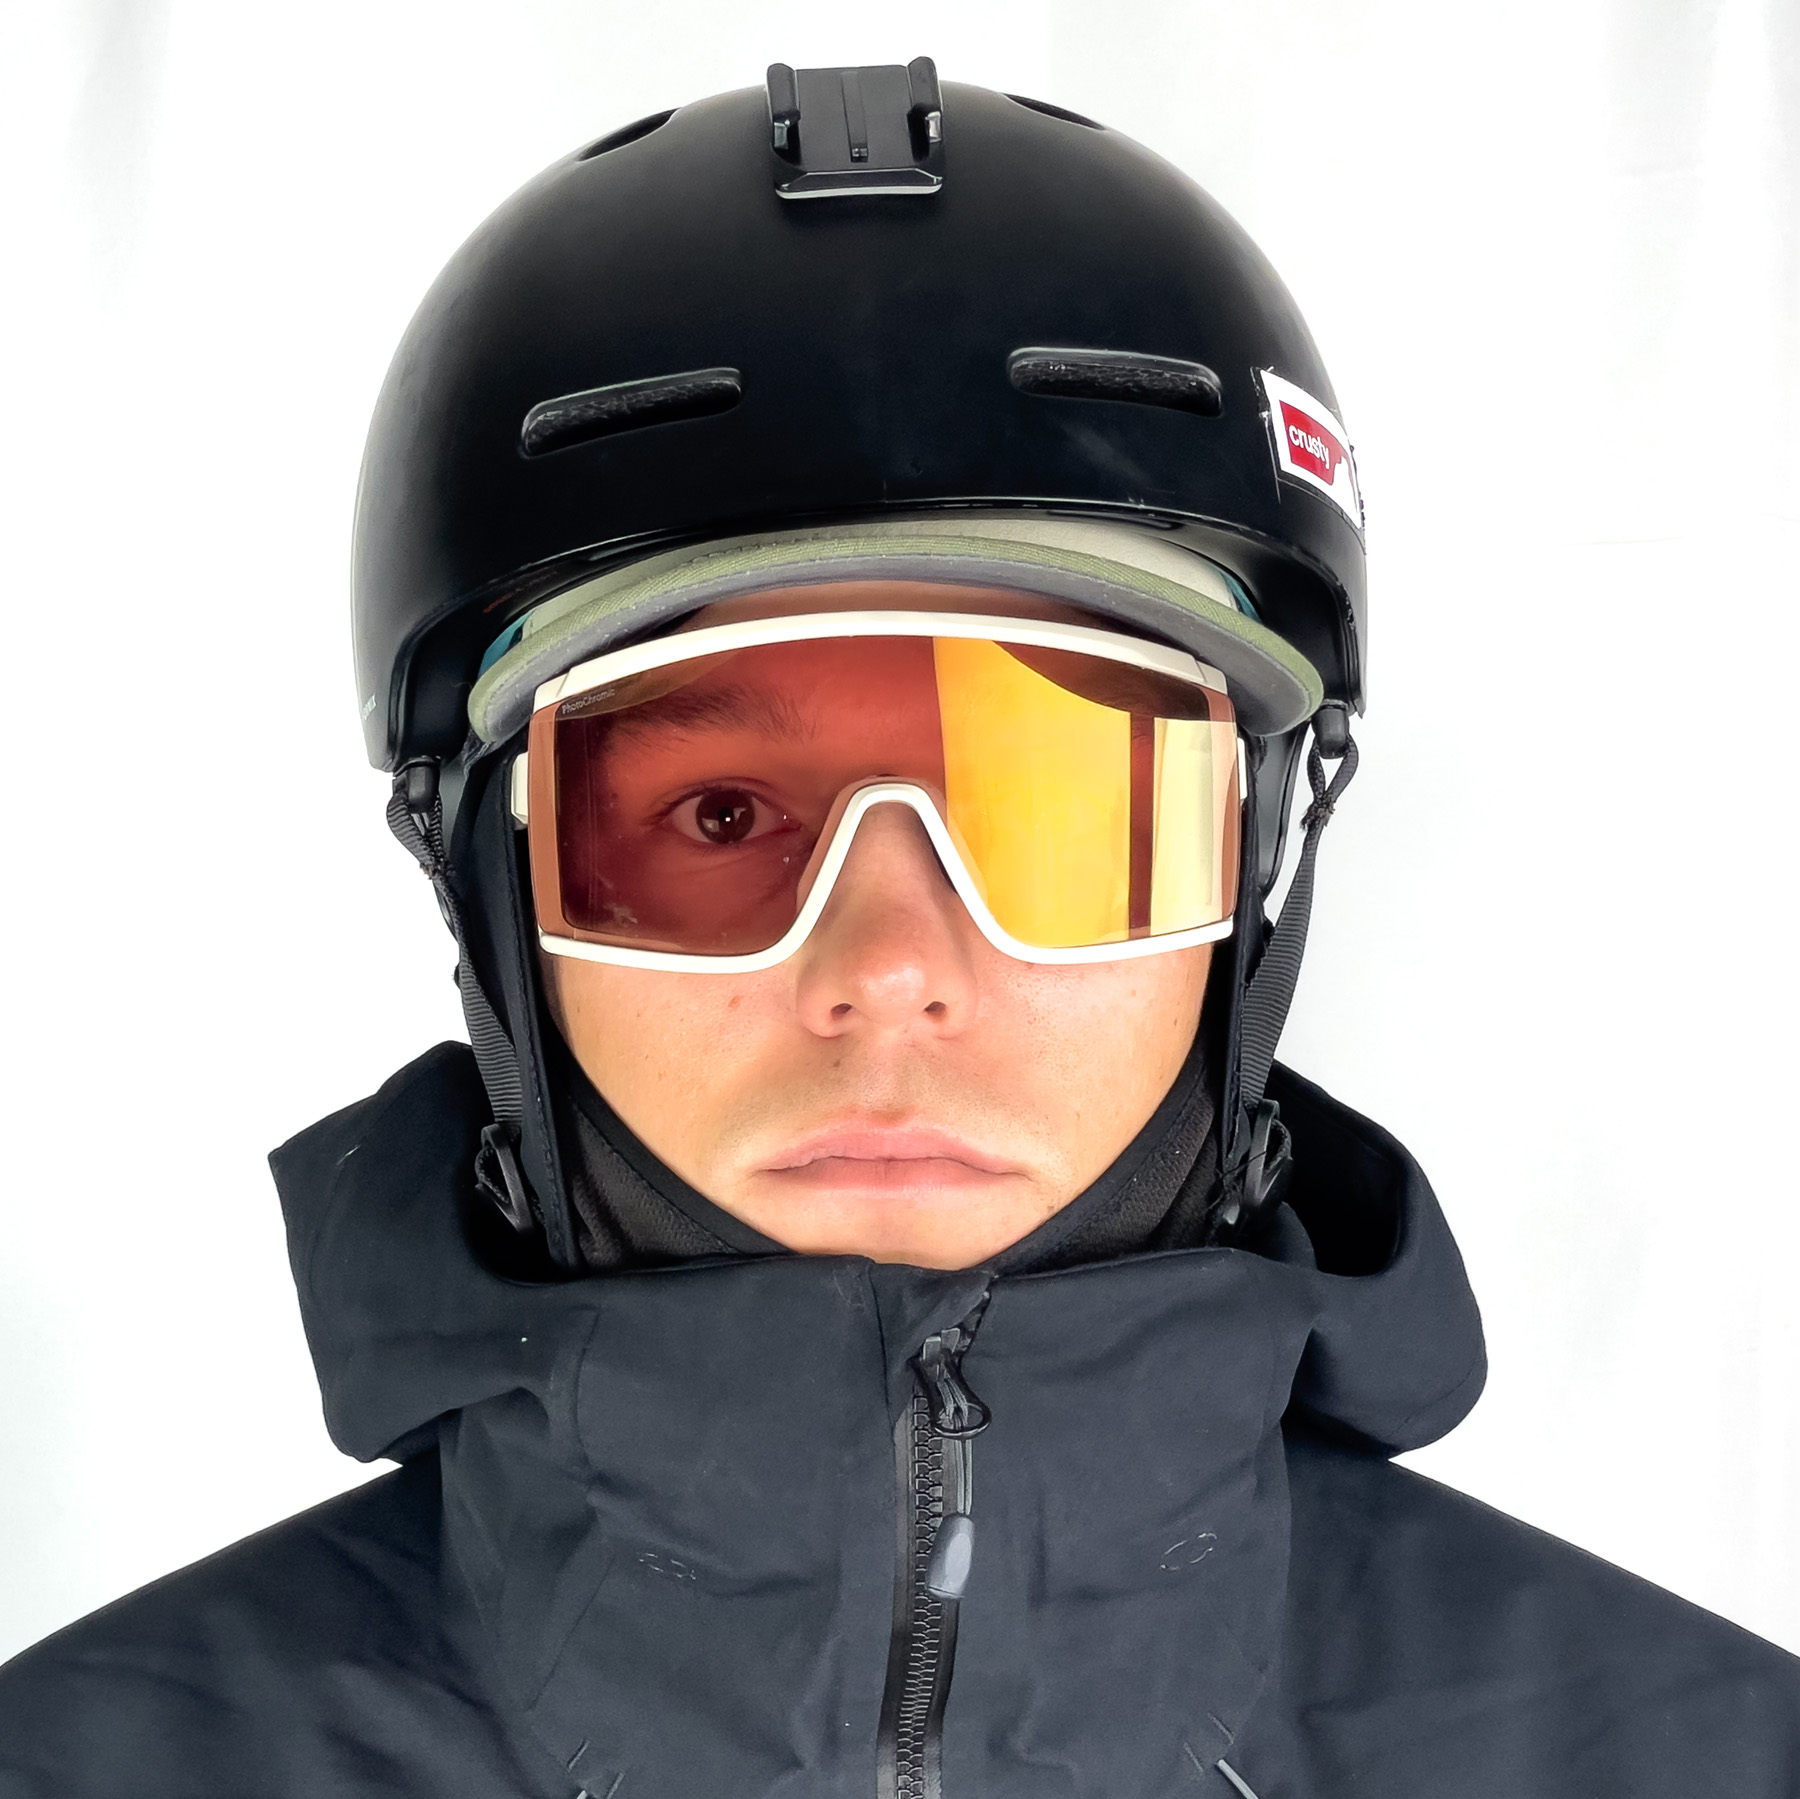
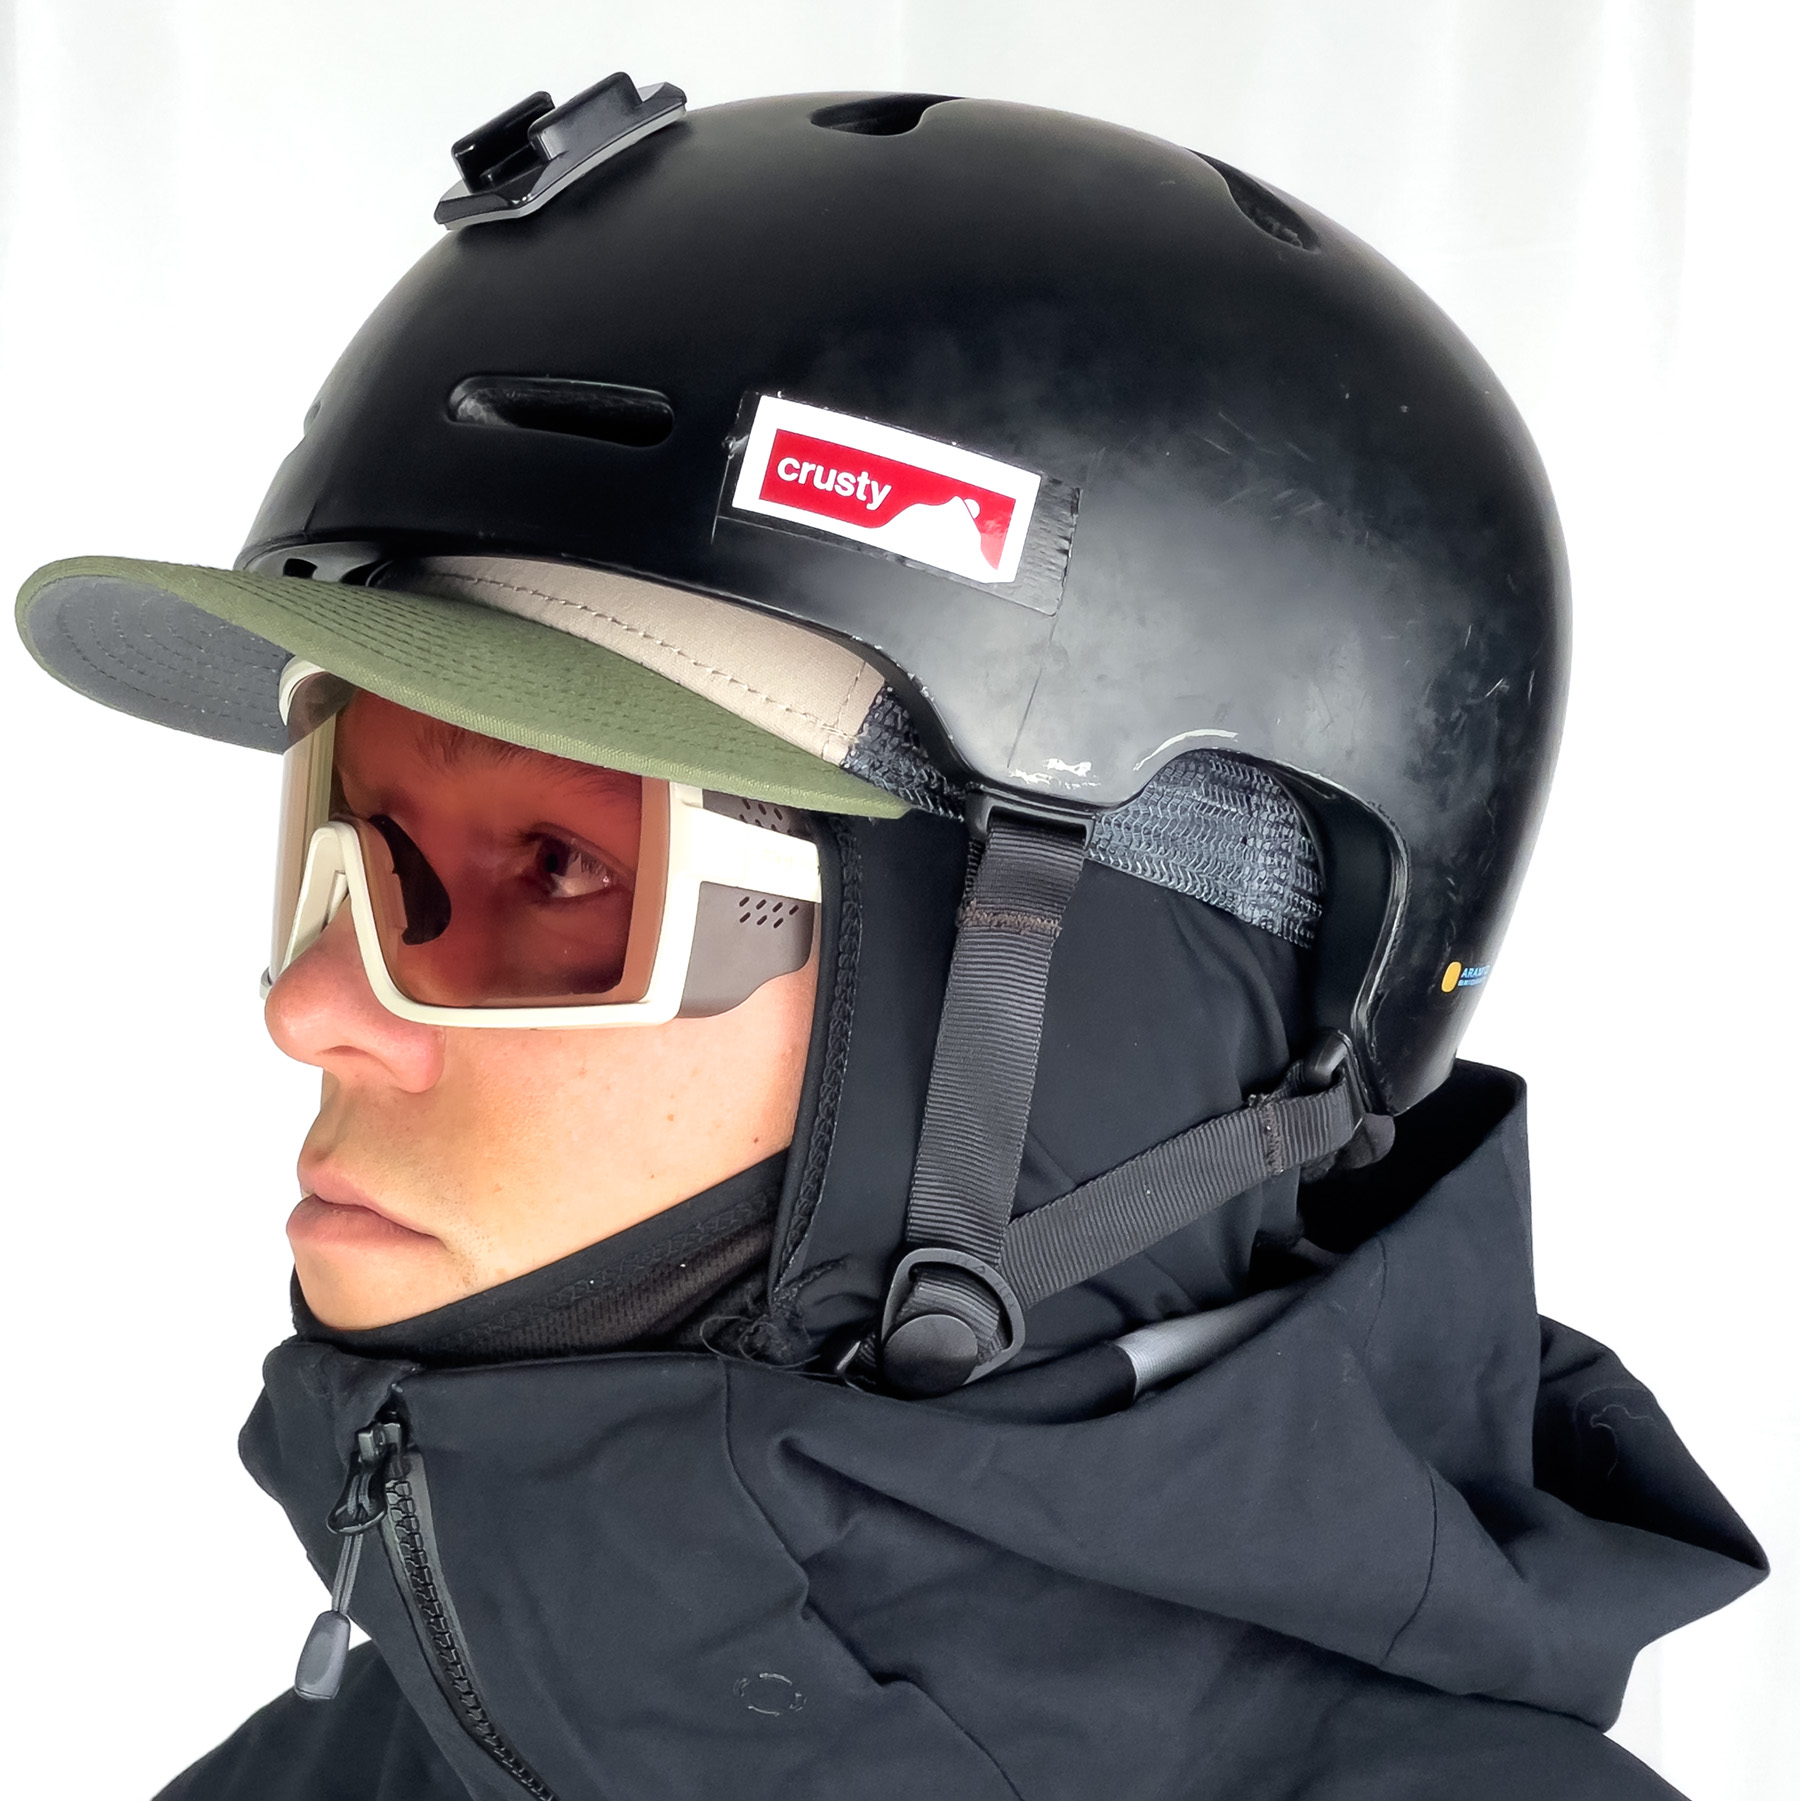
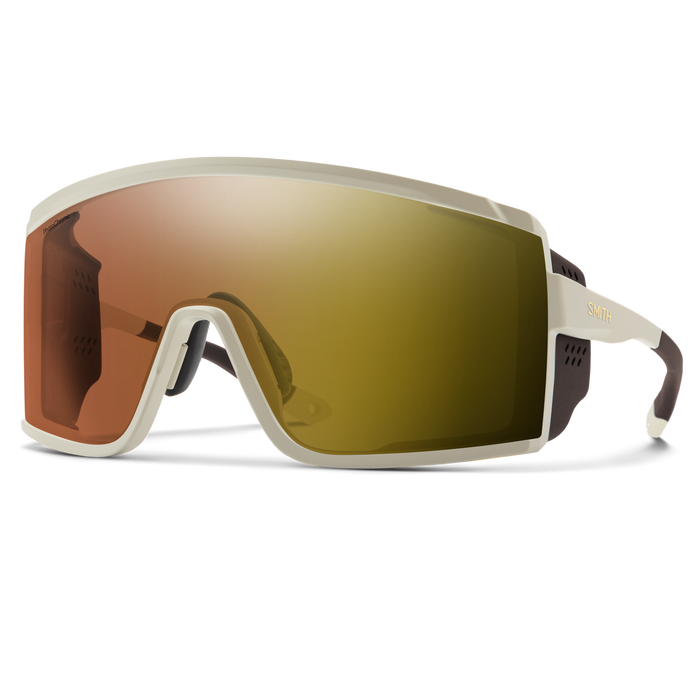
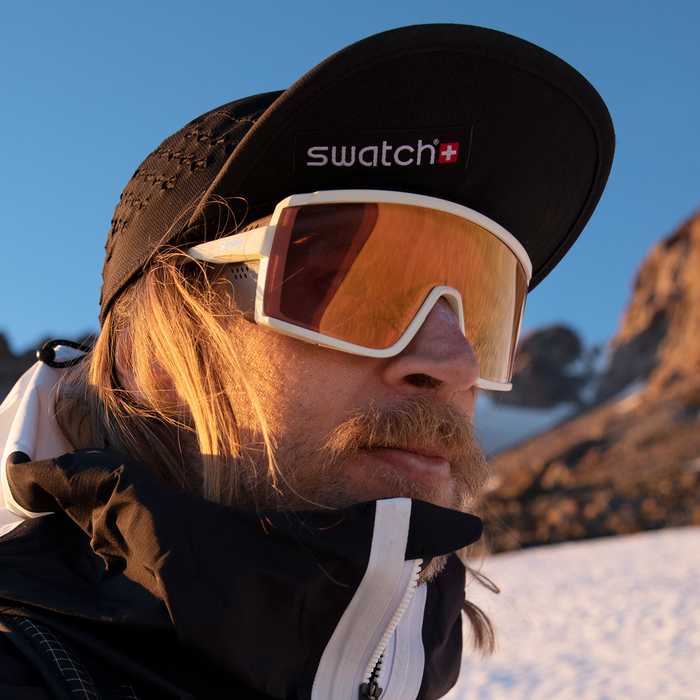
However, those shields do have little vents and I’ve been surprised by how rarely I can get the Pursuit to fog up while I’m working up a sweat. I even used them for 65°F / 18°C sunny mountain biking and had no complaints in that department.
The Pursuit also has adjustable nose pads, similar to the Pit Viper Try Hard, but the Pursuit’s slightly tackier “Megol” material (and how the Pursuit happens to fit my face) has helped it feel more secure on my head than the other two. The Pursuit also features straight arms that you can bend a bit to fit your head, and they work well with most helmets and hats I’ve worn.
Arguably the most impressive aspect of the Pursuit is its “ChromaPop Glacier Photochromic lens.” These tint-changing lenses are available in a few colors but all reportedly change from a very low 7% VLT all the way up to 45% VLT — from “category 1” to “category 4” on the visible light transmission scale.
In use, the VLT range of these lenses and, in turn, the conditions in which they feel practical, are huge. I’ll swap in the Pursuit’s included clear lens if I’m skiing at night, but otherwise, I’ve happily used the “ChromaPop Glacier Photochromic Copper Gold Mirror Lens” in basically all other light conditions. They get quite dark while skiing in the sun, but they transition pretty quickly once I get into the trees. Same goes for biking in the open sun vs. dipping into darker forests.
These lenses might not satisfy someone who will actually carry two lenses with them and swap mid-ride or mid-tour, but their VLT range and how quickly they transition have made them an easy choice for most of my outings. It probably doesn’t hurt that, like other Smith ChromaPop lenses, these also offer above-average contrast and clarity.
The Pursuit is fairly large but not massive for this class, sitting at 5.8” / 14.8 cm wide and 2.6” / 6.6 cm tall. It happens to fit my face quite well, and between that and its extremely versatile lenses, it’s become one of my favorite sunglasses for all sorts of ski touring.
Strider Snow Bike Kit
MSRP: $49.99
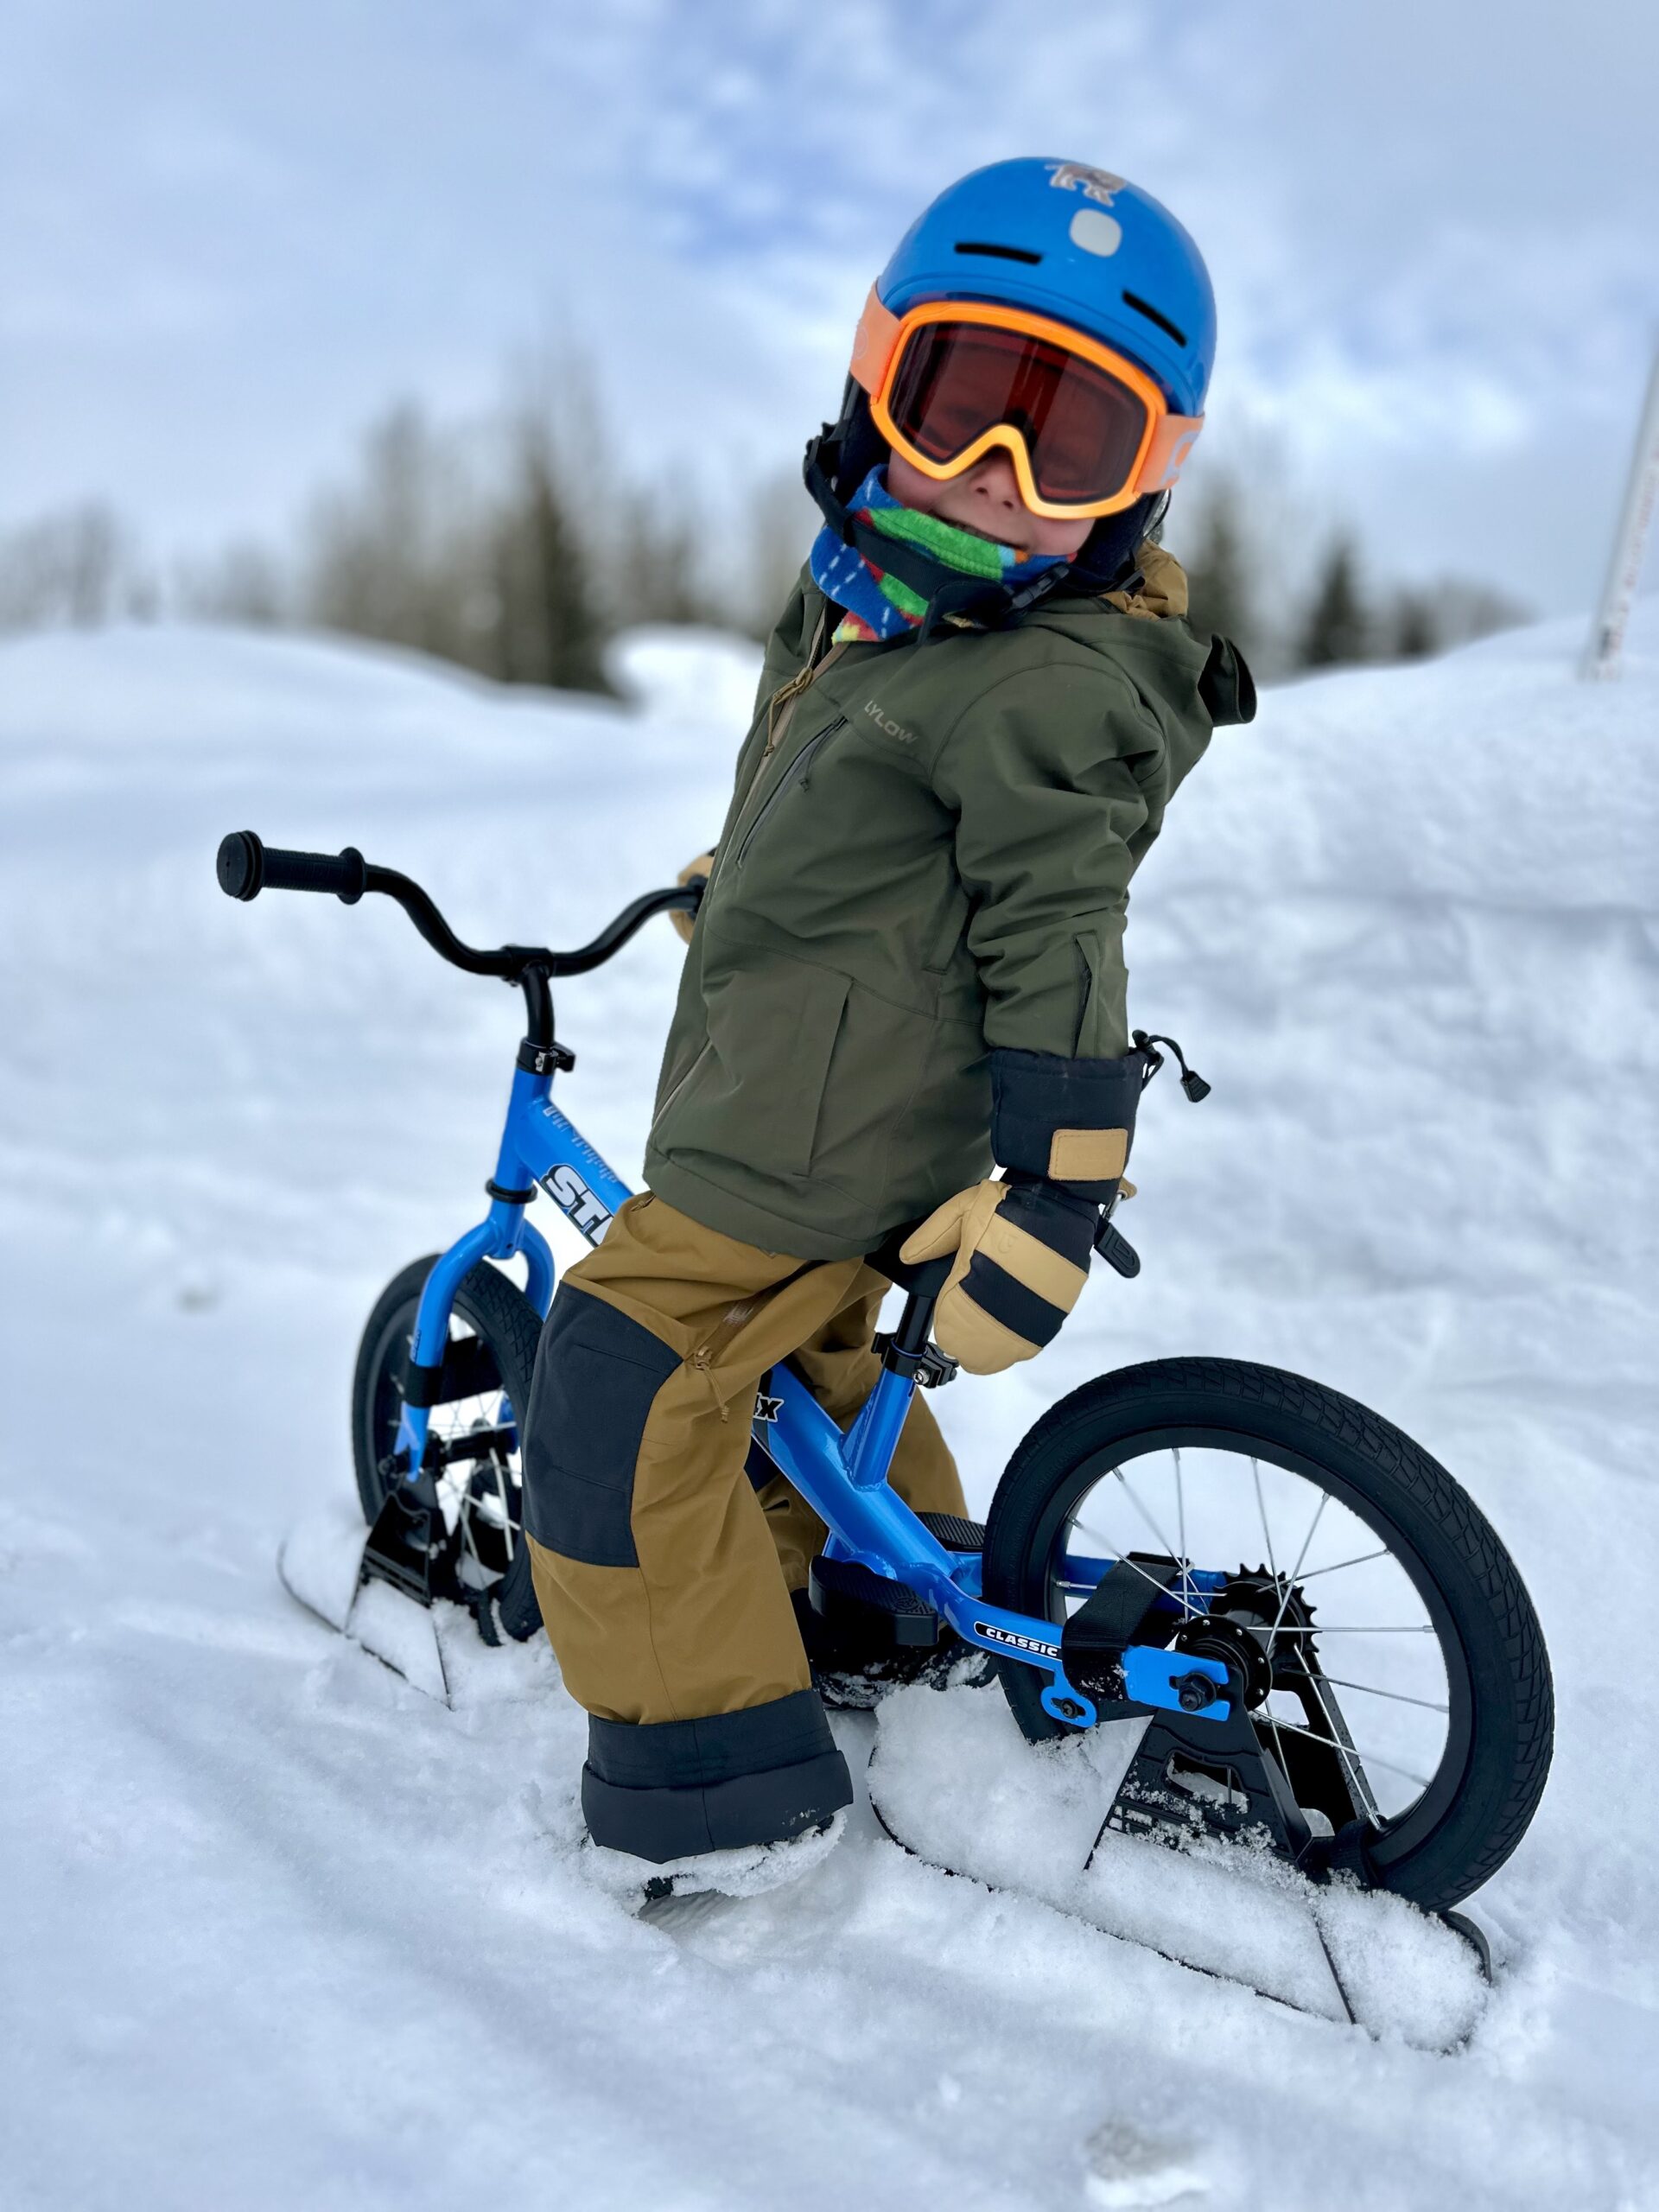
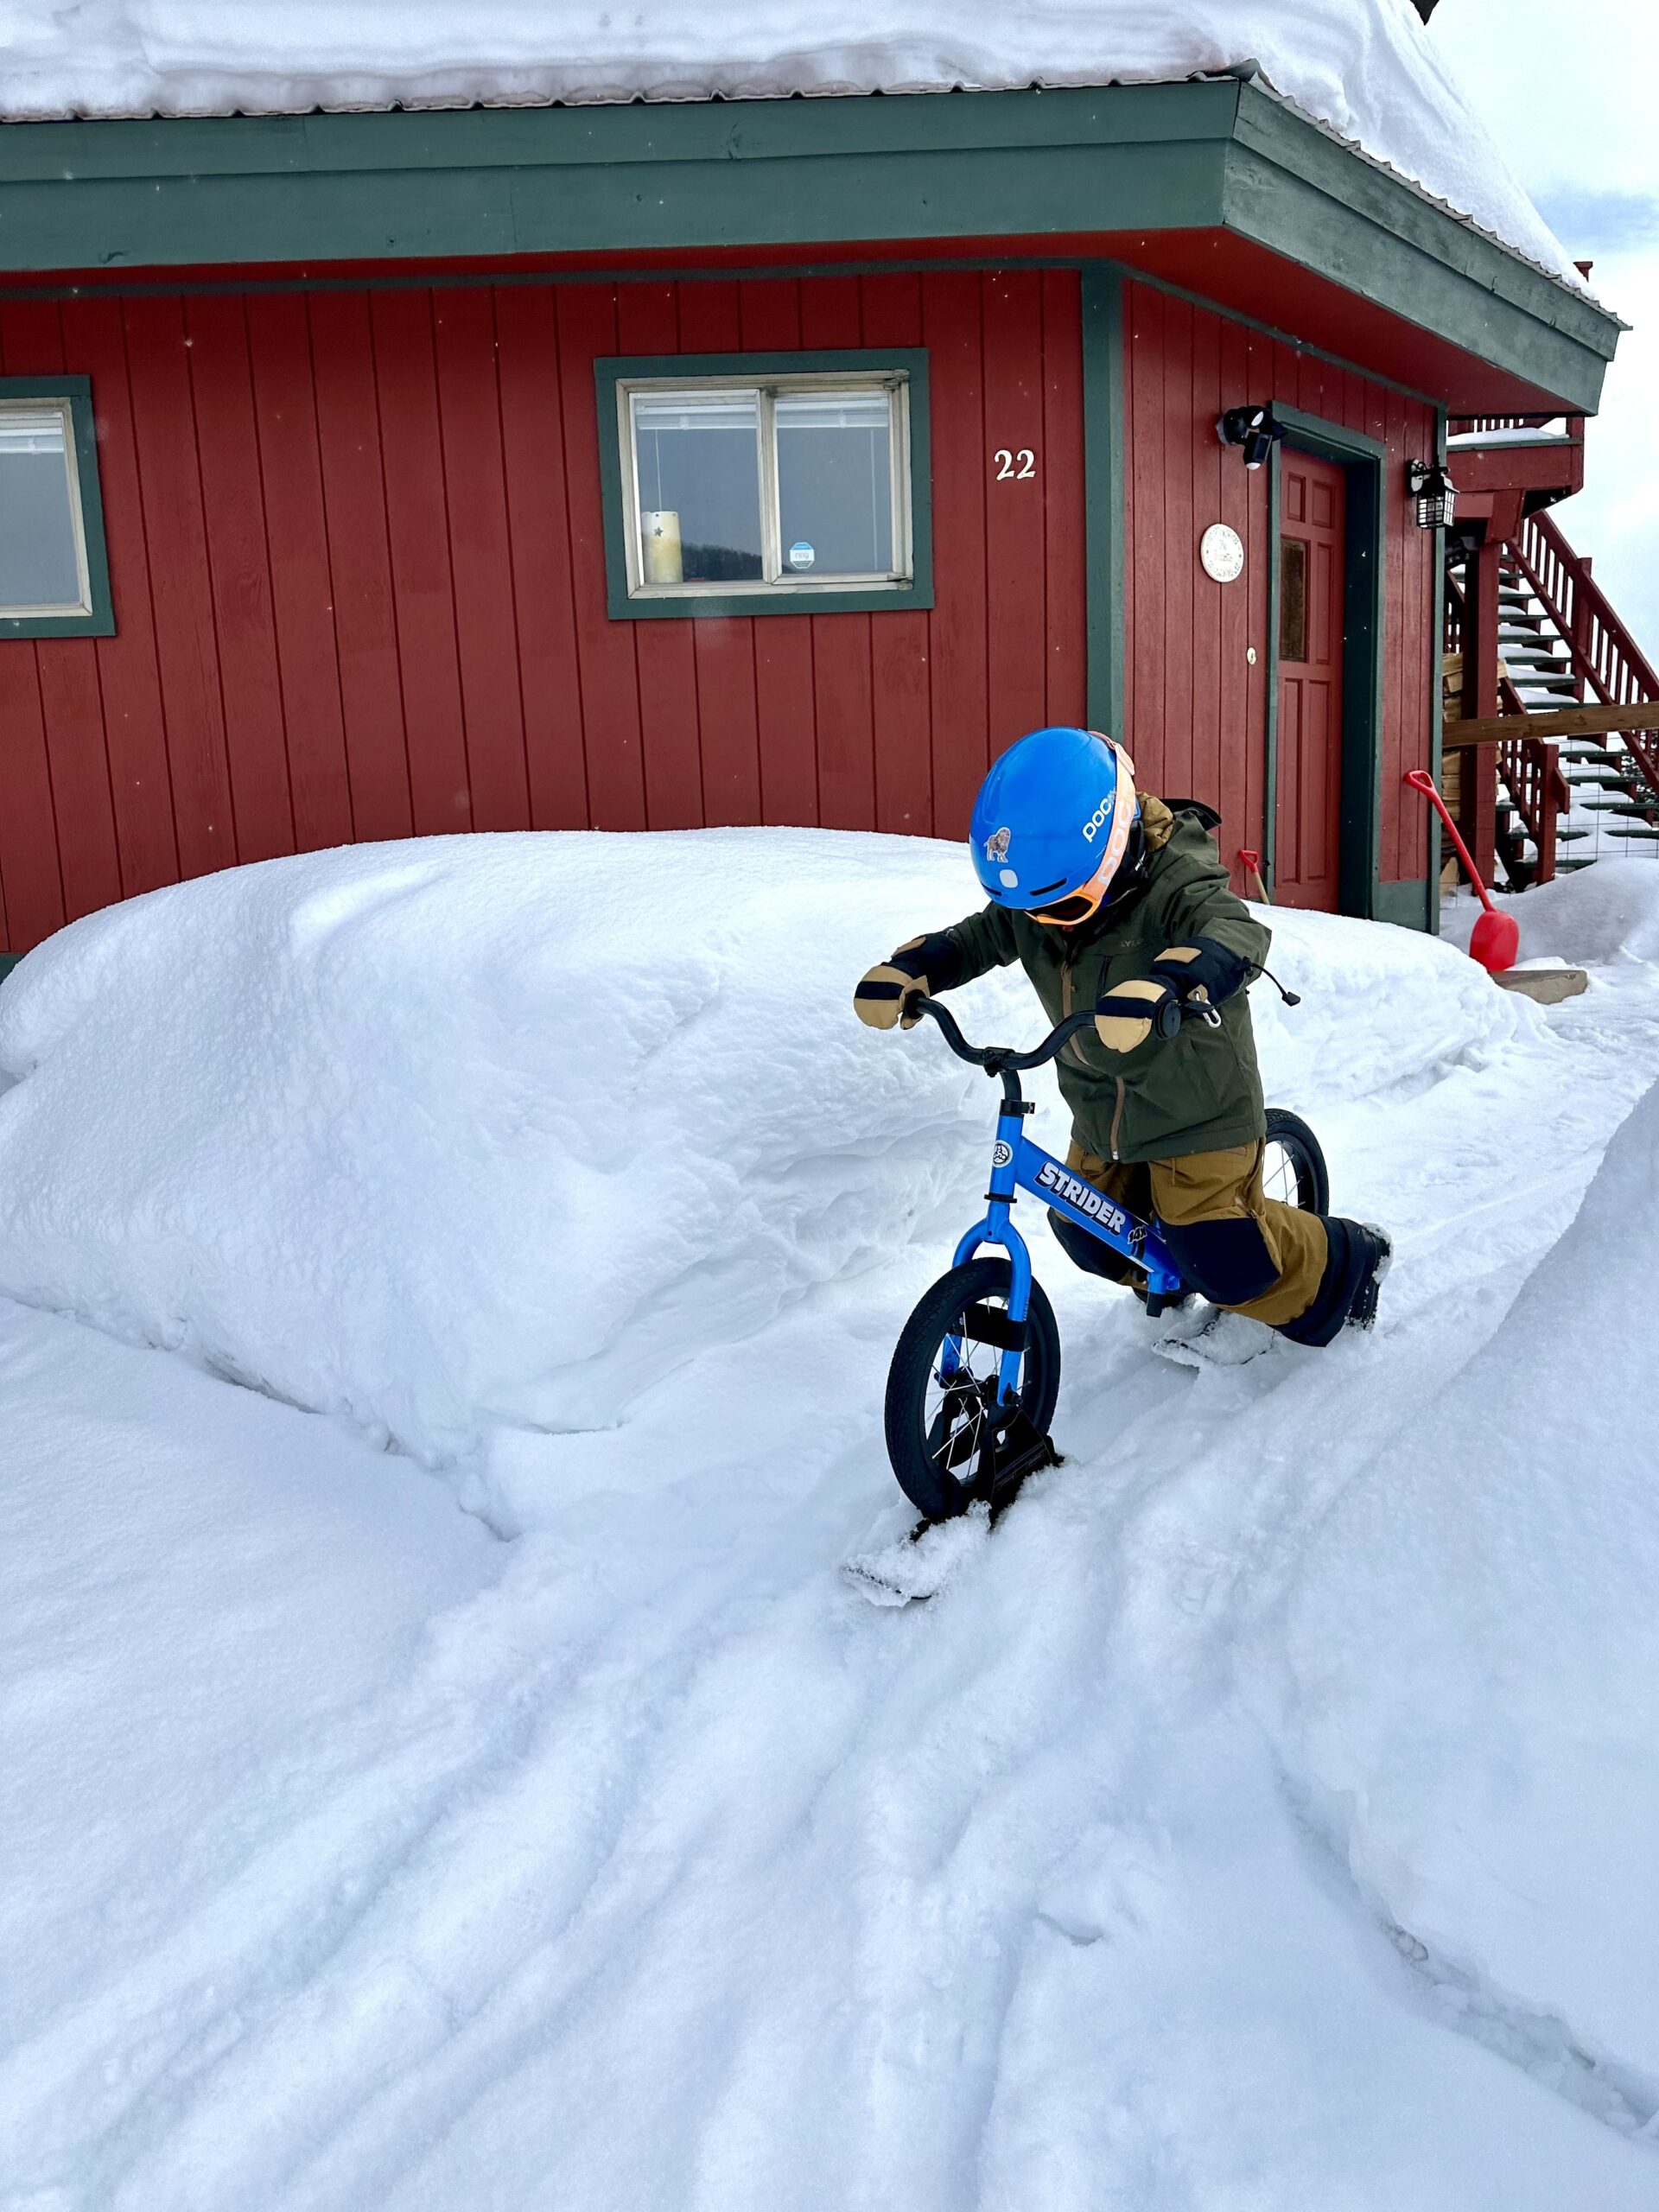
Kristin Sinnott (& Linden): When I first saw the Strider’s Snow Bike Kit, I kept thinking “$2.” If you don’t know this (albeit poor) reference, check out the classic ski film, Better Off Dead. It wasn’t until we moved to a house with a gently sloped driveway that the Snow Bike kit started to look appealing. And of course, once Linden saw it, he was very excited to try it.
My son is now on a 14x Strider so we have the corresponding Snow Bike kit, but there is also a kit for the 12x Strider. No tools are needed to add the skis to the bike and it only took 5-10 minutes to install. It probably would have gone even faster if my son hadn’t insisted on helping…
Once complete, my son tested it out by riding around on our carpet. We then took it outside and that’s when the fun really started. At first, the slope was a bit too gradual, so we made a ramp in one of the snow banks and off he went. It was fun to see him riding on the snow and I can only imagine how this will help his biking once the snow melts.

Two dollars, cash!
You undersold how good Kaenon’s Polarization is on the water for glare. They’re the only ones I’ll use on a boat.
These kids recommendations are gold; would love to have the team pull together key products by age. Good mitts are hard to find; I’m a total gear nerd and had never seen these Fischer One boots (already ordered). Attempting to be comprehensive would be an anti-goal, rather highlight gems.
The North Face Basecamp Gear Box is similar to Rux and has been a game changer for me. Store and travel in the same container is the way to go.
Luke, have you been touring in the Synthesizer with the foam gasket on? Fit issues not withstanding, does that not get too steamy inside? Or do you need to do something like push them out a little to let air in? Sounds like a cool concept, but I’m trying to figure out how they work in the real world
I am also interested, is the foam gasket easy to remove?
Burton Kids mitts have been great for us. Goretex version, have good features great price for kids growing fast. Columbia not bad either. BIggest challenge has been something with a good cuff either over or under sleeve with an all leather mitt to hold up better to hard abuse of wood, sledding, ice building (yes all the kids)…. Kinco ones that are suede-ish didn’t have good cuff and water sponges. I think the smallest version of the tougher kincos would work but now pressing 50$ or more hard sell for a season or two. Dexterity is key. The nylon columbias holding up ok actually for harder play burton saved for mtn use.