Two Basic Setups: 75mm vs. NTN
Until a few years ago, there was really only one modern boot and binding option available, called a 75mm system. This system uses a boot with a 75-milimeter wide “duckbill,” or flat plastic extension of the toe, which is placed into a metal toe piece in front of your foot. A cable extending from the toe piece of the binding, near the ball of your foot, latches to the heel of your boot, securing your foot to your ski while still allowing your heel to lift. For many years this system was the industry standard.

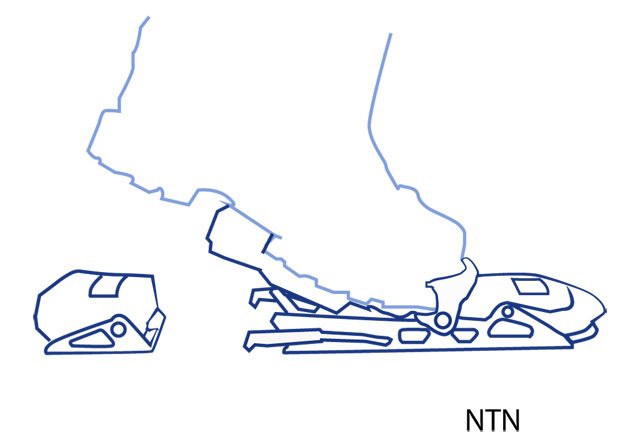
Then in 2007, the NTN (New Telemark Norm) system came along to shake things up. These boots and bindings work very differently than 75mm systems. You step into the binding and click into a plate underfoot that lifts with your boot as you make your turn. An NTN boot does not have the duckbill toe, and the cables going across the back of your heal are gone. They also have brakes that work just like alpine brakes. (75mm telemark bindings usually do not release when you fall, but on the rare chance you fall hard enough that they pop off, or if you don’t put the binding on correctly, they come with leashes that connect your bindings to your boots so your ski does not run away.) Here’s an illustration of the NTN system:

NTN is an exciting new system offering great downhill performance (check out BLISTER’s NTN review), but it’s much more complex and slightly heavier than the simplest 75mm options.
Another factor to consider is that NTN is the most expensive telemark binding on the market. The other various pros and cons of NTN versus 75mm are subtle and have a lot to do with your skiing style and ability. Learning more about the range of available bindings and how they work will help you decide which system is right for you.

A useful rundown. Also worth adding that there have been a couple of telebindings with inbuilt release capability (7TM and Voile CRB) and one make of DIN-rated release plates to fix bindings to (Telebry Safeout). For the older tele skier or one with injuries these can provide some peace of mind.
Kate, great article, really enjoyed it. thanks for taking the time to really talk in depth about the gear available to telemark. probably.the best in depth article I’ve seen recenly. i recently came back to telemarking after not skiing or boarding for many years.
Really enjoyed this article. Best advice for Tele skiers may have been at the end:
Final thoughts…
One last factor to consider is keeping your gear somewhat consistent, especially given the range of power and stiffness you’ll find among boots, skis, and bindings. If you go stiff with one of those elements, you more than likely need to upgrade your whole setup. For example, when I first got my K2 Hellbents, I was still skiing on a Scarpa T2 boot, which is pretty soft. I had a hard time controlling such a big ski with such soft boots. I upgraded my boots to a stiffer T Race and had a much better time. Bindings work the same way. Your stiff T Race boots and a fat heavy ski will do you no good if you are still rocking a G3 cable binding.
Bindings, Always been the weak link. Now(.2018) some bindings can handle alpine skis with a stiff tele boot.