Intro
Most of our reviews are pretty long — and take a long time to produce — because we want to provide enough info for you to determine whether the gear we tested will work well for you.
But we get asked to check out an increasingly wide range of products, and sometimes, we just want to tell you about something we’ve been using and loving lately.
That’s where this monthly series — Stuff We Like — comes in. It’s where we keep you current on a broad range of things we’re digging. Check out this month’s submissions, and let us know if there’s any gear you’ve been loving!
Intuition Downhill Tongue Dual Density 12 mm Boot Liners
MSRP: $210 USD
Zack Henderson: I’m a long-time fan of Intuition liners, having run their older Tour Wrap liners in my Tecnica Cochise 120 ski boots for years as a means of dropping weight and adding comfort over the stock liners. I have a combination of narrow feet, tall arches, a low-ish instep, and skinny ankles and calves that can cause headaches for boot fit, but the Intuition Tour Wrap liners (along with some heel lifts and custom insoles) have given me a pretty dreamy boot fit.
I’m both a skier and a snowboarder and while snowboard boots are immensely comfortable in comparison, they often run too wide for me. I found the Salomon Dialogue Lace to offer the best fit for me, but they’re softer than I would like, and the floppy stock liner wasn’t doing them any favors in that department. So when I had the opportunity to try some of Intuition’s latest liners in those boots, I jumped at the chance.
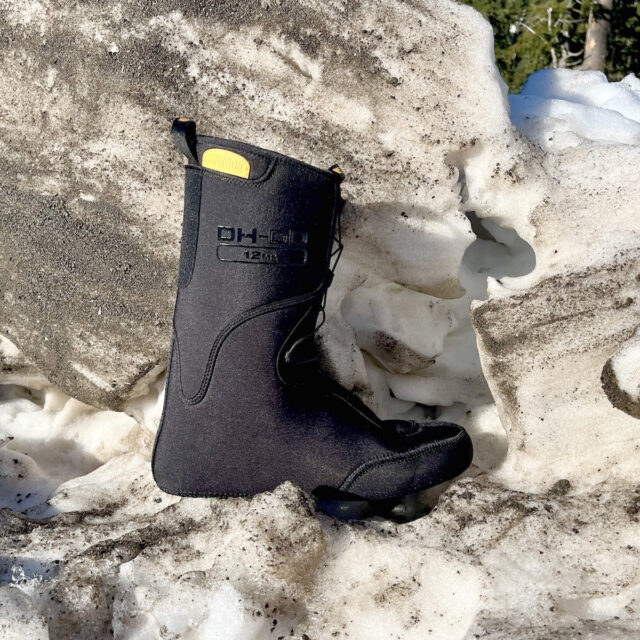
Using Intuition’s Liner Selector on their website gave me a couple of recommended options, and I first opted for the Intuition Downhill High Density Wrap liner in the 12 mm thickness. Upon receiving them, I couldn’t get them to fit nicely with my boots — even with a heat mold, the overlapping high-density foam at the instep took up too much space to fit into my boots. After some consultation with the folks at Intuition, their suggestion was to go with the Downhill Tongue Dual Density liner in a 12 mm thickness (DHT-DD12, for short).
Using Intuition’s at-home fit kit, I was able to get an absolutely dialed fit with the DHT-DD12. They slipped right into my Dialogue Lace boots without a fuss, and in combination with some Sidas Winter 3Feet High insoles, my feet were absolutely locked in without any pinch points. While the firmer foam of the Intuition liners helped with that more solid fit, the biggest improvement was how the DHT-DD12s improved the flex pattern of my boots. Thanks in part to a snugger fit around my calves, the edge-to-edge response was dramatically improved, and the stiffer foam of the DHT-DD12 helped to make my slightly-too-soft boots feel stiffer and more direct. It was an immediate and very noticeable performance upgrade, with better comfort as the cherry on top.
It seems that it’s much more common to see folks using aftermarket liners in the ski world, but based on my experience with Intuition’s DHT-DD12 liners, there’s a lot of value to be added for snowboarders, too. The DHT-DD12s have delivered a better fit and better performance through my many days of riding since I received them — they’re a new must-have for my snowboarding setup.
7mesh Chilco Vest
MSRP: $160 USD
Zack Henderson: As someone who struggles to balance my body temperature when exercising hard, I’m constantly stuck weighing just how far I need to take the “be bold, start cold” approach when it’s cold and windy. I’ve increasingly gravitated towards vests for the balance of core warmth that they provide without being bulky, and the 7mesh Chilco Vest is the best I’ve come across so far.
I’ve been rocking my Chilco Vest for over two seasons now, and it’s in constant rotation from late fall through early spring. 7mesh’s WTV 300 fabric has a rather soft, high-loft fleece material on the inside with a stretchy, air-permeable face, and it does a remarkably good job of breathing well and wicking sweat while still providing some measure of wind protection. It doesn’t offer much protection in wet weather, outside of shedding a light mist / snow, but the wicking properties and fairly form-fitting pattern are good enough that it never feels waterlogged or saggy, even when it’s really wet out.
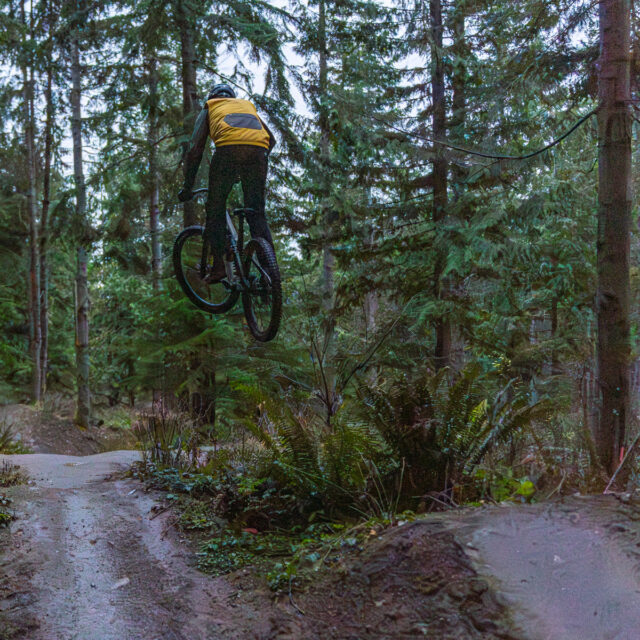
7mesh has nailed a lot of the other details for cycling, too. Rather than hand pockets, there’s a single pocket across the lower back that can hold onto snacks or smaller items (I’ll often throw in some extra gloves), but the best part is the “StashSystem” straps hidden inside. Should you want to shed the vest, simply turn the pocket inside out and pack it down — there are three straps inside that allow you to clip the vest to your bars or top tube. The StashSystem straps mean I don’t need to carry a bigger bag for stashing away my outerwear, and I wish all weather-resistant cycling outerwear came with this feature.
Tumblehome Outdoors ZipStow 6
MSRP: $55 USD
Dylan Wood: Tumblehome Outdoors makes handmade river bags that are purpose-built for stand-up paddleboarding, canoeing, kayaking, rafting, coolers, and more. I have really been enjoying their ZipStow 6, which adds valuable storage space to my whitewater kayaks.
The ZipStow 6 is a mesh bag with a burly, auto-locking zipper designed to only open when you want it to. It can be mounted using Tumblehome’s clever “Tumblelock” snap system, or by using the D-rings on all four corners of the bag. I have got a lot of use out of it by using some Tumblelock adhesives to mount it inside of my kayak, just under my leg. Here, it is in a great spot to store water-resistant items that I want to access without having to dig into my lap drybag. I’ve used the ZipStow 6 for my GoPro, sunscreen, paddling gloves, and more. I also found it great for storing a couple of canned drinks, or empty cans (I had a beer explode in my drybag once…never again). There are also a ton of different colors available, allowing you to customize your bag and make it unique.
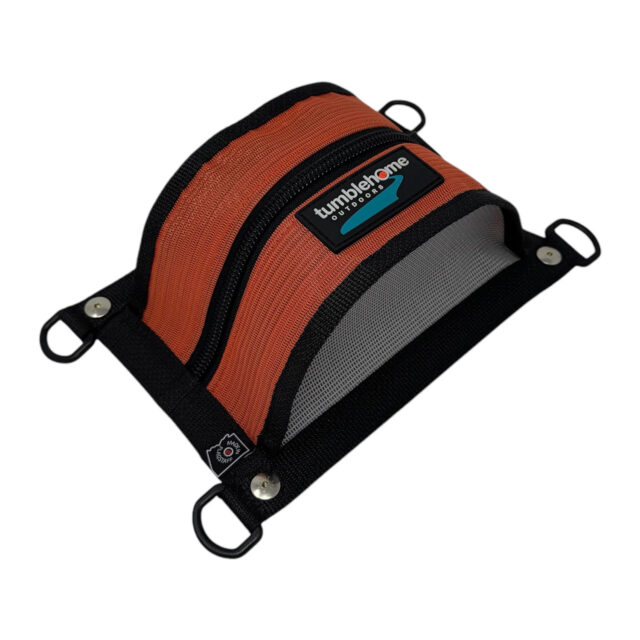
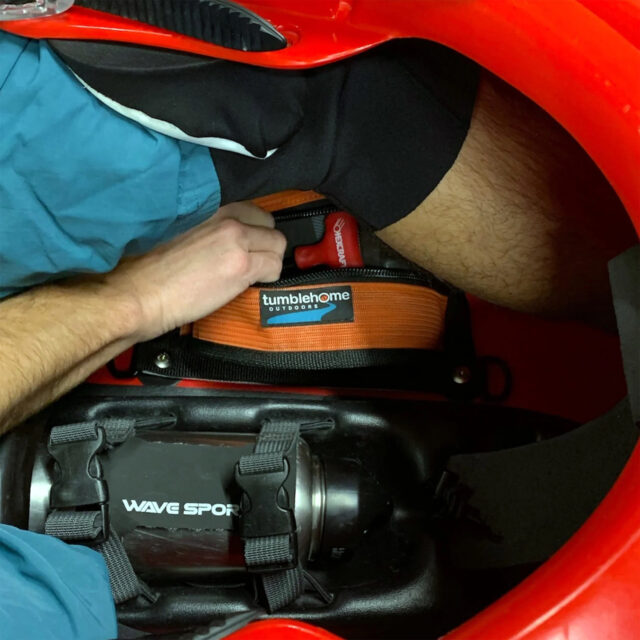
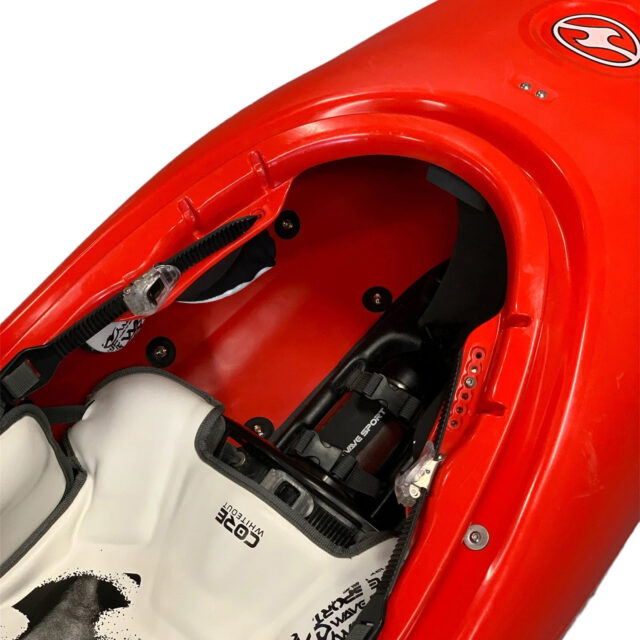
One of the best things about the ZipStow 6 is the Tumblelock system it is designed around. As the proud owner (or hoarder, depending on who you ask) of 5 whitewater kayaks, I can use a single ZipStow 6 in any of my boats, so long as I mount 4 Tumblelock adhesives ($8) in each boat. The bag attaches via special snaps that do take some practice to get on and off, but, subsequently, are also extremely resistant to getting ripped off when you don’t want them to. I took a class IV swim (at Lava Falls in the Grand Canyon, of all places) with the ZipStow 6 mounted to my Jackson Antix 2, and it stayed securely in place the whole time and has never popped off in any other circumstance. The bag is really well-made and seems like it will last me many years to come.
Tumblehome’s ZipStow 6 and their Tumblelock system are shaping up to be great products, and I could see so many uses for their ZipStow 6 beyond whitewater with a little creativity. It’s a really clever system, and I could see it solving some storage problems for a lot of people out there.
BCA Stash™ Pro 40-UL Backpack
MSRP: $300 USD
Kara Williard: I have spent the last couple of weeks relying heavily on the BCA Stash Pro 40-UL backpack, and it has proven a very effective backcountry pack for several reasons.
Between taking my AIARE Pro 1 course in Mt. Baker and then following that up with a hut trip in BC, my days in the backcountry have been anywhere from 8-10 hours long for two weeks in a row. Given that, I needed a pack that was large enough to carry plenty of gear, keep it organized and easy to access during exams, and versatile enough to allow me to switch up my load and make plenty of uphill to downhill transitions throughout the day.
The BCA Stash Pro 40-UL is BCA’s newest design and is generally lighter and more mountaineering-oriented than some of their other models. I’ve spent quite a bit of time with BCA’s Stash 32 over the past few seasons and really enjoyed it, but I needed something a bit bigger for the recent objectives / trips. The Stash Pro 40-UL was the perfect backpack for these occasions. The BCA Stash Pro 40-UL is, as the name suggests, a lightweight design (about 2.6 lbs / 1200 g), but I have been impressed by how well-featured this backpack is.
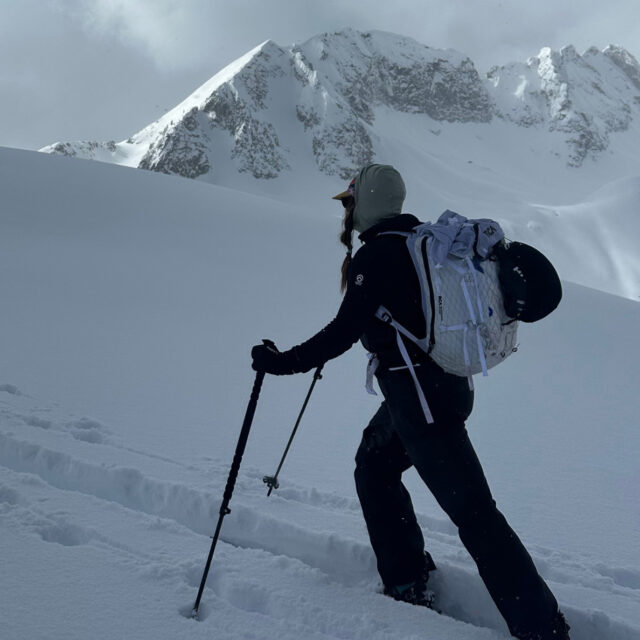
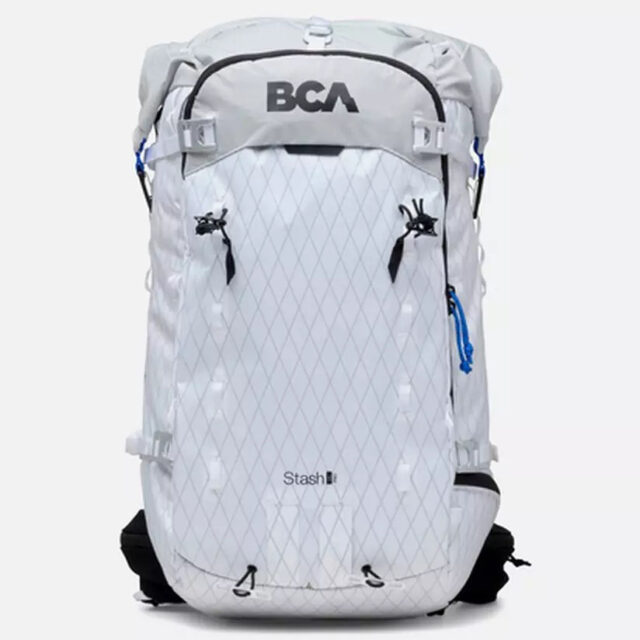
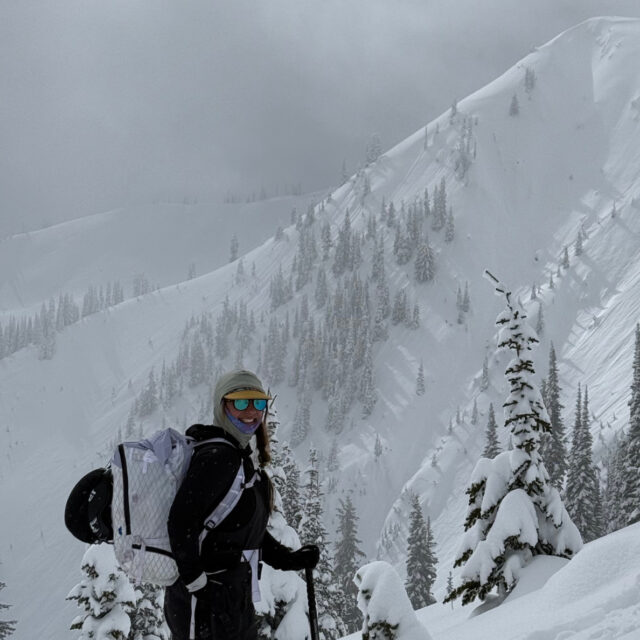
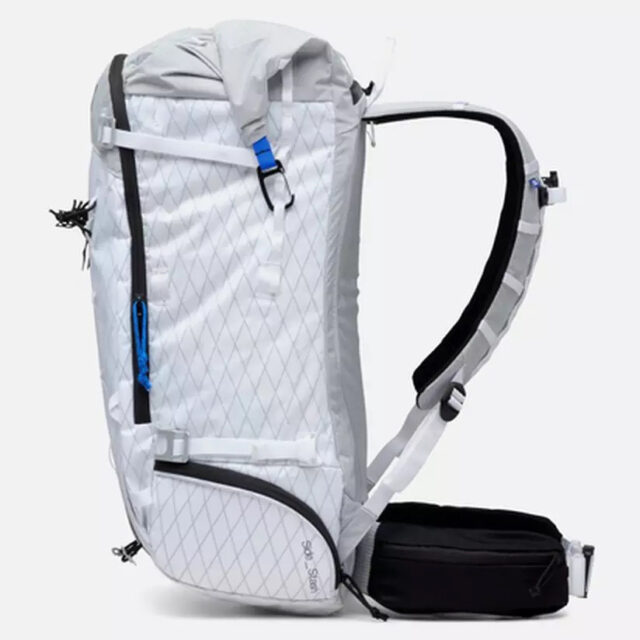
Some of the standouts include a dedicated pocket for tools such as a shovel, probe, and snow saw; a side-access zipper to reach the main compartment without having to undo the roll-top; easily accessible “Side Stash” pocket that can be used as a separate compartment and is easily accessible while wearing the pack; dual hip-belt pockets; a fleece-lined goggle / sunglasses compartment; plenty of options for carrying skis or board; and a removable external helmet carry. There are also tons of compressible straps on the outside to help carry items, including straps for ice axes, ski poles, and more.
As I mentioned up top, my recent days in the backcountry have been quite long. I have also found myself carrying a ton of gear to deal with really wet days, cold temperatures, needing plenty of food and water, etc. So, I needed to carry plenty of stuff, but I’m not a fan of having it all jumbled together in one massive pocket. The Stash 40-UL has been a great solution so far. I rarely found myself having to search for what I needed, and it was extremely easy to access my most needed items via the side-zipper access. The roll-top design also allows for some adaptability in terms of overall volume, depending on how much I need to carry for the day, and that plus the highly water-resistant X-Pac main fabric has kept the gear inside nice and dry.
I’ve also been quite impressed with how comfortable the Stash 40-UL is. Its hip belt is low-profile but does a good job of distributing weight. The back paneling is molded and has kept my back feeling good even with the pack fully loaded, and I felt the M/L size was plenty adjustable to work for my 5’9” frame.
Overall, the BCA Stash 40-UL has been spacious enough for long days, it still keeps my gear easily accessible, and it doesn’t hurt that it’s on the lighter end of the spectrum for this class.
Wolf Tooth ShiftMount
MSRP: $30-40 USD
David Golay: My opinions on integrated control mounts are a matter of public record, and while I gave Wolf Tooth a shout-out for offering some (on-paper) promising solutions in that linked article, it took me a while to get around to trying them.
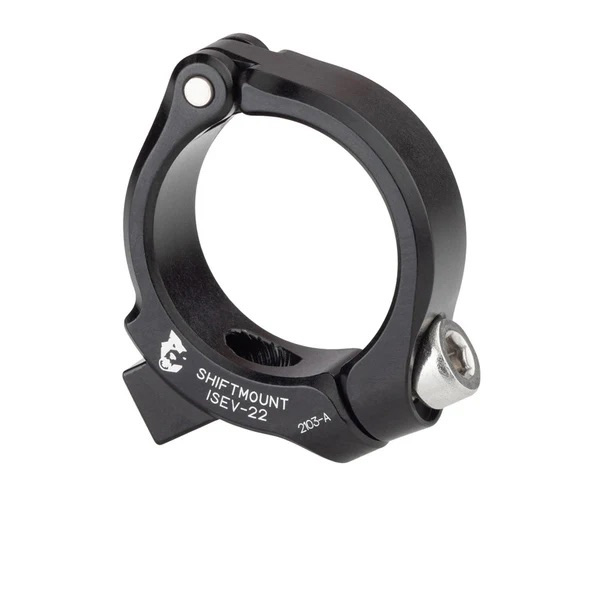
And, well, I haven’t tried all the variants, but the one I’ve found the most useful for my needs is the I-Spec EV to 22.2 mm clamp offering. It does exactly what I want it to — namely, let me mount a Shimano I-Spec EV shifter on its own, independently of the brake lever.
I stand by my take that integrated controls just make for a minefield of compatibility issues (especially with Shimano’s parts because they’ve repeatedly changed the mounting standard). They also tend to make it harder to find replacement parts in a pinch, but the bigger issue for my needs is that I can’t position the shifter exactly where I want it with Shimano’s integrated I-Spec EV system. I’ve got big hands with long digits, and my optimal control configuration puts the shifter and dropper lever quite far inboard of the brake lever clamp with most combinations.
I can make SRAM’s Matchmaker X system work for me by swapping the mounting brackets left to right so that they’re offset inboard of the brake lever rather than outboard of it. Still, the advent of Transmission and its Pod Controllers (which use a different mounting system) means that I get a lot of review bikes with a Pod Control on the right side, and a regular Matchmaker X integrated clamp on the left. In that case, I can’t just swap the brackets side by side, and I need to keep a pile of “right” brackets to use on the left side of those bikes.
Shimano’s I-Spec EV setup doesn’t even offer the ability to swap brackets in the same way, and I simply can’t move the shifter as far inboard as I’d like to. Enter the Wolf Tooth ShiftMount. It’s simply a thin, low-profile, standalone clamp for an I-Spec EV shifter (or dropper lever), and it does its job nicely.
Wolf Tooth also makes a bunch of ShiftMount variants for folks who want to mix and match integrated clamp standards in ways that the OE brands don’t support (e.g., a Matchmaker X brake with an I-Spec EV shifter and a whole bunch of other combinations). That’s great, too, and could potentially save some folks a bunch of money / headaches in navigating various compatibility issues, but I really just want the option to separate all of my controls. Wolf Tooth has me covered.
Long Lost Love
MSRP: Priceless
David Golay: Getting reunited with an old flame who you’d fallen out of touch with and immediately hitting it off again is probably great. I haven’t had that experience in a romantic context; here, I’m talking about the We Are One Arrival.
I really, really clicked with the Arrival when I reviewed it a few years back, but I couldn’t quite justify picking one up for myself for several reasons. It was expensive. The Super Boost rear end and unguided internal cable routing are substantial inconveniences, especially as a parts-testing platform. And I was already feeling like I didn’t get to ride my personal bikes as much as I’d like, given my slate of review bikes, so adding another one to the mix didn’t make sense.
Fast forward to about eight weeks ago, when a friend sent me a link to a frame for sale locally at a very good price. I was immediately tempted. Then I talked myself down from that ledge. And then, in a moment of weakness, I bought it.
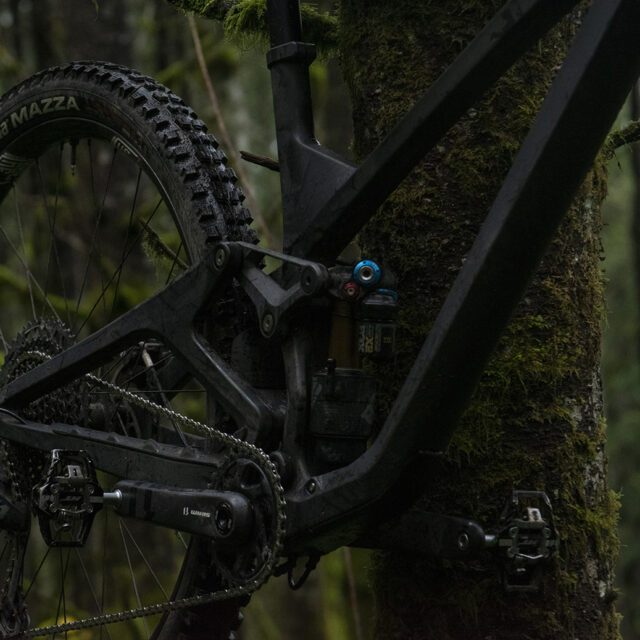
While I was waiting to round up the final parts to build it up — most significantly a Super Boost rear hub, where I opted for a Project321 G3 — I started to be wracked by doubts. Sure, I loved the Arrival when I reviewed it all those years ago, but my preferences for bike setup and fit have evolved substantially since then. Would I still love the Arrival as much as I remembered? Would my decision to size up to the SZ3 from the SZ2 that I reviewed be the right call to account for my evolved preferences? Was I being stupid in buying a bike that’s now out of production? I really wasn’t sure.
And then I got my first ride on my Arrival, just a few hours ago as of writing this. And it’s still great. I don’t have the setup dialed yet, I don’t yet fully trust the new front tire I’m testing on it, especially in the very wet prevailing conditions around here, and I’ve got a massive slate of review parts that I’ll be cycling through the Arrival in the weeks and months to come. But I’m already feeling the magic back, and I’m confident that will only grow as I fine-tune the setup and get reacclimated to the Arrival.
I can’t share a photo of the new bike yet since it’s got a ton of embargoed stuff bolted to it (seriously, stay tuned to the site — there’s so much new stuff coming), but you’ll be seeing a lot more of it in due time. This one’s a keeper.
Luke Koppa: I’ll just add that I had a similar experience when I got back on the Rossignol Sender Free 118 a couple of weeks ago. I’m finalizing that review and will be posting it soon, so I’ll have a lot more to say, but like David, I’d just like to say that it’s really nice to get back with something you loved and not be disappointed. And I mean this in a totally platonic sense… right?
Smith Summit Helmet
MSRP: $235 USD
Jed Doane: We’ve featured Smith’s Summit helmet in our Winter Buyer’s Guide in the past, but I thought I’d include it again here as a great option for a touring helmet. I switched from my previous touring option, the Pret Fury X and I’ve been very impressed.
The Summit is triple-certified: EN 12492 (European certification for mountaineering helmets), EN 1077B (European certification for ski helmets), and ASTM F2040 (American certification for ski helmets). For those doing couloir skiing or, like myself, riding underneath crumbly rocks, that mountaineering certification is probably worth the investment, and it doesn’t come at the price of, ahem, looking more like a climber than a skier. The Summit features Smith’s top-of-the-line Koroyd material, which is essentially a collapsible plastic matrix that still allows for ventilation. The shell is made of a more durable plastic on the top with a lighter material on the bottom, and the MIPS system is standard on all Summit helmets.
I was nervous about the lack of ear pads at first — I’ve never loved wearing beanies under helmets, and don’t love the way that goggles can sit without ear pads. After several months of use, I’ve been pleasantly surprised with the versatility that the lack of ear pads offers. If I’m skinning quick laps, it’s very easy to wear a balaclava on the way down, slip it off my head at the bottom, and skin up with the helmet on (I don’t have a very sweaty head). The lack of ear pads and insulation also makes it easy to layer for different conditions, which is nice — I often found that I could get very hot when using other helmets with more traditional ear pads in warm conditions and have no way to temperature regulate. The Summit’s fixed ventilation is well-designed and allows for uphill travel while wearing the helmet, which has been very nice on shorter laps.
The Summit also has some nice features. The BOA fit system is nice and easy to adjust on the fly, even throughout the day when using different headwear underneath. I did use the headlamp routing during a sunset lap in the Tahoe backcountry and found that it wasn’t the easiest to get into, but once I did, my headlamp stayed put very nicely. I did miss the one-handed Fidlock magnetic strap buckle featured on other high-end helmets like the Smith Nexus and Pretty Fury X, but that’s more of a nicety than an essential feature.
Overall, the Summit is an awesome backcountry helmet. It’s light, comfortable, well-ventilated, and features a mountaineering certification. I wear it almost every day while touring.
Gear Totes
MSRP: $119 USD (Patagonia Black Hole) & $99.95 USD (Gregory Alpaca)
Kristin Sinnott: Regardless of the season, I am always walking to or from my car with multiple bags, my arms exhausted from trying to balance everything, and myself frustrated from this exercise day after day. From XC skiing to schlepping my son’s stuff (hockey, XC, alpine, snacks, etc) and packing for another cold day of spectating outdoor hockey practice, I’m always looking for better ways to keep things corralled. I’ve tried bags with separate compartments, big duffles, reusable grocery bags, and everything in between, but I’m always on the hunt for something better.
This past winter, I started using Gregory’s Alpaca Gear Basket 70 and Wide Mouth Case 25; more recently, I started using the Patagonia Black Hole Gear Tote 61L and the Gregory Alpaca Utility Tote 50. I still love the Gear Basket and Wide Mouth Case (and use them frequently), but they both have rigid sides. This makes them more ideal as gear “boxes,” but it’s harder to throw them over my shoulder or to carry them one-handed.
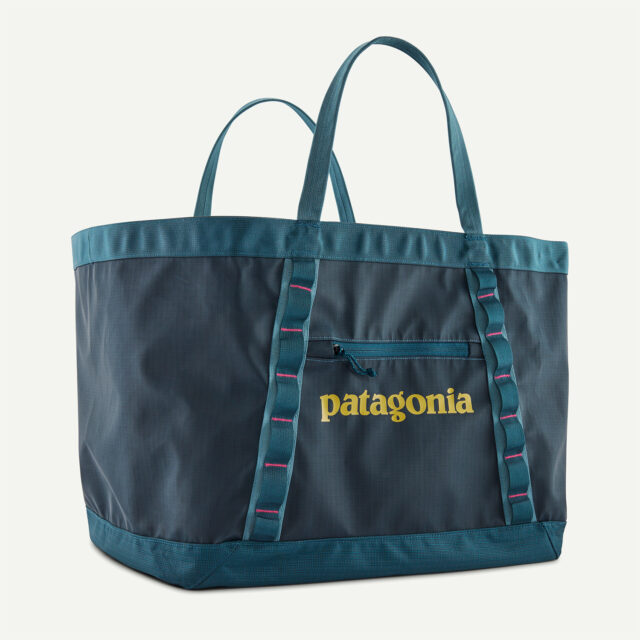
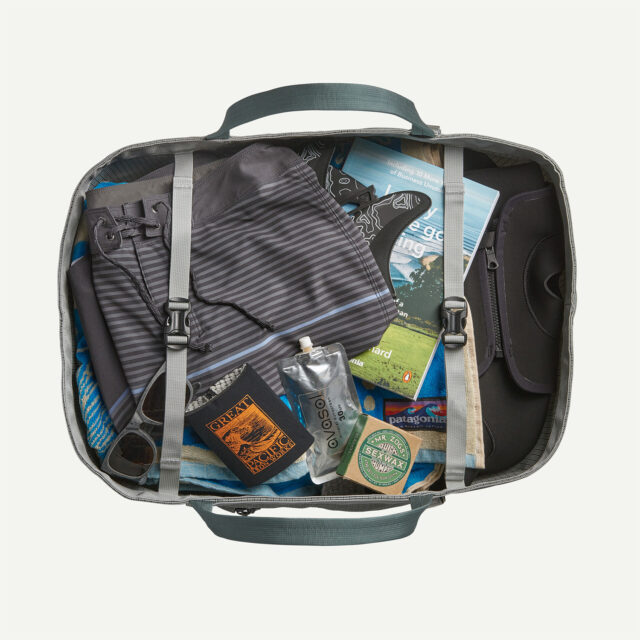
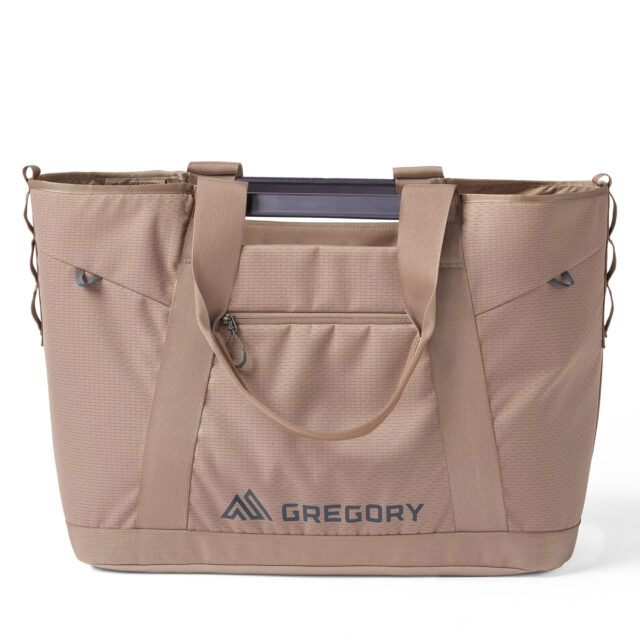
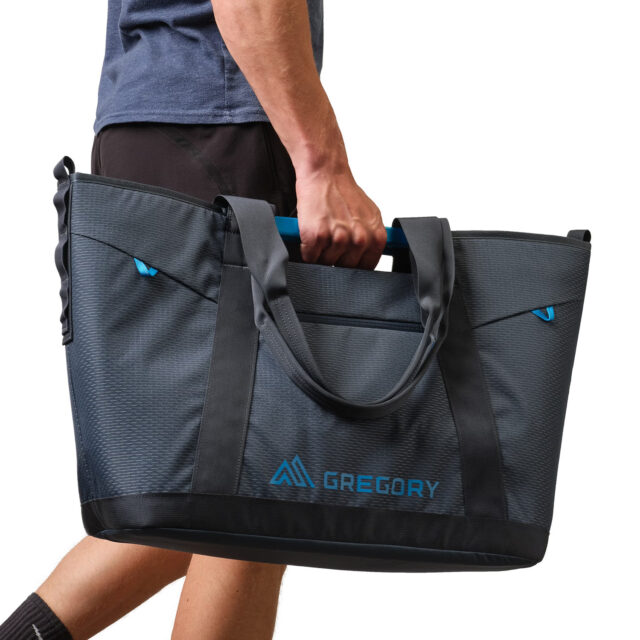
The Black Hole Gear Tote and Alpaca Utility Tote are soft-sided, have handles for one-handed carry, and are both minimalist by design. They don’t have a bunch of internal compartments to separate items, but they do have internal and external zippered pockets to store small bits like phones, keys, etc., and I’ve found that’s all I need most days. If I’m packing a bunch of smaller things and want to keep some items separate, I use a packing cube like the Gregory Alpaca Gear Pod.
The Black Hole Gear Tote packs down nicely when not in use. I find myself using it when I have a lot of gear – multiple puffy jackets, ski boots, lunch, etc. On a recent backcountry tour, I used the Gear Tote to corral everything I would need for the day but had yet to put on or pack in my backpack. It saved me from making multiple trips to / from the car. And I was able to quickly get ready for the day once we arrived at our destination. The Gear Tote also has internal straps to cinch down items and to keep the sides together. And when the straps aren’t used, the bag opens up really wide, so you can see everything inside pretty easily.
The Alpaca Utility Tote is more structured and has a few more internal pockets (including a water bottle holder), but, like the Black Hole Gear Tote, it can be used for a variety of adventures and activities. I reach for the Utility Tote when I have fewer bulky items. I have been using both Totes daily and I recommend checking them out if you’re constantly hauling gear like me.
Luke Koppa: I haven’t yet tried the Gregory version, but I have two of the Black Hole Gear Totes, and I use them on a weekly basis throughout the winter and almost daily during the warmer months. One serves as my wet-gear bag for fishing — it’s where my waders and wading boots spend most of their lives, as well as anything else I don’t want dripping all over my car. The other gets used for grocery trips (I’m a fan of making infrequent trips where I get a bunch of essentials all at once). It’s also recently been used a lot to shlep all my stinky ski apparel between Blister HQ and my washing machine. It’s not a complicated product, but I find a ton of use for it, and the burly, water-resistant fabric has held up perfectly over the past few years. For a much cheaper alternative, check out IKEA’s iconic blue bags — they’re not as durable (especially with hard items with pointy corners) and don’t carry as well when fully loaded, but they’re seriously good values at just a few dollars per bag.
GOREWEAR R5 Windstopper® Pants
MSRP: $160 USD (currently on sale for $112 USD)
Kristin Sinnott: In high school and college, I spent a good deal of time in the cross-country skiing world, and I loved it. One aspect I didn’t love was the ski pants.
At the time (many years ago), there were very few options on the market, and I found myself training in these horribly uncomfortable and ill-fitting XC ski pants. After college, my partner and I moved around a lot, and it’s been years (decades — eek) since I’ve spent a lot of time cross-country skiing. That changed when I moved to Crested Butte, and while I was super excited to cross-country ski again, I was determined to find better pants for skiing and dryland training. Thankfully, I found Gore’s R5 Windstopper Pants.
From cross-country skiing to mountain biking, trail running, hiking, and bike commuting, these Windstopper pants have been a staple of my wardrobe. As I’m writing this, I just got back from a fast and fun spring ski on our local Nordic trails and I’m still wearing the Windstopper pants.
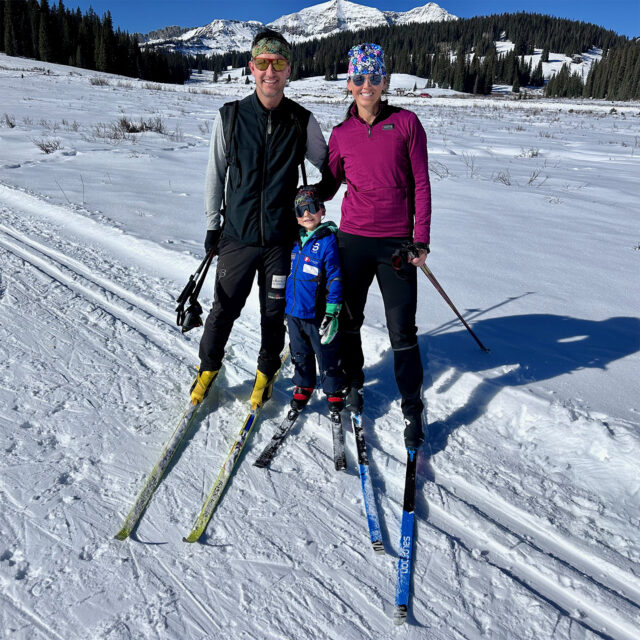
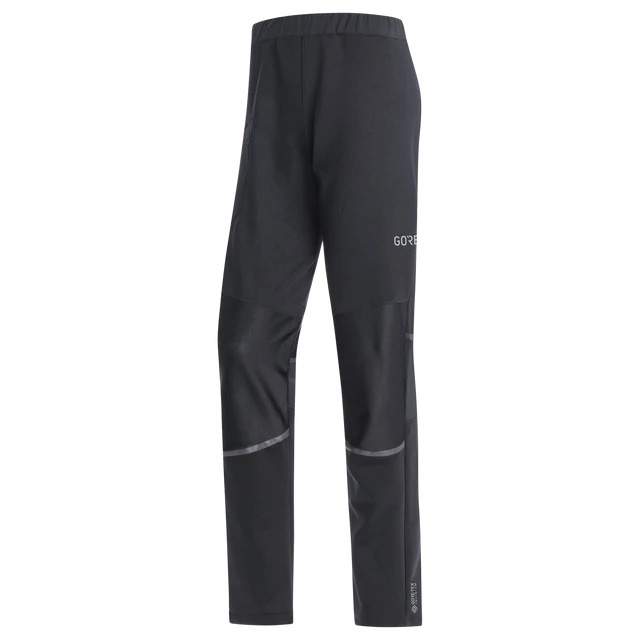
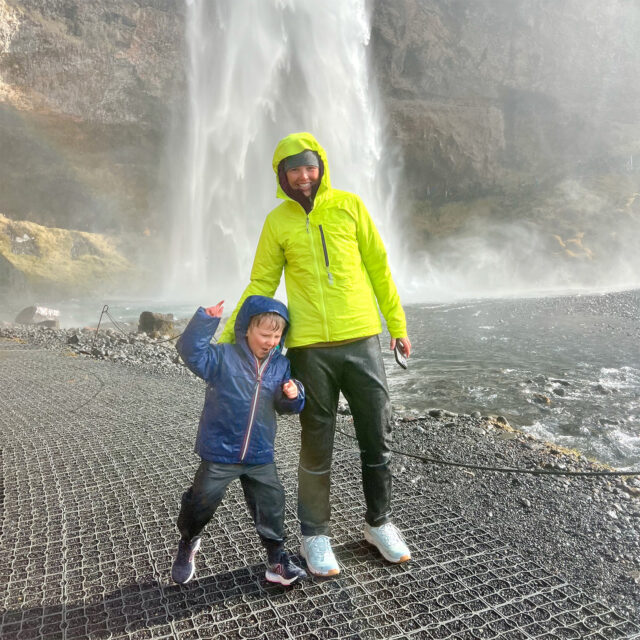
These softshell pants are loose fitting, windproof, water-resistant, breathable, fairly quick drying, and perhaps best of all — they’re just really comfortable. I initially ordered a size Small but promptly returned them for a size Medium. I’m 5’8”, 135 lbs / 173 cm, 61 kg and the Medium is comfortably loose fitting without being baggy. The pants have a wide elastic waistband and zippered pockets on the back and right leg, with the leg pocket being big enough for my phone. I wore these on cool, wet days of hiking and exploring in Ireland and Iceland this past spring break, on rainy commutes to town last fall, and for cool-weather runs all year. If you’re looking for an athletic pant that’s not skin-tight, still wind-proof, and that can be used for a variety of activities, I recommend checking out the G5 Windstopper Pant.
Yardsale Day Bag
MSRP: $139 USD
Noah Eckhouse: As an engineer, I’m always amazed by the opportunity for incremental improvement in everyday items. New materials, new manufacturing techniques, and new ideas can make traditional items seem new and fresh again.
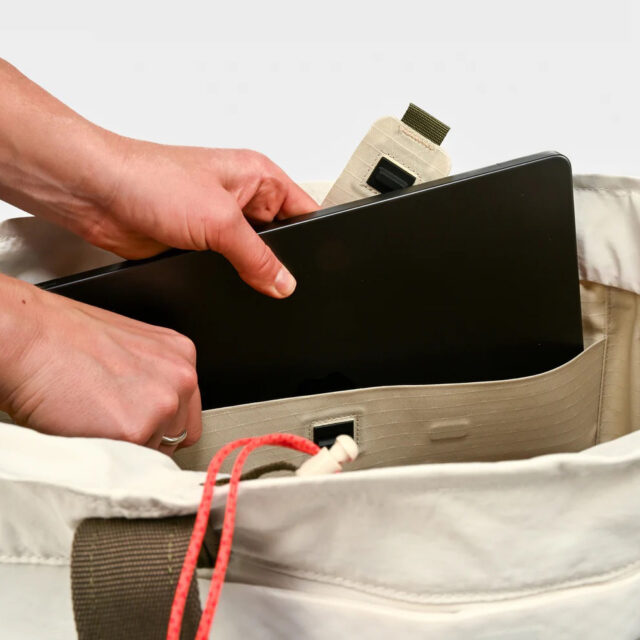
The Day Bag by Yardsale is just such a reimagining. Motivated by the messy schlep of gear into the base lodge, Yardsale’s founders (two scrappy ex-Apple product designers) contemplated what would make the process easier. Their answer was a waterproof shoulder bag with some distinct features: a separate helmet pocket, cinch-drawstring bag closure, a laptop sleeve, plus a few other features I will get to.
I had a chance to see this bag and hear the designer’s vision at last month’s Blister Summit. Then I got my hands on it for a month of spring season and travel. I can confirm it’s a winner.
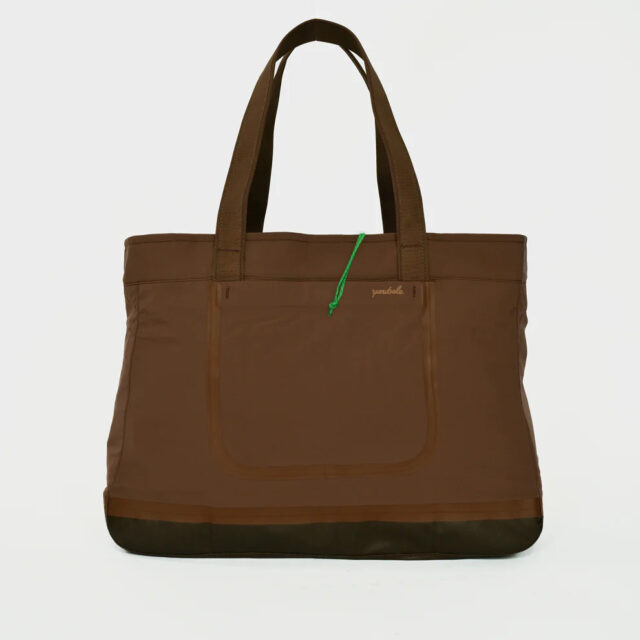
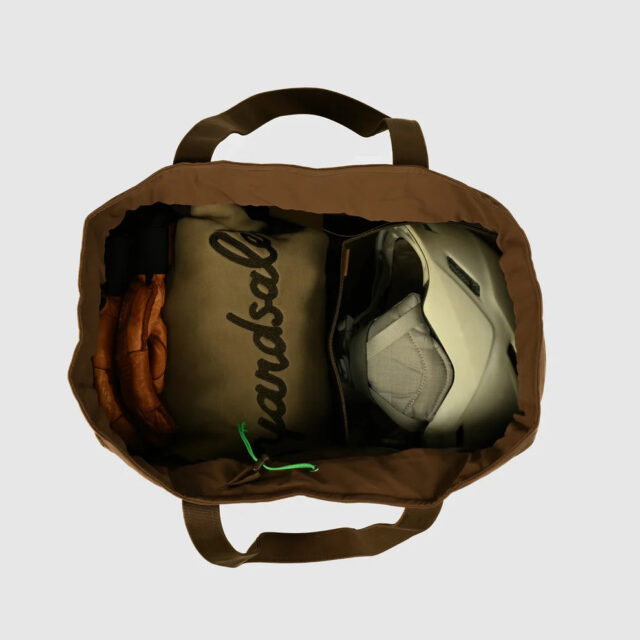
Why? First, the lightweight waterproof construction is way better than a large, bulky boot bag for lodge storage. Let’s face it: many of the environments a ski bag faces are skanky, damp locations. Think: floor of a lodge, back of a car, or snowy midwinter parking lot. Coupled with a very effective drawstring closure, my stuff was dry and secure.
And while this intrepid Blister reviewer doesn’t often carry his laptop for skiing, I appreciated the dedicated, padded laptop sleeve inside the bag. Some people need to treat remote work to its extreme, and I often see laptops in base areas being utilized for mid-day check-ins. Yardsale refers to this as “work from lodge,” and WFL is a real phenomenon these days.
The Day Bag has additional interior pockets for other goodies: lunch, snacks, battery packs, hand warmers, buffs, hats, etc. They also have interior magnetic latches to keep things organized. Works great at the supermarket, farmer’s market, and even liquor store!
Besides skiing, there are two other activities I’ve loved this bag for: flying and biking.
Have you ever tried to do a ski trip as a carry-on exercise? I have, many times, and the problem always comes down to helmets and goggles. Assuming I’m renting skis, I can fit my boots inside a carry-on and squeeze clothes and hat / gloves around the edges. I can wear my fleece and shell on the plane. But my helmet and goggles are usually banging on the outside of my backpack.
With the Day Bag, its internal sleeve holds a helmet and goggles securely inside, and its oh-so-useful “rollerboard” sleeve allows me to stack it on top of a roller bag. At 30 liters of total volume, it is large enough to handle my ski gear, laptop, and whatever else I’d have in my backpack for a day. As mentioned, it cinches tightly closed and slides over the handle of your roller bag, protecting your helmet and other possessions while only counting as your “one personal item.”
Bike gear has many of the same challenges as ski gear: helmet, shoes, snacks, tools, water bottle, etc. — often in a dirty or muddy environment. I think the Day Bag will play well here, too.
Peak Performance Vertical GTX Pro Jacket & Bibs
MSRP: TBD (won’t be cheap)
Luke Koppa: We recently started testing several new pieces from Peak Performance, a company that I’ve always had an eye on. Historically, the Swedish brand’s products haven’t been readily available in the States, but that’s changing, with significantly broader distribution starting in the fall of 2025. One of the kits we’ve been testing is the flagship Vertical GTX Pro, which uses the new PFAS-free “ePE” version of Gore-Tex Pro.
In short, this is a very high-end shell jacket + bib combo that’s meant to be the pinnacle of snowsports performance for the brand. I’m sure it won’t come cheap (MSRP’s haven’t been released but I’d guess somewhere around $800 per piece), but so far, it’s lived up to its flagship designation when it comes to features, finish, and overall quality.
For starters, I love all the zippers. They’re surprisingly easy to use, especially the extra-long underarm vents. I also love the dual exterior chest pockets (my preferred pocket layout for ski shells), and the dual horizontal hand pockets are nice for stashing gloves, skins, or a chairlift’s worth of canned beverages. There are also multiple internal pockets for smaller items and a removable powder skirt. The Bib comes with dual chest pockets, dual hand pockets, and a single thigh pocket.
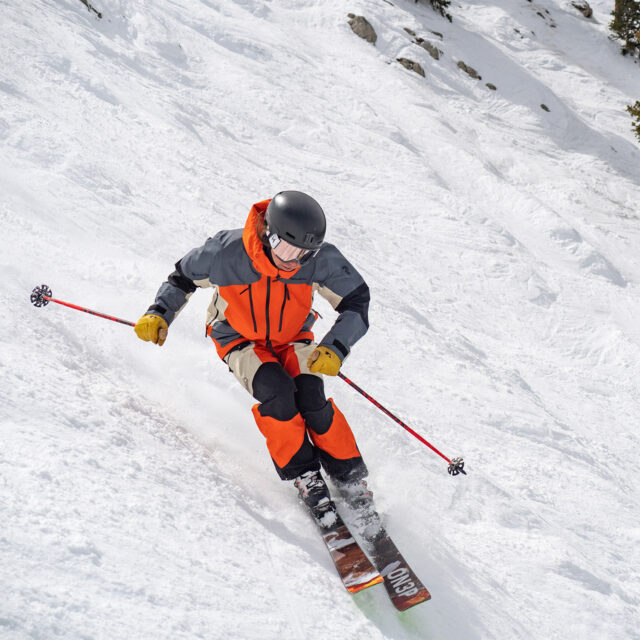
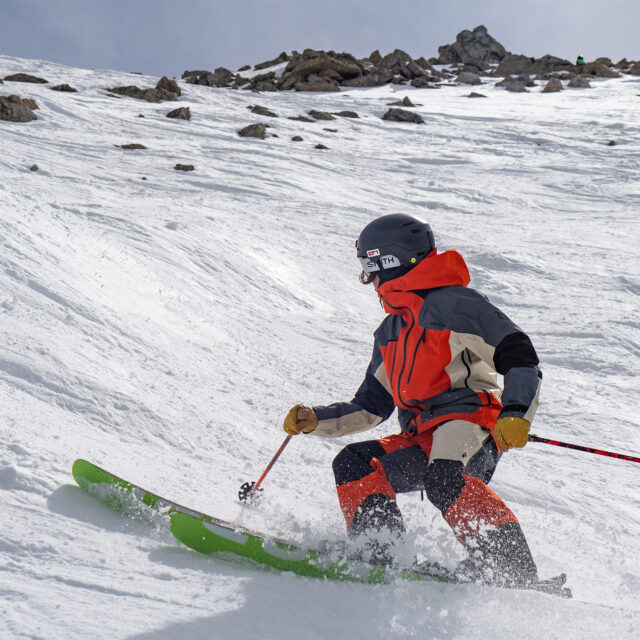
The fit is a pretty good summation of what I’d call a “freeride” cut. It’s moderately voluminous (neither very tight nor very baggy), but the jacket is long and has my favorite fit element — a tall cuff that stays up over my chin when I want it to. That’s complemented by the helmet-compatible hood, which features a sort of hinged brim that doesn’t dig into my helmet like so many shells do.
We recently started testing a handful of pieces that utilize the new ePE Gore-Tex Pro laminate, so we’re still in the early stages, but I’m pretty happy so far. Like the original Pro laminate, the new ePE version is on the stiffer / crinkly end of the spectrum, though I think the ePE version is a tad more supple. More importantly, so far, it’s been excellent in terms of weather resistance and pretty good in terms of breathability — again, this is after initial testing, but I’m not noticing any significant performance differences.
The version utilized on the Vertical GTX Pro kit uses a pretty lightweight ripstop face fabric (I’d guess somewhere around 40 to 80 denier?). Given that, I’m not sure how it will hold up to multiple 100-day seasons in the resort, but it’s held up great to a handful of crashes and scrapes against rocks and trees (it’s already taken several trips down Rambo…). But that also makes it a totally viable option for 50/50 use inside the resort and in the backcountry, especially if you live in a wetter climate (I often prefer a less water-resistant / more breathable shell for Colorado touring).
Finally, there’s the look. Personally, I’m a big fan of pairing the heavily color-blocked jacket with plain-black pants, or vice-versa. There’s no denying that the fully matching kit is eye-catching, but it’s just a bit much for my personal preferences. Overall, though, I really like the fit, fabric, and feature set of the Vertical GTX Pro kit, and it seems like a very competitive option against the other top brands in this category.
RMU Core Pack 25L
MSRP: $249 USD
Luke Koppa: We’ve reviewed a lot of RMU skis and several of their biking-oriented hip packs, but we only recently started testing some of their backpacks.
They make 15L, 25L, and 42L variants of their snowsports-oriented Core Pack, and the 25L version has been great so far. 25 to 30 liters tends to be the ideal volume for me when it comes to ski backpacks — enough to hold my camera gear, extra layers, food, water, etc., but not so big that I’m left with empty space in which my gear can bounce around.
The Core Pack 25L lets you access the main compartment via a full back-panel zipper or clamshell-style top zip. I usually have a camera cube in my pack if I’m skiing with one, so back-panel access is a must-have, and the one on the Core Pack works well — but I still like having multiple access options.
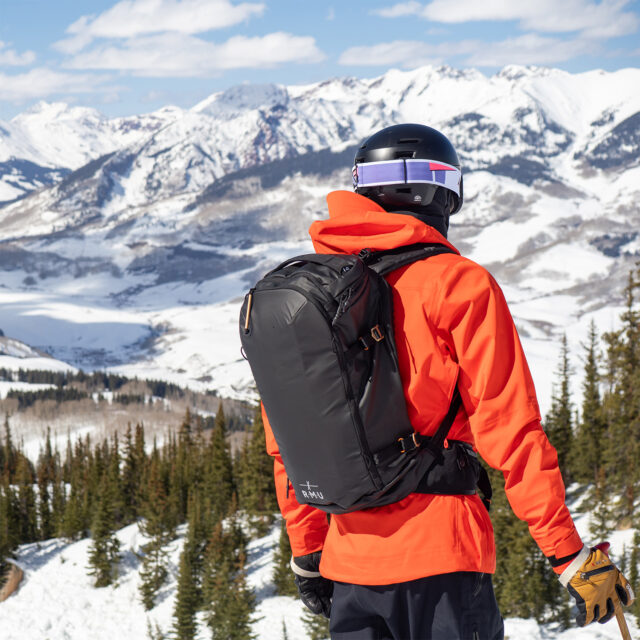
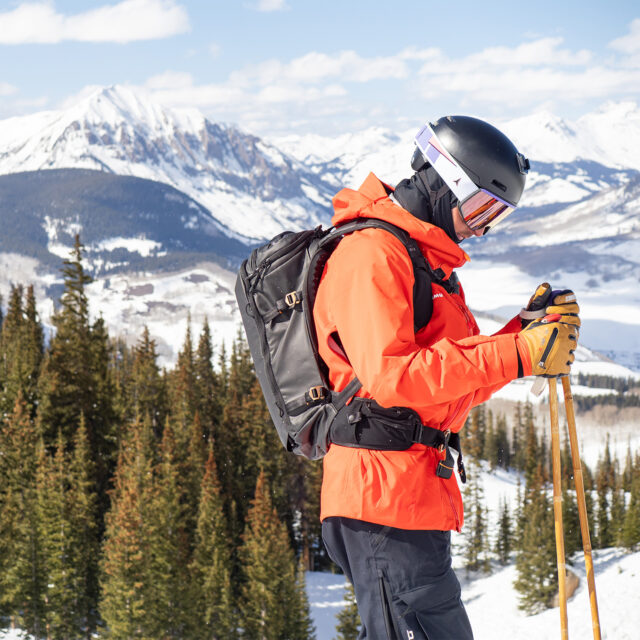
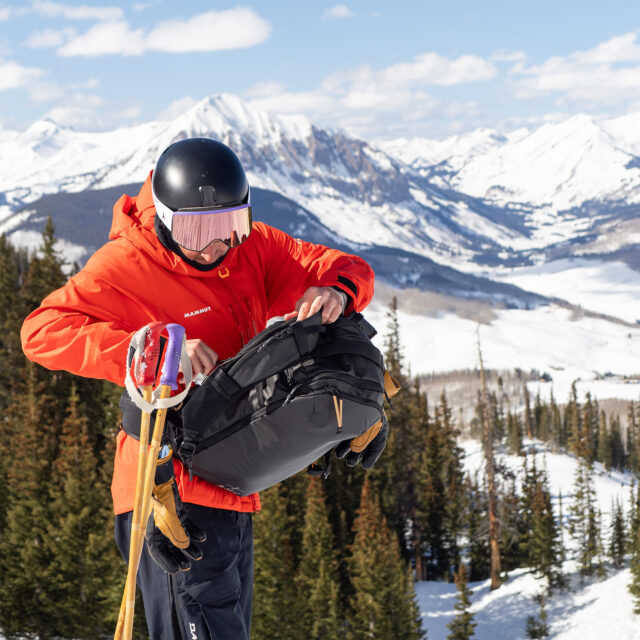
This pack also has a fleece-lined top pocket for goggles, sunglasses, etc., as well as a dedicated pocket on the face for avalanche gear and/or wet gear like skins. There’s also a stowable helmet carry on the face, dual compression straps on each side, dual hip-belt pockets, and options for A-frame and diagonal ski carry. Plus, it has stretch-mesh sleeves on the shoulder straps for small stuff, a small internal zippered pocket in the avy-tool pocket, and routing on the shoulder straps for a hydration tube and/or radio. There are a ton of pockets.
So, there should be enough organizational options to satisfy just about anyone, and I appreciate that, but I think what I’ve liked most about this pack is how well it carries while skiing. It’s quite low-profile overall and doesn’t shift very much once you snug it down.
Personally, I’m not a big fan of the metal buckle used on the Core Pack’s hip belt (or other packs that feature a similar closure). I like it in concept, but I’ve never gotten the hang of quickly closing or opening these types of buckles. In most cases, though, I just get around that by rarely undoing the buckle — if I need to access the back panel, I just undo the sternum strap and flip the whole pack around me (shoutout to Justin Bobb for teaching me this solution for packs with finicky belt buckles).
The Core Pack 25L doesn’t have dedicated attachments for more technical tools like ice axes, and its generous feature set + burly recycled fabric lead to a heavier weight of about 3.3 lb / 1500 g. So it’s not what I’d pick for fast-and-light excursions, but I know how well my roommate’s Core Pack has held up in the past several years of near-daily use, and I expect the latest version to fair just as well. If you want a rugged snow pack with tons of pockets and features, it’s definitely worth checking out.

If you aren’t already, you should test Stellar Equipment Shell 2.5 and Freeride 2.5 (their PFAS-free versions).
The Nemo double haul duffel/tote is to the Patagonia black hole what the black hole is to an Ikea bag. The alpine diaper bag of your dreams