
Intro
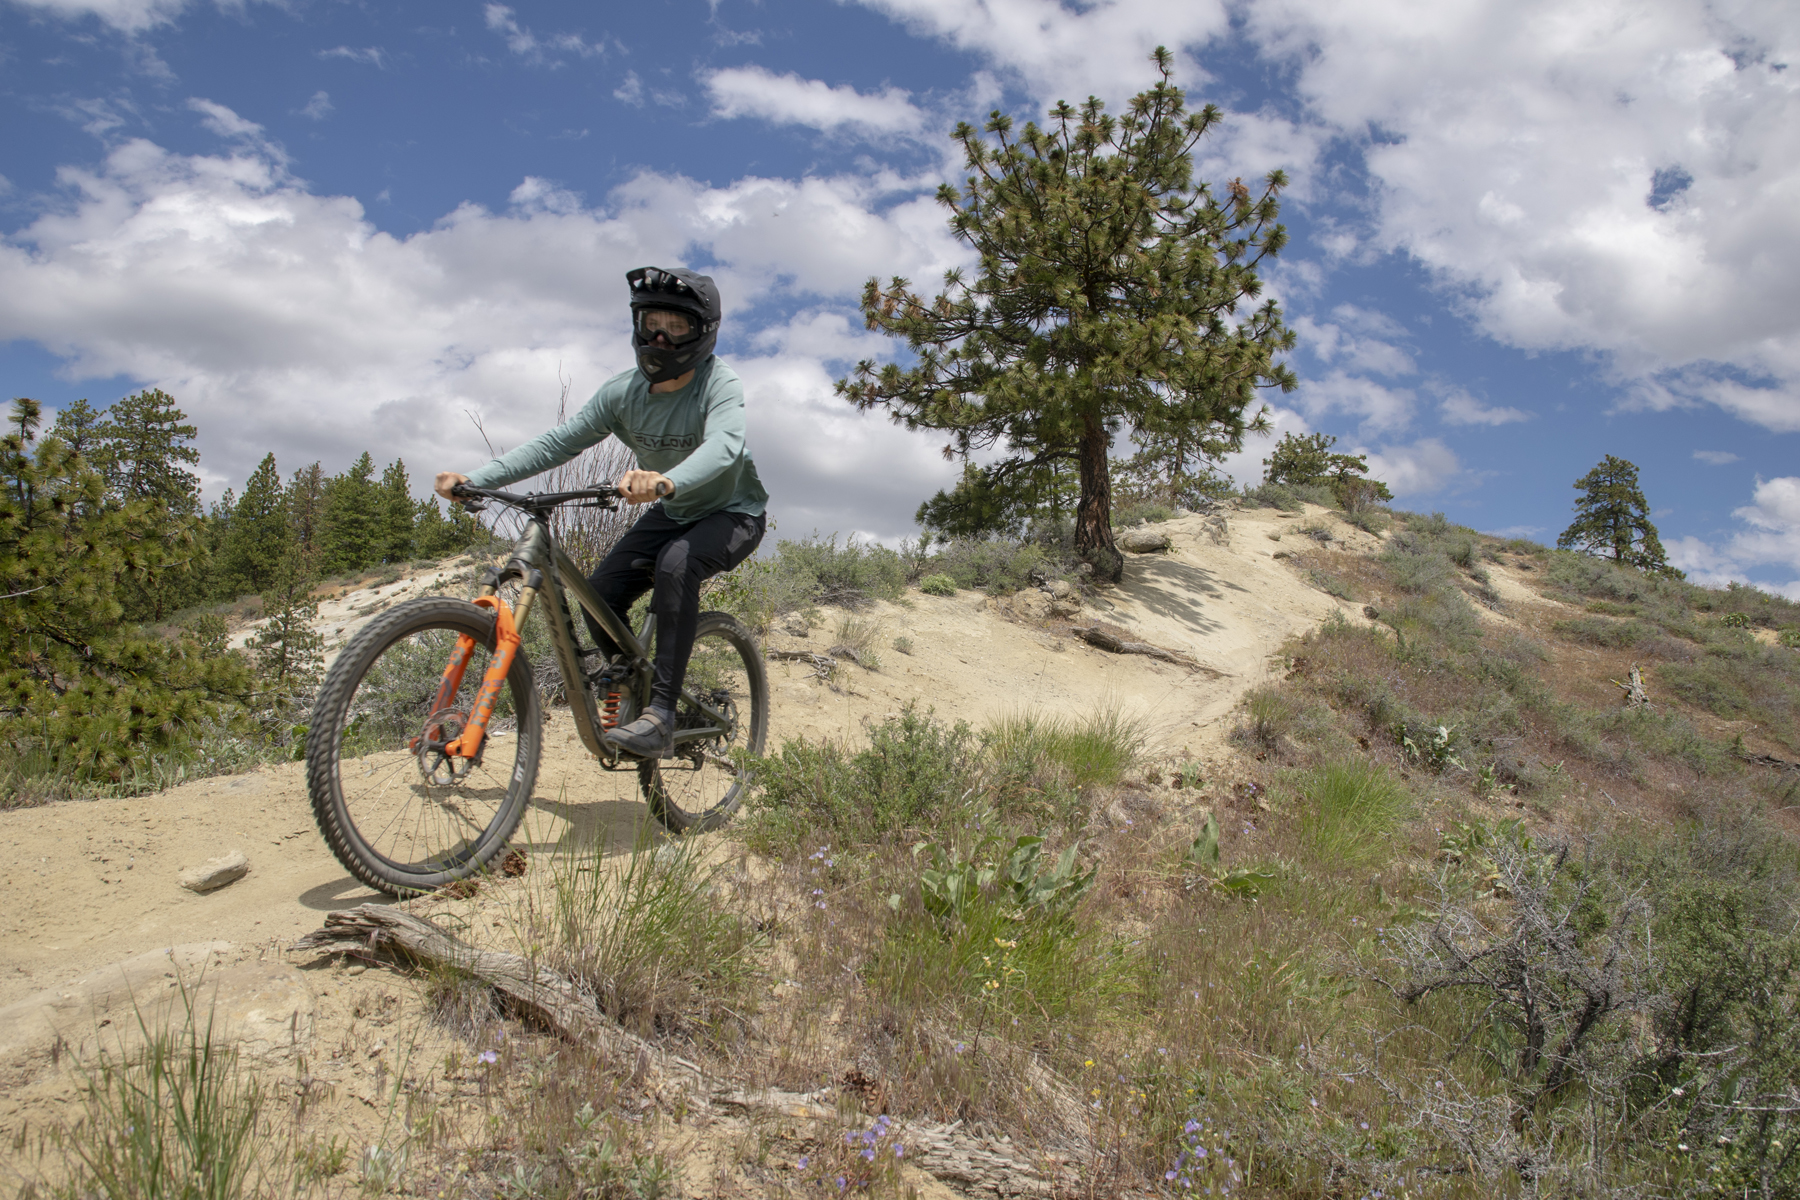
Okay, this has been a long time coming. We first teased this brake shootout back in Ep.132 of Bikes & Big Ideas last August, and have been working on it for a lot longer than that. As we’ve been talking about a whole lot at Blister, there are a lot more (good) brakes on the market than there were just a few years ago, and at the same time, modern bikes and riders are placing greater demands on their brakes than ever before. Folks are riding faster and going bigger; 29-inch wheels have become commonplace on gravity-oriented bikes, and the bigger wheels effectively reduce brake power by reducing the leverage that the brake has over the wheel — in effect the reverse effect of going to a larger rotor. We’ve also been getting a ton of questions about the different brake options out there and figured it was time to make a super in-depth roundup of a whole lot of the top options.
You’ll notice that we’re focusing on the bigger, more powerful end of the market here, and there are a few reasons for that. First, as I said up top, modern bikes are asking more of their brakes than ever before, and there’s been a substantial catching up of the brake market to meet those increased demands. So while most of these options are marketed as DH brakes, we’d argue that the right option for most folks on mid-travel Trail bikes and on up (i.e., Enduro & DH) is in here somewhere. For one, as Hope so elegantly puts it in their brake selection guide, “[a brake that] can do more can do less.” Having a more powerful brake (within reason) can actually make for easier modulation since you’ve got better fine-motor control when you’re squeezing with a more moderate effort, and can help stave off hand and wrist fatigue by not requiring as much effort to wring adequate power out of the brake.
And on top of that, the weight gains by going to a bigger, more powerful brake tend to be relatively modest and can be further offset by running smaller rotors and adapters to produce adequate amounts of power. Going to a bigger brake and dialing in the rotor size accordingly might not weigh much more (if any) and gives you more headroom to experiment if you want to bump up power with bigger rotors down the line.
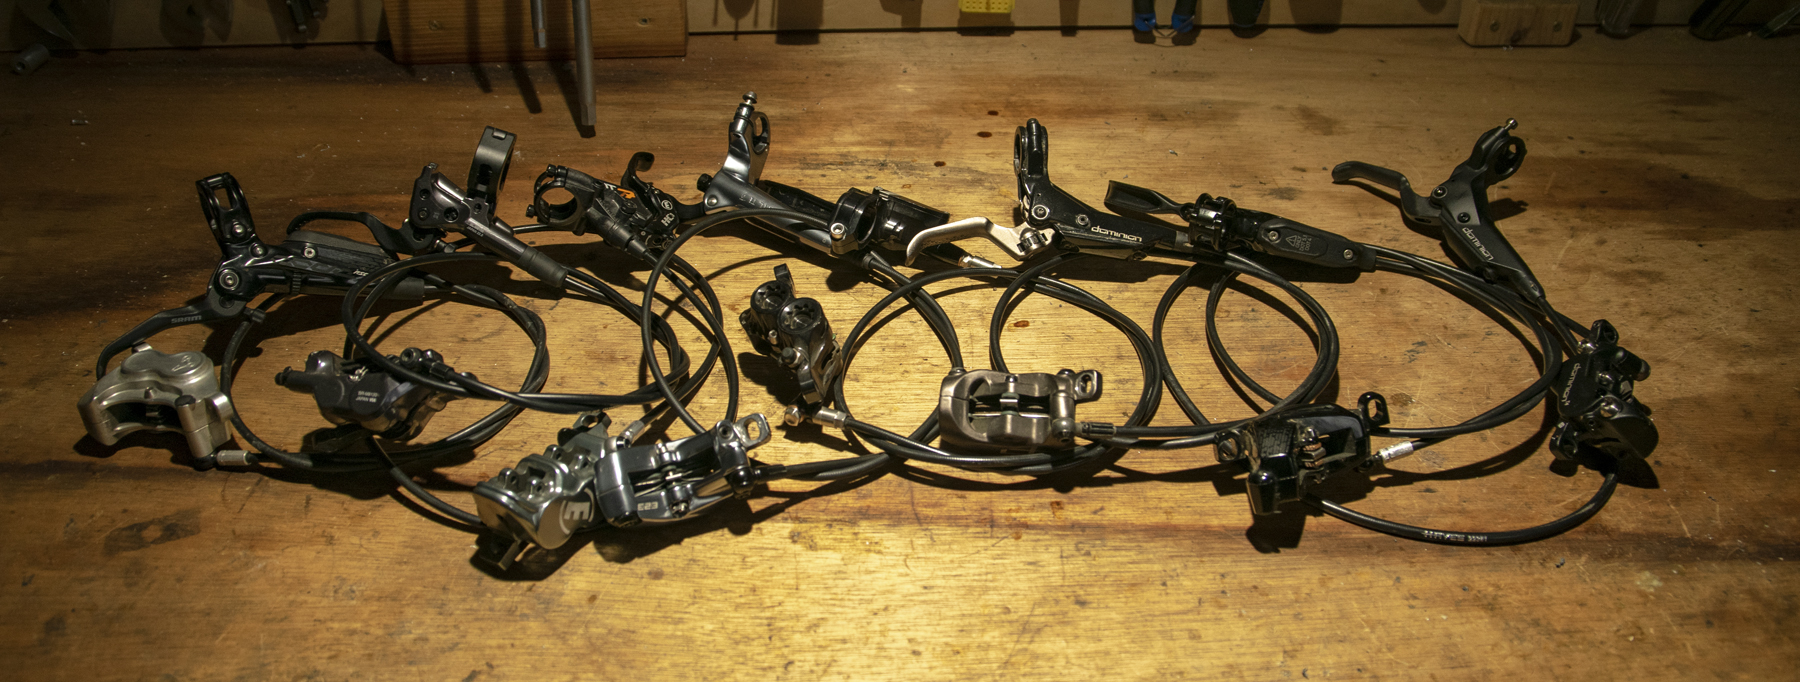
So far all of those reasons, we also figured that most folks who are looking to upgrade their brakes probably have an increase in power at least somewhere on their list of wants, and that a guide to brake upgrades was going to be most useful if it focused on the bigger, more powerful options out there. That brings us to this shootout: a test and comparison of eight of the most powerful, highest-performing mountain bike brakes out there.
But before we dive in, we’ve got a few notes on our test methodology. We’ve tested all of these brakes extensively with their stock pads and rotors — check out our full reviews of the individual brakes for info on those (you can click on the titles of nearly every brake to see our individual review). However, in the interest of isolating as many variables as possible, we’ve also tested all of them with Galfer Pro brake pads, and at least tried them with Galfer’s 2.0mm-thick Wave rotors, in both 223 mm front / 203 mm rear and 203 mm front / 180 mm rear combinations.
Different brands of rotors (assuming equal size) make very little difference in brake power, apart from variations in heat dissipation at very high temperatures, and certain brakes (most notably the TRP DH-R Evos, which are designed for TRP’s 2.3 mm thick rotors) work best with their stock rotors due to those thickness variations. The Magura MT7s also don’t work all that well with the Galfer Wave rotors, due to their notably small pads and the especially large cutouts in the Wave rotors (check out the full MT7 review for more on that).
So throughout, we’ve tested with identical brake pad compounds and the same rotors where practical, and equally-sized ones of a different design in the limited cases where the standardized rotors didn’t make sense. All of our measured weights are for a single brake, including the stock pads but without rotors, adapters, or mounting hardware, with a full-length hose (in the rear brake configuration, for brakes that come with different hose lengths for the two). And similarly, the stated prices are for a single brake, without rotors or adapters unless otherwise noted.
It would probably also be helpful to define a few terms that will be used throughout, and how we think about them.
Bite Point: The point in the lever’s throw where the brake truly engages, i.e., the point where the lever starts to firm up, the brake really starts to deliver power, etc. At various points we’ll refer to both the position of the bite point (where it occurs in the stroke / relative to the handlebar) and how firm it is (how abruptly the lever firms up once the brake engages).
Free Stroke: The portion of the lever throw before the bite point. Similarly, we discuss both the length of the free stroke (how far you have to squeeze the lever to reach the bite point) and how stiff the lever feels through the free stroke.
Reach: The distance from the handlebar to the lever blade. For the most part when we’re talking about reach, we’re referring to it at the bite point (where all the braking actually happens) but do touch on it at the initial lever position in a few instances where relevant.
Power Delivery: How the amount of power produced by the brake changes with increased force at the lever. A “linear” power delivery means that there’s a 1:1 relationship (i.e., a 10% increase in lever force produces a 10% increase in brake power). A more “abrupt” or “sharp” power delivery means that the brake comes on stronger at the bite point but then has a more modest increase in power when you really start squeezing harder.
Now, with all that out of the way, let’s dive in:
Shimano XT M8120
- MSRP: $230 per brake
- Blister’s Measured Weight: 310 g per brake
- Fluid Type: Mineral Oil
- Adjustments: Tool-free reach, contact point (w/ #2 Phillips)
- Pad Shape: Proprietary (shared with many other Shimano 4-piston brakes)

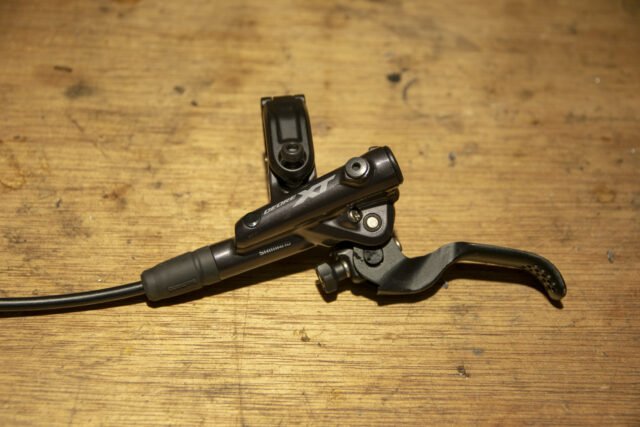
The latest M8100 generation of Shimano’s venerable XT groupset has been on the market since 2019, and the four-piston version of the XT brakes, the M8120 model, has been one of the most widely used mountain bike brakes in recent years.
The XT brakes use an asymmetric right- and left-hand specific lever assembly with a hinged clamp to allow removal of the brake lever without messing with the other controls. The brake levers can either be run with standalone clamps, or with Shimano’s latest I-Spec EV integrated mount for the shifter and/or dropper post lever; the brake lever is the same no matter which setup you want to run, with different shifter / dropper lever options depending on whether or not you want the integrated clamps. I’ve long been on the record as being anti-clamp integration, but can make the I-Spec EV setup work well enough for me in terms of control positioning; that said, it’s annoying that the most adjustable version of the system is reserved for the top-tier XTR brakes (which get 60° of shifter rotation instead of just 20° on the XTs), and certain third-party dropper levers (e.g. the Fox Transfer one) can end up with slightly odd positioning on the lower-tier brakes as a result.
Particularly at the time of their launch, the XTs were one of the most powerful options on the market, though they’ve since been surpassed by a number of newer models — more on a bunch of those below. What does still make the XT brakes stand out, though, is their combination of good power with a very firm bite point, not-super-long lever throw, and quite sharp power delivery, with lots of power very readily available from the initial engagement of the brakes. Many of those traits tend to come in direct conflict with each other — increasing power means increasing the overall leverage of a brake, which tends to make for a longer free stroke and softer bite point, for example — and the balance that Shimano has struck is impressive and likely to work really well for folks with the right preferences.
Unfortunately, the other thing that the XT brakes (and Shimano brakes in general, dating back multiple generations) are known for is developing an inconsistent bite point after a period of use. We’ve ridden a lot of pairs of XT brakes at this point, and while not all of them have developed the issue during our testing, more than a couple have. Once it shows up, the bite point of the affected brake will vary, seemingly at random. Typically it’ll firm up to the normal, correct point with some use, but then get softer and farther into the lever’s stroke, in severe cases leading to the lever going all the way to the bar until it’s pumped back up with several strokes. More typically, the brake will feel softer and spongier than it should, but still work to some extent.
Bleeding the affected brake tends to solve the issue on only a very temporary basis. The problem seems to be tied to slight leaks forming and air entering the system. When that air winds up in the “active” part of the brake, it causes sponginess; with some use, it’ll migrate up to the reservoir in the lever, out of the pressurized part of the system, and regular brake function will return. Shimano does offer certain service parts for the XT brakes (e.g. lever blades) but doesn’t sell seal kits for the levers or calipers, so once a leak develops there’s little to be done short of replacing the brake.
It’s too bad, because they’re good brakes otherwise. The lever feel is really nice, at least for folks who prefer a firmer bite point; their power is very good, just not best-in-class; they’re not that expensive; replacement pads are available everywhere, and so on. The reach adjustment has a broad range and should suit the vast majority of riders out there (though the bite point adjustment doesn’t do all that much).
Shimano’s higher-end rotors also feature what they call “Ice Tech” — essentially an inner aluminum layer of the braking track, sandwiched between harder stainless steel outer faces, which the pads ride on. The idea is to help draw heat out of the braking track by use of the aluminum inner section, which is riveted to a central aluminum carrier (since aluminum conducts heat far better than stainless steel does). In our experience, it does help mitigate overheating a little bit, but also makes the rotors more prone to warping than more conventional all-stainless steel alternatives. The XT brakes generally work well with many other brands of rotors, if you’d prefer.
- Best For:
- Firm bite point & sharp power delivery
- Good power / weight / price ratio
- Weaknesses:
- Inconsistent bite point
- Limited availability of small service parts
- MSRP: $264 per brake
- Blister’s Measured Weight: 344 g per brake
- Fluid Type: DOT
- Adjustments: Tool-free reach, tool-free contact point
- Pad Shape: Proprietary
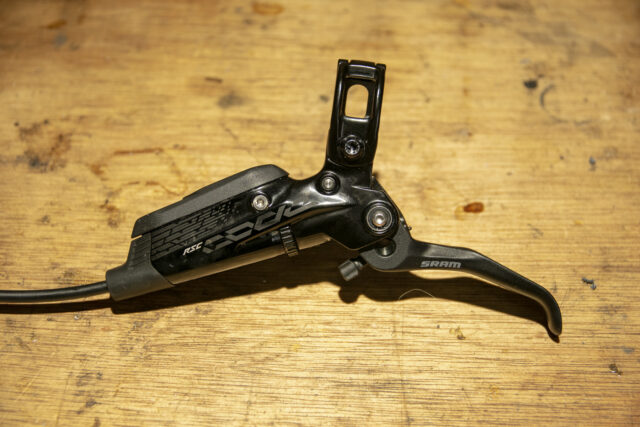
The current generation of SRAM’s Code brakes have been around for even longer than the Shimano XT M8120, and between that longevity and the fact that they’ve been spec’d on a ton of complete bikes, they’re almost certainly the brake in this guide with the most pairs out in the wild.
As with the XTs a few years later, the Code RSCs were among the most powerful brakes available when they came out back in 2017 but now look more middling by the standards of the newer high-end, high-power options available. But for folks who don’t need the absolute most outright power, they’re still a good option. The lever is especially adjustable, with a wide range of reach adjustment and a notably effective contact point adjuster (though as we’ll get into in a minute, I’m a little dubious about how necessary those really are for most people). The lever blade does feel like it slopes outward a little more than I’d like when the reach is set to the shorter end of its range, which does feel like it mitigates the efficacy of the hook at the end of the lever blade somewhat, but isn’t a deal breaker by any stretch. And we’ve had great luck with the reliability of a lot of pairs of Code RSCs over the years — these brakes really turned SRAM’s brake reputation around after years of issues with prior-generation offerings.
The Code RSC lever is asymmetric, to be run on either side of the bar without swapping hoses around, and features the best integrated clamp setup we’ve tried to date (though I still prefer separate ones). SRAM’s “Bleeding Edge” connection port at the caliper is especially slick as well, and makes bleeding the Codes notably straightforward and tidy. Spare pads are widely available, and SRAM also offers caliper and lever rebuild kits with the requisite seals and small parts to refresh a tired set.
In addition to the top-tier Code RSC, there’s a less-expensive Code R available, which forgoes both the free stroke adjustment (which isn’t such a great loss in my book) but also the “Swinglink” cam in the lever, which modifies the leverage ratio of the lever to deliver more power without making the total free stroke substantially longer. So the Code R is largely similar to the RSC version in most respects, but with a bit less power — already not the strong suit of the Code RSC, relative to a number of the newer brakes on the market.
The other potential downside, at least for some folks, is that the free stroke of the Code RSC levers feels especially firm, and though the bite point isn’t what we’d call spongy, it’s not as well defined as many of the other brakes here. That’s largely due to the firm initial part of the stroke masking the instant that the brake really starts to engage. The firm early stroke also just takes more effort to squeeze through than a lot of other brakes, which isn’t such a big deal for quicker stabs at the brakes, but does start to add up in instances where you’re needing to drag them for longer periods.
Overall, the Code RSCs are a solid, dependable brake with great spare parts availability and relatively linear power delivery that’s likely to appeal to folks who find certain brakes (such as Shimano XTs) to be too “on / off” and tricky to modulate. Their outright power is well short of the biggest, strongest brakes here but especially with 200+ mm rotors, it’ll be enough for a lot of folks on a lot of bikes, and there’s plenty to like about them otherwise.
- Best For:
- Reliability & availability of spare parts
- Lever adjustability and excellent control integration
- Weaknesses:
- Less powerful than many of the options here
- Firm lever feel through the free stroke
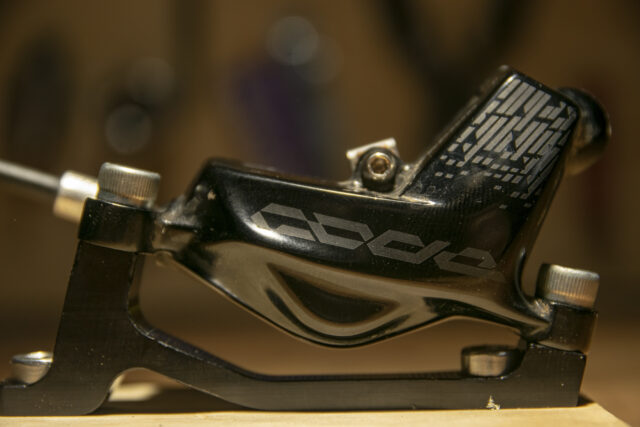
- MSRP: $283 per caliper (SRAM Code lever and hose also required, sold separately)
- Blister’s Measured Weight: 354 g per brake (w/ SRAM Code RSC lever)
- Fluid Type: DOT
- Adjustments: Tool-free reach, tool-free contact point
- Pad Shape: SRAM Code
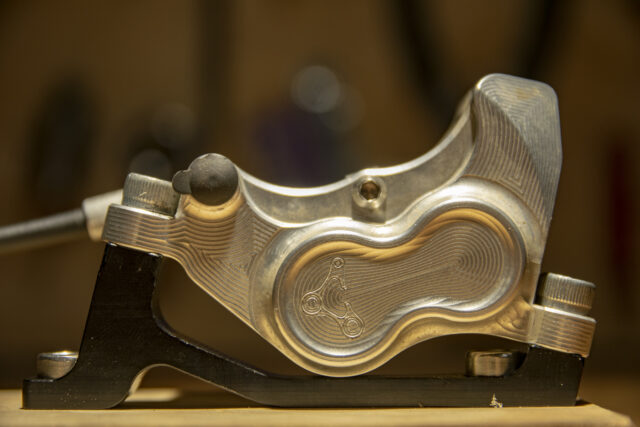
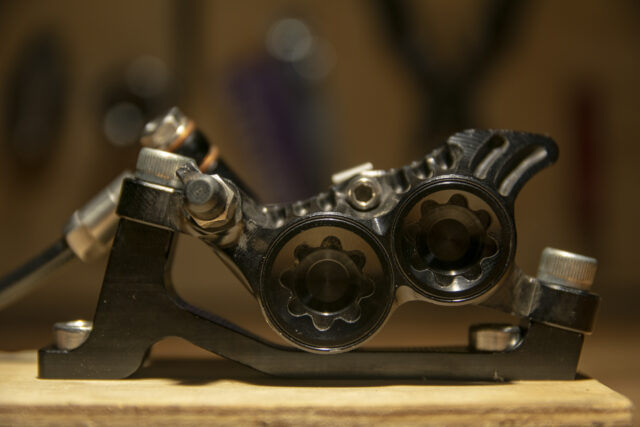
Cascade Components founder and engineer Jimmy Davis has been a longtime fan of the Code RSC brakes for a lot of the reasons we just touched on, but also agreed that there was one key area where they could be improved: raw power.
And so he made the North Fork calipers to fix that. In short, they’re an aftermarket brake caliper that bolts up to a Code (R or RSC) lever and hose, but uses substantially larger pistons (two 18 mm and two 16 mm per caliper instead of two 16 mm and two 14 mm in the stock caliper). That makes for ~20% more piston area, and therefore about 20% more power as well (keeping everything else like pad compounds and rotors consistent) — and that’s a lot.
Now, absent other tweaks, that 20% increase in piston area would also make for 20% more lever throw, but Cascade Components have reduced the amount of piston rollback (the distance that the pistons retract when the lever is released) to compensate, and in doing so have actually made the lever throw a little shorter than a stock Code. Of course, that also means that there’s less clearance between the pads and the rotor, so getting the calipers aligned is a little trickier than it is with the stock calipers, but we haven’t had too much trouble there.
And so, for the most part, the North Forks just feel like a much more powerful Code, with a slightly shorter lever throw. Of course, with the RSC lever you can also lengthen that free stroke back up by way of the contact point adjuster if you’re so inclined, though that doesn’t open up any more clearance at the caliper, and instead just makes for a “dead” portion of the lever throw — check out our Hayes Dominion A4 review for a more in-depth explanation of that concept.
But for the folks who want a really short free stroke, Cascade Components also offers a replacement set of lever cams to change the lever feel and power delivery. The cams are only compatible with the RSC version of the lever (since the base Code R lever doesn’t have the Swinglink cam that they replace) and they don’t make much difference to the outright amount of power, but rather tweak how it is delivered.
In short, the replacement cams make the already-short free stroke of the North Fork brakes a bit shorter still, and (more significantly) make the bite point firmer and more direct. In doing so, they also make the power delivery sharper, for folks who want a stronger initial bite, and we agree with Cascade Components’ assessment that they’ll work best for people who prefer to do their braking in sharp, strong bursts, and less well for folks who tend to do more extended dragging or feathering of the brakes.
The cams can be used with stock Code RSC calipers, too, though at least for my personal preferences, they make more sense in conjunction with the upgraded North Fork calipers — since they favor braking in short, heavy bursts rather than more extended pulls, a more powerful brake better facilitates that style. That said, at $37 for a pair, the cams are relatively inexpensive to try out, and aren’t all that hard to swap with the right tools.
The North Fork calipers themselves, though, are quite expensive at $283 each, or $530 for a pair. That’s as much as many of the complete brakes here, though they are manufactured at Cascade’s own facility in Everett, Washington and feature some fancy hardware, including titanium bolts to tie the two halves of the caliper together. SRAM’s excellent Bleeding Edge fitting carries over as well. The North Forks probably make the most sense for folks who have Codes already and like the lever feel but want something with more power — and for that camp, they’re great.
- Best For:
- Essentially a much more powerful SRAM Code
- Notably short free stroke
- Weaknesses:
- Price
- MSRP: $265 per brake
- Blister’s Measured Weight: 309 g per brake
- Fluid Type: DOT
- Adjustments: Tool-free reach, tool-free contact point
- Pad Shape: Proprietary
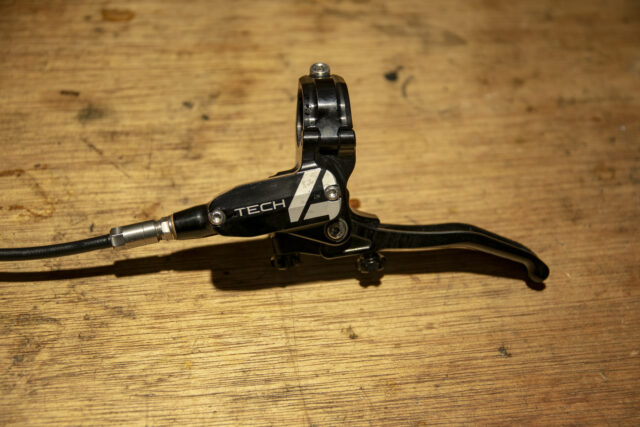
Hope has been making hydraulic disc brakes for just about as long as anyone, but their longstanding Tech 3 V4 brakes were starting to lag behind the pack in terms of outright power. The new Tech 4 version emphatically changes that. As per usual for Hope, the Tech 4 V4s are machined in their own facility in Barnoldswick, UK, and the machining is especially sharp looking. A bunch of different anodized colors are also on offer if that’s your thing.
Most of the updates to the Tech 4 generation happened at the lever end — which has been fully redesigned from the Tech 3 version. It’s still an asymmetric lever for dedicated left- or right-hand mounting, but it’s got both a smaller master cylinder piston and greater mechanical leverage ratio to bolster the power, and despite the physically long lever blade, the length of the free stroke is fairly average. Of course, there have to be tradeoffs somewhere, and the pad-to-rotor clearance is on the tighter side to balance overall leverage ratio (i.e., power) and free stroke. While I’d love for there to be some sort of magic best-of-all-worlds solution there, physics really gets in the way (at least until we enter the brave new world of power-assisted bike brakes, which would be a whole other can of worms) and I think the balance that Hope has struck is quite good, particularly for folks who prioritize big power and are willing to accept slightly fiddly alignment in trade.
The bite point of the V4s is on the soft side, though as I discuss in more detail in our full review, I actually haven’t found that to bother me on the trail, even as someone who tends to prefer comparatively firm ones — I think mostly because the V4s have so much outright power that I’m rarely hauling on them ultra hard. They do feel a little soft if you’re just squeezing them while straddling a bike in the shop or parking lot, but in actual practice, I haven’t found myself noticing while riding.
One other detail that’s worth pointing out is that the Tech 4 lever blade feels especially thick and chunky, which might not be for everyone. When measuring actual lever thickness for this piece, I was surprised to find that the measurement across the lever hook is actually more average than I would have guessed, but the face of the lever blade is notably flat, which produces the sensation of it being thicker than it really is. Personally, I find it to feel notably different from most of the other brakes here, but not really a problem or anything. We’re well into the realm of personal preferences, though, and your mileage may vary.

That said, as someone who likes to set their brakes up to engage fairly close to the bar, I’ve gotten along quite well with the Tech 4 lever. The reach adjustment range is quite broad, the main lever pivot is fairly close to the bar (which helps prevent the lever blade from feeling like it’s sloping outward too much with the bite point set close), and, crucially, we’ve spent time on two pairs of V4s now, and they’ve both been consistent and reliable for most of a season of use (a faulty batch of pre-production lever seals in one pair excepted — see our full review for more on that).
I was certainly in the camp of people who felt that the now-retired Tech 3 V4 brake was lacking in power, and the Tech 4 iteration has fully turned that around — so much so that I named them one of my favorite products I reviewed last year, in our 2022 Recap episode of Bikes & Big Ideas. Their outright power is outstanding, the ergonomics are good, the power delivery linear, and they look really sharp.
Hope also offers an optional stainless steel braided hose for the Tech 4 V4, at a $15 per-brake upcharge. Historically, those hoses have helped firm up the bite point and shorten the lever throw on brakes, due to reduced expansion under pressure, but Hope actually says that their newer standard hoses are just about as stiff; these days, the stainless hoses are mostly just tougher and harder to damage in a crash.
For folks who think that the full-on V4 is likely to be overkill, Hope also makes a Tech 4 E4, which uses an identical lever, paired with a slightly smaller caliper (with four 16 mm pistons instead of two 18 mm and two 16 mm ones). We haven’t yet tried the E4 version, but in theory, the change in piston size should make for about 13% less power than the V4s, a slightly shorter stroke and firmer bite point, and otherwise very similar performance.
- Best For:
- Huge power
- Gorgeous machining
- Weaknesses:
- Softer bite point (but it’s probably fine for most people)
- Blocky-feeling lever blade won’t be for everyone
- MSRP: $250 per brake
- Blister’s Measured Weight: 326 g per brake
- Fluid Type: DOT
- Adjustments: Tool-free reach
- Pad Shape: Proprietary (shared with Dominion T4)
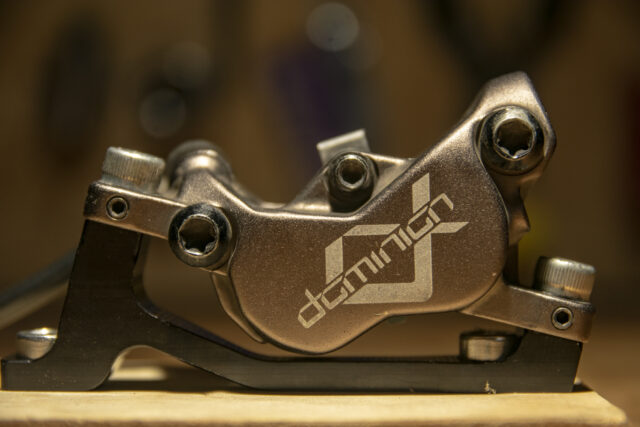
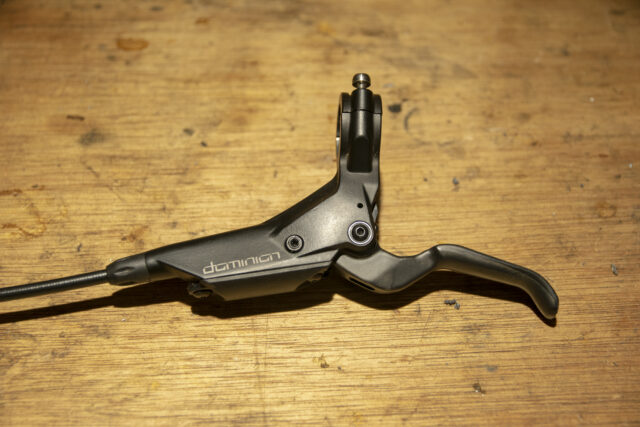
Like Hope, Hayes was a big player in the early days of hydraulic disc brakes — probably the biggest player, for a time — but their popularity faded as other brands caught up in the market in the late 2000s and early 2010s.
Hayes then went back to the drawing board and actually left the brake market entirely for a time, and what they came up with for their reintroduction in 2018 — the Dominion A4 — is a huge step forward for their brake offerings. I’d honestly kind of forgotten that the Dominion A4 came out that long ago and was surprised when I looked it up, because, while the brake market in general has improved a lot in the last few years, they don’t feel the least bit dated.
They’re not quite the most powerful brake here, but the Dominion A4s are still in the upper part of the range, and aren’t far off from either the Cascade Components North Fork or Hope Tech 4 V4. And they pair that with a remarkably light free stroke — something that I didn’t quite realize was such a positive until I tested the Dominion A4s for the first time a few years ago. The return spring in the lever feels especially light (but is still plenty up to the task), and between that and how low-friction and smooth the whole system feels, the Dominion A4s both take less effort than most other brakes to feather, and feel a little easier to modulate under moderate braking loads in particular. The bite point isn’t quite as firm as the absolute most solid options here, but it’s fairly firm, and the power delivery is comparatively immediate and direct, without being as on / off feeling as Shimano XTs, for example.
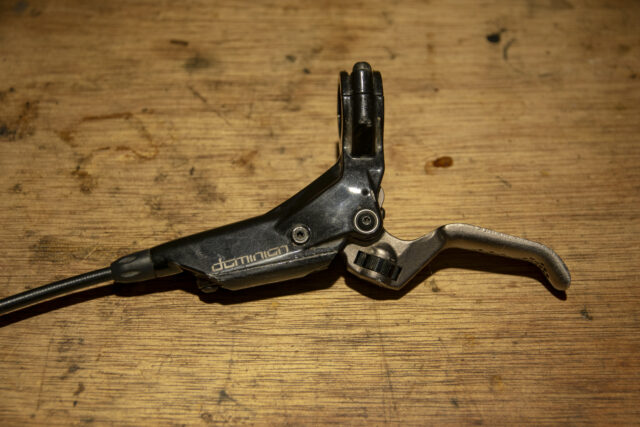
Hayes also offers two different versions of the lever blade on the Dominion A4: the standard version (tested here) and a separate “Small Finger Lever” which is shorter (in terms of its length parallel to the bar), thinner in cross section, and features a deeper hook for an overall shorter reach range. As someone with pretty big hands (I typically wear an XL glove) but who prefers to run their brakes with the bite point set in close to the bar, the ergonomics of the standard lever feel excellent to me.
I’ve only tried the Short Finger Lever (SFL) in a parking lot, but my hunch is that it’s going to best suit folks with, well, small fingers who want a thinner lever blade to have to wrap around and a shorter reach at both the starting position of the lever and at the bite point. I personally care quite a bit about getting the bite point in close to the bar, but am fine pulling through a comparatively long free stroke to get there, since my larger hands can reach plenty far out. The physically shorter SFL makes for a shorter free stroke (though theoretically a corresponding decrease in power, due to the reduction in leverage) and feels like it will help folks who want a shorter reach to the starting point of the lever, not just where it lands at the bite point. The free stroke of the Dominion A4s with the standard lever blade is definitely on the longer side, and the SFL reigns that in somewhat.
Whichever lever blade you opt for, the Dominion A4s feature a symmetric lever assembly that can be run on either side of the bar without swapping hoses around and conveniently are compatible with the older (pre-Bleeding Edge, or the Bleeding Edge version with a second threaded hose fitting) style of SRAM (and Formula) bleed kits, for folks who have those kicking around. The pad shape is proprietary but quite large (which is nice for heat dissipation and wear) and there are some aftermarket pad options available, including the excellent Galfer Pros used for this roundup, in addition to Hayes’ own offerings.
The Dominion A4 has a couple of extra clever features with an eye toward ease of maintenance — most notably the “Crosshair” screws on the mounting tabs. In short, they’re just a pair of set screws that press on the caliper mounting bolts, and make it super easy to fine-tune the caliper alignment. Simply push the caliper inward with one hand while adjusting the two screws in or out in conjunction to dial in the alignment, then tighten down the mounting screws and hit the trail. It’s slick and works quite well.
The caliper also features two bleed ports, one on each bank of pistons, to make it easier to eke every last air bubble out of the system. Of course, you don’t have to use both, and in plenty of cases a normal bleed with one syringe at the lever and the other at one of the caliper bleed ports will be adequate, but you can repeat the procedure on the other caliper port — or even circulate fluid with a syringe on each of the two caliper ports if need be. Put that one in the category of “can’t hurt, might help.”
I’ve been riding the same set of Dominion A4s on… I’m not even sure how many different bikes at this point, over the course of three full seasons, and they’ve been completely reliable, with consistent bite point and no need for service beyond replacing brake pads and the occasional bleed (more often due to the annoyances of internal brake routing and swapping bikes than the brakes themselves). I’m a very big fan. If I’ve got any gripes, it’s that the cosmetic fit-and-finish could be better (though there is now an all-black version for folks who aren’t into the original bronze) and that’s made absolutely no difference whatsoever from a performance standpoint. They’ve been around for a while now, but they’re still one of the best brakes on the market.
- Best For:
- Ultra-light free stroke & firm bite point
- Very good power
- Ingenius alignment and bleeding features
- Weaknesses:
- Cosmetic finish isn’t great
- MSRP: $325 per brake
- Blister’s Measured Weight: 281 g per brake
- Fluid Type: DOT
- Adjustments: Reach (w/ 2mm Allen key)
- Pad Shape: Proprietary (shared with Dominion A4)
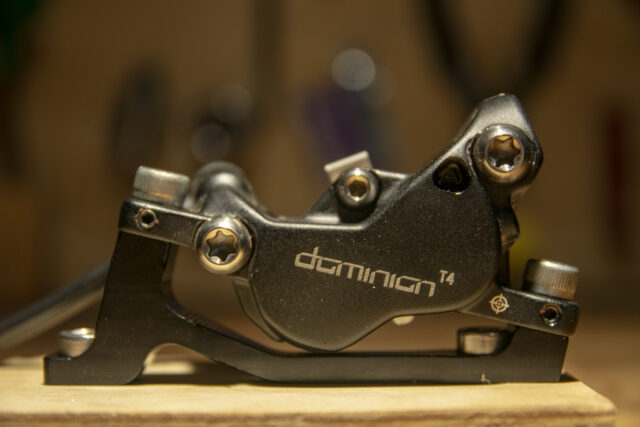
The newer Hayes Dominion T4 is essentially the premium, lighter-weight version of the Dominion A4, and in most respects, their performance is functionally indistinguishable. The T4 saves about 45 grams from the brake itself by way of titanium hardware throughout, a carbon fiber lever blade with a tooled reach adjuster (in place of the tool-free one on the A4), some additional machining to remove excess material from the caliper, and aluminum-backed brake pads in lieu of the standard steel-backed ones. The Dominion T4s also include titanium caliper and rotor mounting bolts in the box to save a few extra grams that aren’t captured in our measured weights for the purposes of this roundup (see our notes on methodology in the intro).
And… that’s about it, though we’re not complaining. The Dominion A4 is a great brake, and the T4 is a nice alternate option for the folks who are willing to spend some extra money to save some weight (and get a nicer-looking finish on the levers and calipers). Performance-wise, there’s very little to separate them, though the carbon fiber lever on the T4 does feel slightly slimmer than the aluminum A4 one, due to subtle differences in its shape, and is probably a tiny, tiny bit more flexible, resulting in a very fractionally softer-feeling bite point, but that difference is extremely subtle.
It is worth noting that Hayes (at least for now) doesn’t offer a Short Finger Lever version of the T4, though, so folks who are interested in that option will need to stick with the A4. But otherwise, it really is fair to think of the Dominion T4 as the fancier, lighter version of the Dominion A4, and the decision between the two should really just come down to which side of the price vs. weight tradeoff you want to land on.
- Best For:
- Essentially a lighter, better-looking Dominion A4
- Weaknesses:
- Big price premium for the weight savings
- No Small Finger Lever option
- MSRP: $270–300 per brake (varies by color)
- Blister’s Measured Weight: 330 g per brake
- Fluid Type: Mineral oil
- Adjustments: Tool-free reach
- Pad Shape: Shimano 4-piston (non-finned)
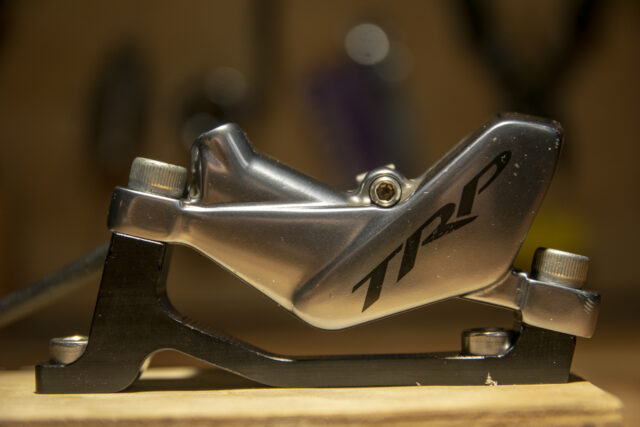
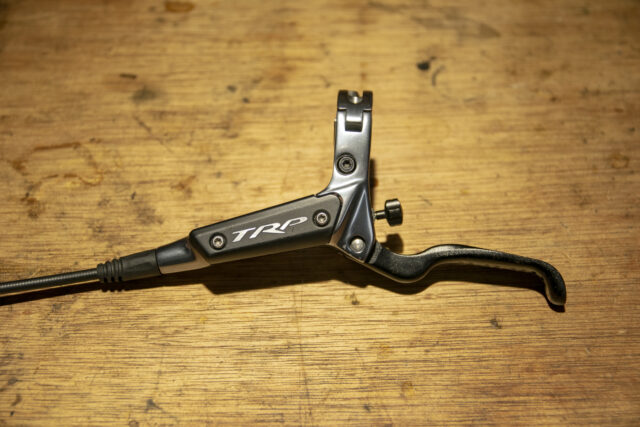
TRP has been in the brake game for a while now and has long had a high-profile relationship with a bunch of top athletes, most notably Aaron Gwin, but (in what is something of a recurring theme here) their DH-oriented brakes had been lagging behind the class leaders in terms of outright power. The DH-R Evo launched a few years ago as their new top-tier offering, and it’s indeed a very big step forward for TRP.
The DH-R Evo is a notch behind the very most powerful offerings on the market (check out the spectrums, below, for more on that) but is definitively a DH-worthy brake, and in particular stands out for its combination of very good power plus extremely linear, easily controllable delivery of that power. They’ve also been quite consistent and reliable in our testing, with no signs of wandering bite points or other such issues.
The DH-R Evo uses asymmetric left- and right-hand specific levers, with a hinged clamp and a variety of options for integrated clamp assemblies, sold separately. The lever features tool-free adjustable reach, via a knob that’s tucked in behind the lever blade; the design of that adjuster means that the DH-R Evo is the only brake here where the lever blade doesn’t hinge outward from its starting position on a spring-loaded pivot. I don’t think that’ll be a big deal for most folks, but it does mean that I’ve noticed that I’m a little more prone to banging my knuckles on the back side of the lever blade when climbing or just death-gripping the bar without covering the brakes, since the lever blade doesn’t move out of the way in those instances.
The DH-R Evos (and the rest of TRP’s “Evo” brake series) are designed around TRP’s extra-thick 2.3 mm rotors, and TRP says that the extra material helps with both heat dissipation and propensity for warping of the rotors. They were also ahead of the curve in offering rotors in sizes bigger than the typical 200 / 203 mm top end, though more and more brands are catching up on that front. The extra thickness does, of course, come with a modest weight penalty (about 50 g per rotor for a 203 mm diameter, as compared to TRP’s 1.8 mm thick version) but the thicker rotors do help with heat management and seem to be tougher to bend or warp than many of their thinner counterparts, especially in larger diameters. We’d recommend using them with the DH-R Evos, though a bit more caution would be needed in using them on other brands’ brakes since many won’t have enough clearance for the extra rotor thickness.
- Best For:
- Good power with super linear delivery
- Excellent lever shape and light free stroke
- Weaknesses:
- Very long reach and free stroke
- MSRP: $329 per brake
- Blister’s Measured Weight: 282 g per brake
- Fluid Type: Mineral oil
- Adjustments: Reach (w/ 3mm Allen key) and leverage ratio (w/ T25 Torx)
- Pad Shape: Proprietary (shared with the Magura MT5)
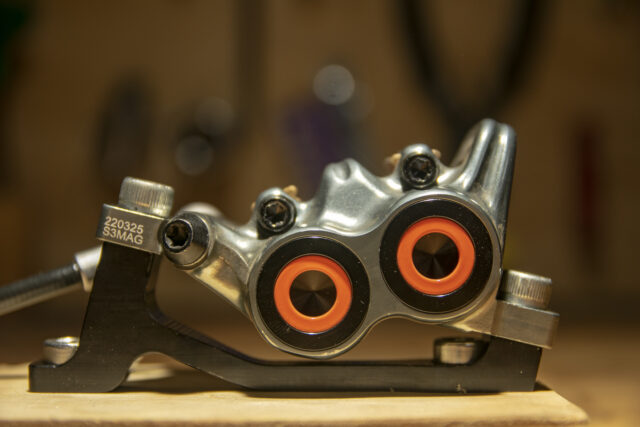
Magura’s MT7 HC3 is their flagship gravity brake and includes a bunch of interesting features and design elements not seen on any of the other brakes in this guide. The caliper is a one-piece forged affair, which is normal enough, but the MT7 uses four brake pads per caliper (one per piston), which are held to the pistons with small magnets embedded in the piston faces (plus a normal pad retention bolt), in lieu of the more typical return leaf springs. Magura’s argument for the four-pad arrangement is that it helps with heat management by “breaking up” the heat buildup across the length of a more conventional full-length pad. How much of a difference that really makes is tough to assess, but as we’ll get into below, the heat management of the MT7 is a little bit of a complex story.
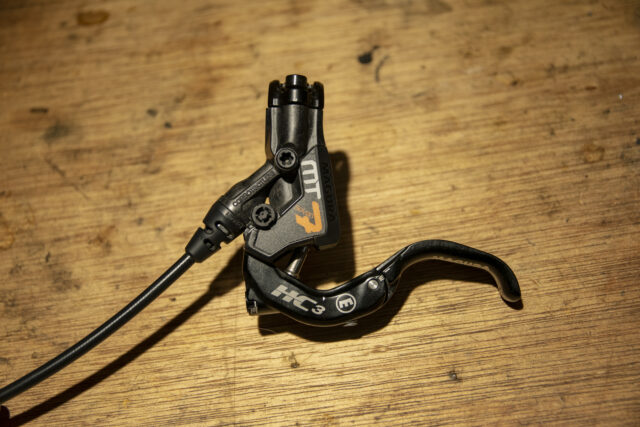
The lever end is maybe even more interesting. The main lever body is made of a fiber-reinforced composite, and uses a split clamp arrangement to be run on either side of the handlebar, with options for add-on clamps to integrate the other controls. And then the lever blade features an unusual combination of adjustments — starting with the leverage ratio adjuster built into its base.
In short, the HC3’s version of a contact point adjuster actually changes the leverage ratio of the lever itself, with the higher-leverage settings producing more power at the expense of some extra lever throw and a slightly softer bite point, or tightening both up at the cost of some outright power. But throughout its range, the HC3 has a notably short free stroke and firm bite point, even at the “more leverage” end of the range. It’s a clever system that seems far more useful than the more conventional contact point adjusters on most other brakes that feature them — check out our full review for a more in-depth explanation.
And then to make way for that leverage adjuster, the HC3 lever blade moves the reach adjuster to a pivot in the middle of the lever. The HC3 lever features an especially deep hook and a short reach that feels especially well suited to running with a comparatively short reach, though the range of adjustment is fairly broad and should suit quite a few people nicely. Magura also offers a number of other lever blade options (which we haven’t yet tried on the MT7s) for folks with different preferences; check out our review and their website for a more complete rundown.
Those ergonomics and the excellent short stroke and firm bite point are the real highlights of the MT7 HC3s’ performance. Their outright power is on the lower end of the offerings here, though they don’t feel wildly outclassed or anything like that. We also had some issues with heat management when using Magura’s lighter Storm HC rotors, but bumping up to the beefier MDR-Cs did a lot to remedy that issue, at the cost of a bit of weight. The MT7s also didn’t work great with our standard Galfer Wave rotors, as mentioned up top — again, check out our full MT7 review for more info.
But with beefed-up rotors (Magura also offers a higher-end MDR-P that’s meant to help with heat dissipation, and comes in a 220 mm diameter option, though we’ve yet to try it) and our reference Galfer Pro pads installed, the MT7 HC3s work quite well, and their ergonomics and lever feel really are excellent, especially for folks who’d prefer a short to medium reach, paired with a relatively short lever throw and firm bite point. The power delivery is also on the more linear / less abrupt end of the spectrum, which is really going to come down to personal preference, but is likely a good place to be for a lot of folks.
Of course, as we’ve been saying throughout, there are tradeoffs inherent to making a powerful brake with a short stroke, and the MT7s’ pad clearance is a bit on the tighter side. Getting them 100% rub-free is somewhat trickier than many of the other brakes here, and my hunch is that the four-pad-per-caliper arrangement makes that a little harder as well. The bleed process is also not quite as foolproof as some of the other brakes here (especially the Hayes Dominions) but is quite a bit easier than Maguras of yesteryear, and isn’t likely to be a big deal for most folks.
So if you’re after a brake that’s relatively lightweight, has an especially short, crisp lever throw with a solid bite point, and don’t need the absolute most powerful option that you can get your hands on, the MY7 HC3s are very solid. They’ve got a few quirks, but have some very real upsides as well, and their unique ergonomics and feel are going to be a strong selling point for certain folks.
- Best For:
- Great ergonomics, especially for shorter reaches
- Short throw and solid bite point
- Weaknesses:
- Relatively modest power & heat management
- Finicky to bleed and align
Spectrums
Pretty self-explanatory — here we’re ranking the brakes from strongest to weakest.
Most Powerful
1. Hope Tech 4 V4
2. Cascade Components North Fork
3. Hayes Dominion A4 / T4 (tie)
5. Shimano XT
6. TRP DH-R Evo
7. Magura MT7 HC3
8. SRAM Code RSC
Least Powerful
This is separate from outright power but is instead referring to how much the brake builds power with increased lever pressure (i.e., linearly) vs. delivering power more sharply at the bite point, with less increase as you squeeze harder.
Most Linear
1. TRP DH-R Evo
2. Hope Tech 4 V4
3. Magura MT7 HC3
4. SRAM Code RSC
5. Cascade Components North Fork (w/ stock Code RSC lever)
6. Hayes Dominion A4 / T4 (tie)
8. Shimano XT
9. Cascade Components North Fork (w/ aftermarket lever cams)
Sharpest Initial Bite
This refers to how much and how quickly the brake lever firms up once the brake is engaged. This one is separate from power and is instead all about lever feel.
Most Firm
1. Shimano XT
2. Cascade Components North Fork (w/ aftermarket lever cams)
3. Hayes Dominion A4
4. Hayes Dominion T4
5. Magura MT7 HC3*
6. TRP DH-R Evo
7. Cascade Components North Fork (w/ stock Code RSC lever)
8. SRAM Code RSC
9. Hope Tech 4 V4
Softest
[* This rating is with the MT7s set up as I prefer to, with the leverage adjuster at the most powerful end of the range, owing to their comparatively modest outright power. Moving to the lower leverage end of the range vaults them at least past the Hayes siblings, into a similar ballpark as the North Fork w/ aftermarket cams, but comes at the expense of a significant amount of power.]
The prior “Bite Point” spectrum ranked the brakes by how the lever feels once it hits the bite point; this one covers how far you have to move the lever to get there.
Shortest
1. Cascade Components North Fork (w/ aftermarket lever cams)
2. Magura MT7 HC3
3. Cascade Components North Fork (w/ stock Code RSC lever)
4. Hope Tech 4 V4
5. Shimano XT
6. SRAM Code RSC
7. Hayes Dominion A4 / T4 (tie)
9. TRP DH-R Evo
Longest
[Throw measured with the contact point adjusters wound all the way in, where applicable, except for on the Magura MT7 since that particular adjuster also impacts power. When set to the shortest possible stroke, the MT7 HC3 has even shorter throw than the North Fork w/ aftermarket cam, but also loses power.]
Here we’re talking about how firm the lever feels through the free part of the stroke before it gets to the bite point. The brakes at the top of the list take the least effort to move through the initial part of the stroke; the ones at the bottom feel firmer.
Lightest
1. Hayes Dominion T4
2. Hayes Dominion A4
3. TRP DH-R Evo
4. Shimano XT
5. Hope Tech 4 V4
6. Magura MT7 HC3
7. SRAM Code RSC
8. Cascade Components North Fork (w/ stock Code RSC lever)
9. Cascade Components North Fork (w/ aftermarket lever cams)
Firmest
Here we’re talking about the shape / thickness of the lever blade at the hook portion where your finger grabs it, just inside of the hook at the end.
Thinnest
1. Magura MT7 HC3
2. Hayes Dominion T4
3. TRP DH-R Evo
4. Shimano XT
5. Hayes Dominion A4
6. SRAM Code RSC / Cascade Components North Fork (tie)
7. Hope Tech 4 V4
Thickest
[Note: the radii on the edges of the lever blade make a big difference in how thick a lever blade feels. These ratings are how thick and chunky the blade feels, rather than the actual physical measurement, since that’s the more operative thing on the trail. In most cases the two are closely correlated, with the very flat-feeling Hope Tech 4 V4 being the biggest exception.]
Also pretty self-explanatory: this is the actual weight of the brake, fully bled, with a full-length hose and stock brake pads, but excluding mounting hardware and rotors.
Lightest
1. Hayes Dominion T4
2. Magura MT7 HC3
3. Hope Tech 4 V4
4. Shimano XT
5. Hayes Dominion A4
6. TRP DH-R Evo
7. SRAM Code RSC
8. Cascade Components North Fork
Heaviest
Alright, we’ll leave it at that for now. Hopefully, this made it easier to decipher the differences, upsides, and downsides of all these brakes. There seem to always be new options hitting the market each year, so stay tuned for updates.
Also, if you haven’t already, be sure to check out our Mountain Bike Buyer’s Guide for more general buying advice, and our MTB Fork Roundup for comparisons of nearly all the latest Trail and Enduro forks on the market. And if you’ve got questions on any of these brakes (or whatever else), become a Blister Member and drop us a line through the form in the Blister Member’s Clubhouse and we’ll help get you on the best option for you.
Holy tamale this is the most complete but succinct round up I’ve ever seen about every brake I’ve ever been curious about, great job! (and then some, I didn’t even know about Cascades!)
Zero actual data lol
Thanks for the comprehensive write up! Definitely will be coming back to this when the time comes for a new build.
wish the Formula Cura 4 was in this review, mostly as I’m curious how my brakes compare.
same!!!!!!!! :(
@Dale, I’d have been curious, too. I’ve got a Cura 2 and 4. The closest feeling brake (to the 4) that I’ve ridden is the DH-R Evo I rode on a demo bike. Don’t know what pads it had, but the feel was similar and I thought the Cura had more ultimate power.
Is it not necessary to do a brake bake off without talking about brake fade? Ok, I did want to just say “brake bake off” … but the key factor for me is consistency over a long ride.
Weight is cool, bite point, power, for sure … but on a longer ride, w/ fast descents … is the power always there as expected? After 4-6 hrs, are the fingers fatigued? Does the modulation and power delivery “feel” consistent throughout the ride?
I am sure there are others reading this who’ve been there … flying down a descent and getting that sick spongey feeling on a hot brake. Kills the confidence, especially for a less-talented old codger like myself.
Hey Jesse,
In short, we didn’t go super deep on brake fade here because it’s much more a function of (1) brake pad type and (2) rotor size (and then to a lesser extent, design) than the brakes themselves. And since we were standardizing those variables here, it didn’t make much sense to try to rank the brakes in terms of fade resistance or anything like that.
Our full reviews comment much more on how the stock pads and rotors fare in that regard.
Appreciate the response, David
Understand you’re trying to keep it apples to apples. Don’t totally agree … or I don’t want to agree (lol, as I am more used to PinkBike comments?).
In all fairness, article has useful insights – will help make or brake a buying decision.
You guys do the best in-depth reviews. Can’t wait to see what the lab does with the wheel shootout.
So much great info in one place! Thanks very much for putting this together.
Enduro Magazine performed lab dynamometer tests on about 20 different brake models a few years ago. It’s an interesting read.
I read that and it was insightful, however that article doesn’t have control pads and rotors, which is a major factor. I know for a fact that trickstuff pads are powerful af (although short life span), which is a factor of why they topped the torque chart.
Now if we can merge this review with the numbers, this would be a perfect review!
Good read!
I think ergonomics is potentially the most important thing as all of these brakes are pretty darn good. I’ve got big paws and love my RSC’s, while my small hand girlfriend hated codes and gushes over her mt7’s. Most power concerns can be fixed with the right rotor and pad combo… 220mm HS2 rotors did wonders for my codes.
In the end, pick a brake and don’t be a dick about it.
Thanks, Dan!
Definitely agreed about ergonomics, which is why we’ve focused on that so much. All of these brakes work pretty well (with a few caveats that we’ve already touched on) but there are big differences when it comes to feel and ergonomics, which really matter.
My biggest complaint with my current bike is the Code RS brakes that it came with (I think these are an OEM model and not available aftermarket like the R or RSC models mentioned in this article). Except for right after a flesh bleed, these brakes feel spongey to me and I hate the feeling of pulling the lever almost to the bar and still not feeling like I’m getting the braking power I need. The RS levers have the reach adjust but not the contact point adjustment that the RSC offers which I can’t help but wonder whether that extra feature might help with the dreaded spongey feeling. Or perhaps I need a different brand altogether…this article leads me to believe that maybe I might like a more instant bite point but I’m a little confused and not sure if that would really be the counter punch to the spongey feeling I’m trying to combat. Any suggestions?
You could try using a thinner bleed block when bleeding. This will advance the pistons slightly since there is more fluid in the system. This can firm them up a bit. Worth trying before you switch them out. I use this method on my code rsc, hopefully it translates ok to your model.
RSC Levers make a great deal of difference for this issue. Girlfriend’s bike had Code R and after she messed up a lever we got a rsc lever. This immediately made the brake so much better we purchased the matching lever for the other side. They are nearly as good as my trp dhr evo now.
Fantastic info. How would you rank the brakes in terms of the ease of getting a good bleed on one try?
Hope brakes being most powerful. Never thought I would see the day. I heard that the previous version was actually quite powerful. You just had to use so much finger force to get there.
Excellent comparison…wondering if the Formula Cura 4s might be on the radar for future reviews…
Hi,
Thank you for this excellent review.
Your description of the Hope T4V4 is on point.
I wonder how you determined the power rating? Was is by feel or have you made some sort of lab-test?
Hi, would you care to elaborate on how you “measured” power?
And could you also comment on the power discrepancies between your article and enduro-mtb’s on say, the XT and MT7? Something doesn’t add up here.
I think it’s because Blister reviews used control pads and Enduro Mag did not. Using control pads (Galfer Pros are the best in my opinion) will give you a much more accurate feel for the brakes actual power.
This is darn near a burn! Couldn’t agree more of course. Having a control pad and same/similar rotor diameters certainly simplifies things.
Big fan of the podcast, big fan or your work. Just a quick shoutout to say I love the nuance of your discussions/analysis.
Any tips on reducing the lever throw of the A4s as the pads wear? Sounds like I like my brakes set up the same as you (pretty close to the bar), however instead of your XL glove hands mine are Ms so extra long throw brakes are often a compromise for me.
This is exactly the type of review I have been waiting for!! Thank you!! With so much product placement and generic clickbait reviews out there, it’s great to see someone actually taking the time put in the work that most of us can’t!!! I totally agree with you that brake fade is mostly a function of pad material and rotors. Any comparison without having control pads and rotors is kind of silly; like judging a bikes performance on it’s tires and air pressure! My code RSCs went from average to great after switching to Galfer pro pads! Based on this review (and advice of friends) I took the plunge and ordered a set Hope Tech 4 V4s and can’t wait to try them on steep dry Squamish Granite this summer!
Cheers
Thanks, PembyBike! We do things differently around here, and it’s always great to hear that folks appreciate it.
David,
Thanks so much for the review. Really curious about the XTR brakes. Love my Saint brakes on my Nomad, great on the scary trails. Struggling to be excited about the MT7s on my new Kenevo SL.
There’s not much difference in performance between the XTs and XTRs. Same lever geometry, piston size, etc. XTRs are lighter but everything else I said about XTs applies there too.
If Trickstuff was included it wouldn’t be a comparison….
Thanks for the reviews!
Im a little confused about the A4 dead stroke. Some reviews mention that the dead stroke is really long, and others say its nice and short. Blister says its even longer than the codes. Well, I really dont like the dead stroke of my code R s, perhaps RSC is a little better. But if the a4 is even worse, then there is no point for me to change.
Also I looked at a Hope bleed video. Frankly I was shocked. Apart from being a very complicated procedure, Im not sure if its possible to do only a lever bleed with their system. If not, that would be a major drawback.
The A4’s free stroke is pretty long. The Code RSC’s is definitely shorter than the R’s (or at least can be, depending on what you do with the bite point adjuster). I don’t have a Code R handy to compare to the A4, but if a short free stroke is high on your priority list they probably aren’t the best option.
The A4’s bite point is quite crisp and firm once you get through the free stroke, but the only way I can imagine anyone saying the free stroke is short is if they’ve pumped the pistons in and aren’t getting full rollback. That’ll only last until the pads wear a little bit, of course.
“Also I looked at a Hope bleed video. Frankly I was shocked. Apart from being a very complicated procedure, Im not sure if its possible to do only a lever bleed with their system. If not, that would be a major drawback.” It’s not because the Hopes IME rarely need bleeding. Finnicky to set-up initially, but I have gone years with only pad changes on 3 Hope models.
Fantastic review.
One thing that’s brought up at the beginning of the article but not touched upon a lot or ranked at the end is the reach of the brake. Where the “braking” occurs relative to the bar distance-wise is an important factor for me in brake feel – I don’t personally prefer the braking action to be right next to the bar as you do and like it a good inch or so away, regardless of how much free stroke there is.
Would it be possible to get a reach spectrum for the reviewed brakes in this article?
Lots of great info. Thanks!
Is the free stroke from the TRP EVO DH-R like the Dominion A4 or is the free stroke shorter/longer ?
Would it be worth including which brakes use mineral oil and those that use DOT?
Fluid type is listed in the header block for each brake.
Great work, Blister team. It’d be sweet to see an addendum to the shootout with the SRAM Maven.
Thanks, Kevin! And yep, an update with the Mavens (and hopefully a couple more options) is coming. We just need a bit more time on them first.
Hey David, exceptional article, I really appreciate the way you broke things down. I am close to purchasing either the Hopes or TRPs, is there anything in your updated review that may change my decision? Thanks.
Enduro Mag used controls in their latest brake shootout. In fact, they did their most recent test both with the stock pads/rotors and controls – so that’s nice.
How did you guys measure the power? I can’t see that you have specified the method. If done by feel, how do you differentiate between braking curve – aka how much power is delivered where in the stroke – and outright power as max power delivered? It seems to be qualitatively assessed here – much like VitalMTB did a few years back, which is unfortunate if so as it severely limits the utility of the findings if so.
hey guys getting a new bike, it comes with sram code bronze stealth. I have am not a fan of sram brakes do you think the TRP DH evo brakes would be a huge improvement or are the new stealth brakes pretty good? cheers